• Skip to primary navigation
  • Skip to main content
  • Skip to primary sidebar
OklaRoots

OklaRoots

Dream. Motivate. Create.

  • Video Tutorials
  • Shop OklaRoots!
  • Pattern Vault
    • All Free Patterns
    • Quilts
      • Binding Calculator and Tutorial
      • Block Party!
      • Free Quilt Patterns
      • Delilah BOM Tips
  • Blog
    • Weekly Roundup
    • Small Business Series
    • Running
  • Subscribe
  • About Jess
    • Drop a line!

Jessica OklaRoots

2018 – Time to Pivot

A Personal Note - Jan. 02, 2019 - Jessica OklaRoots

Happy 2019! It’s that time of year to open a blank notebook and jot down all our goals and hopes in the new year. For some, myself included, it’s a time to reflect on years past. The lessons learned, the strength gained, and even the pain endured.

I don’t recall any past years being an overall bad year. Some are harder than others, but there is always good included. 2018 was my year of change. In 2018 I finally decided to quit my job. Some of you may know that I am a software engineer and have 24/7 availability as part of my job description. I am not self employed, which means giving 150% is no different than giving 50%. But I’m not a 50% kind of person, so you can imagine which party is gaining most from my obsessive work.

So while on family vacation (a rare opportunity) work demanded so much of me that I finally ::finally:: said enough. I thanked my boss for the times he helped me, for the privileges granted, but that I couldn’t endure this anymore. I couldn’t live in Oklahoma anymore, a place I never really felt I belonged. I couldn’t keep taking on the work of 5 people by myself. I could no longer be a part of intense business meetings that were so far out of my job description I felt humiliated even showing up. I couldn’t do any of it any more.

After sending my email I felt lighter. I finally did what I had been wanting to do, as terrifying as it might be. I was going to focus all my energy into writing quilt patterns. A love that seemed utterly ridiculous to my family and friends, but couldn’t be extinguished within me. I might not make much money doing this, but at least it was mine. I would earn as hard as I worked.

But, as is the constant in my life, it didn’t go as planned.

Within an hour I had emails, calls and texts from my boss. To be clear, I have a great boss. I never questioned that. And he had a plan. After receiving my email, he moved mountains. The work couldn’t change, but the atmosphere could. He arranged a position for my husband with the company, arranged us to both relocate to Florida, and would handle all the awful administrative work that goes with it.

And within a span of a few hours while vacationing in Florida, my life was pivoting. After 19 years in Oklahoma, everything would once again change. I was confused, not knowing if I was ready for all that went with it. And if I had known then how the rest of the year would play out, I might have chosen a different path.

Over the next few months we put our house on the market, packed everything we owned into a couple of PODS, throwing away whatever wouldn’t fit, and drove to Florida for the second time that year. We were incredibly fortunate to have my parents help. This crazy plan lit a fire within them too, so they decided to relocate as well. They allowed us to live in their home in St Augustine, while waiting for our house to sell.

Let’s talk about selling a home for a minute. I know many people whose house sold within minutes of entering the market, maybe even a bidding war took place. Those people should only share these stories with friends not currently trying to sell a home. Obviously, we didn’t have the same experience. Over 6 months, our house was struck by lightening and shrunk 400 square feet. You heard that right. Every few weeks it was more bad news, more money lost, more distance between us and our goals. The plan… that stupid stupid plan… wasn’t working.

And while I’m ashamed to admit it, I did let these problems weigh me down. I let them make me feel like a victim. Like the world was punishing me for something. And I moped. And became just a piece of furniture in my temporary home. Less than that even, because at least furniture serves a purpose. Furniture can support and comfort and provide refuge. For a period of time, I didn’t do any of that. I just felt worthless. And it was all my own doing. Because even though things weren’t easy, they weren’t exactly hard either. I was depressed about money. And not serious money. I had food on the table. I had my health. I had a way to provide myself with everything I needed to be truly happy, something so many people in this world crave. And I was moping around, useless. That disgust with myself helped me get out of my funk.

Because the world doesn’t give two licks about my plans. Life has its own, which it won’t share with me, and it changes every moment. I can have goals and dreams and ideas, but when things don’t go according to plan, shutting down does nothing. It does worse than nothing, it eats you from the inside. Quitting is far more destructive than failing. Losing your will to hold on to positivity, allowing yourself to drown in the overwhelming amount of negativity, all this does is hurt yourself and those around you. You think that allowing yourself to feel like nothing will make you nothing… but it doesn’t. You can’t be nothing. You are either a positive presence in the lives around you (and in your own) or you’re a negative one. There is no neutral.

So in 2019, I’m going to once again try to roll with the punches. I’m going to show up for myself and my loved ones. I’m going to remain positive, even when the cruelest bits of this world try to smother it out of me. I still worry about my career. The struggle between the comfort of my current job and salary, and the burn within to branch out and build something on my own will continue. And I believe one day the stars will align and I will feel strong and just gutsy enough to take that leap, to build my own career. But until then I will focus on the community around me, the smell of the ocean that I still can’t believe is so close, and the love of the people I’m lucky enough to call family.

But I swear… if anything in my life gets struck by lightening this year… I will burn this mother down…

Delilah Block of the Month – Month 5 – North Star

Delilah BOM Tips - Oct. 13, 2018 - Jessica OklaRoots

You know what's coming.... you can see it in the picture.....

NOOOOOO CUUUUURRRRVES!!!!

After Month 4 and those tiny curves, I needed this easier block.  Need me to make 5? No problem! Heck, I'll make 20, if you ask. 

...
Read More

Delilah Block of the Month – Month 4 – Fairhaven

Delilah BOM Tips, Quilts - Sep. 26, 2018 - Jessica OklaRoots

So this block took... a while. 

Partly because I have been in a cross country move.  But mostly because.... don't make me say it....

Ok.... I'll say it....

CURVES.

Those @$#^@$&#* curves. 

...
Read More

Sweet Cone Quilt Pattern

Quilts - Sep. 05, 2018 - Jessica OklaRoots

This was such an exciting pattern to put together. I had been mulling over this idea for over a year, trying to come up with an intersecting quilt block pattern.  One that you could arrange however you want, and all the blocks will "connect" with one another. 

TA-DA!  The Sweet Cone Pattern was born. It's currently available in my shop here!  The pattern includes measurements for Throw, Twin and Queen sizes.

...
Read More

Delilah Block of the Month – Month 3 – Shooting Star

Delilah BOM Tips - Jul. 12, 2018 - Jessica OklaRoots

"NO CURVES!!"

Did you hear someone screaming that from their rooftop? You did?! Wasn't me....

...
Read More

Delilah Block of the Month – Month 2 – Bells Beach Block

Delilah BOM Tips - Jun. 03, 2018 - Jessica OklaRoots

Welcome back!  This month we explore curves.... again.  If you have been following me on Instagram (@oklaroots) you may have noticed that I am not a big fan of the curves.  

Well, let me clarify:  I love the look of curves... I just don't like making them. 

...
Read More

Delilah Block of the Month – Month 1 – Rising Sun Block

Delilah BOM Tips - Apr. 10, 2018 - Jessica OklaRoots

Anyone else listen to "Delilah" on the radio?  You know the intro.... "Deliiiiilaaaaaaaahhh"? Well, I sing that EVERY TIME I am working on one of these blocks... and I kind of love it. (So does my husband, he just doesn't want to admit it)

If you don't know, the Delilah star of this blog post is a recent quilt pattern by Jen Kingwell.  I have been holding on to this block of the month pattern since it started... a year ago.  I participated with Amitie quilt shop, receiving a block pattern, acrylic templates and a selection of fabrics each month.  At this point in time (April 2018) the block of the month program is over and the pattern is not available to purchase.  I will update this once that changes. UPDATE: Pattern available here!

...
Read More

Sparkle Bags!

Bags, Tutorials - Apr. 06, 2018 - Jessica OklaRoots

My love for boxy bags has gone to a whole new level today. Introducing, sparkly boxy bags!!!

:: applause :: :: cheers :: :: the crowd goes WILD ::

...
Read More

Fat Quarter Cinch Pouch Tutorial

Bags, Tutorials - Jan. 05, 2018 - Jessica OklaRoots

In an effort to get through the last minute Christmas gift hustle, I realized I didn’t have gift bags on hand for the smaller trinkets.  Instead of braving the elements (and putting on “grown up” clothes) I relied on my handy-dandy sewing room for a solution.

…

Read More

Binding Calculator and Tutorial

Quilts, Tutorials - Oct. 02, 2017 - Jessica OklaRoots


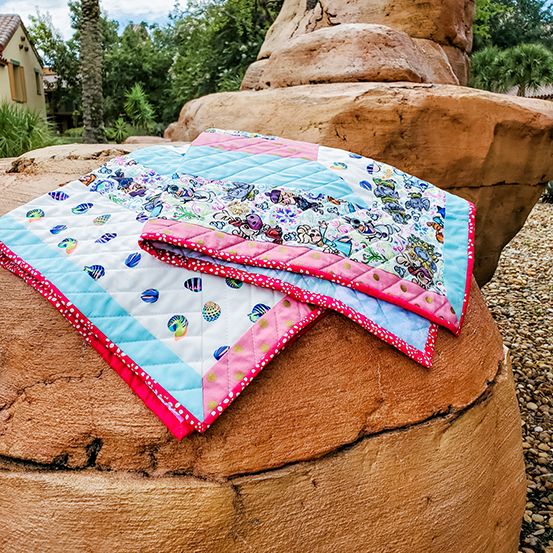
Here is a handy calculator to cut the calculation time for binding down SIGNIFICANTLY!!  

Simply enter in your quilt and fabric measurements, click “Calculate” and the calculator will tell you how long your binding should be, as well as how many strips you need to cut and how many yards that will require.  

I know…. my mind is blown as well. 

Video Tutorial:

Quilt Top Height (in)

Quilt Top Width (in)

Binding Strip Width (in)

Binding Fabric Width (in)

Binding Length (in)

Strips

Yards

The following is a tutorial to make quilt binding. Please refer to the video above for even more details.

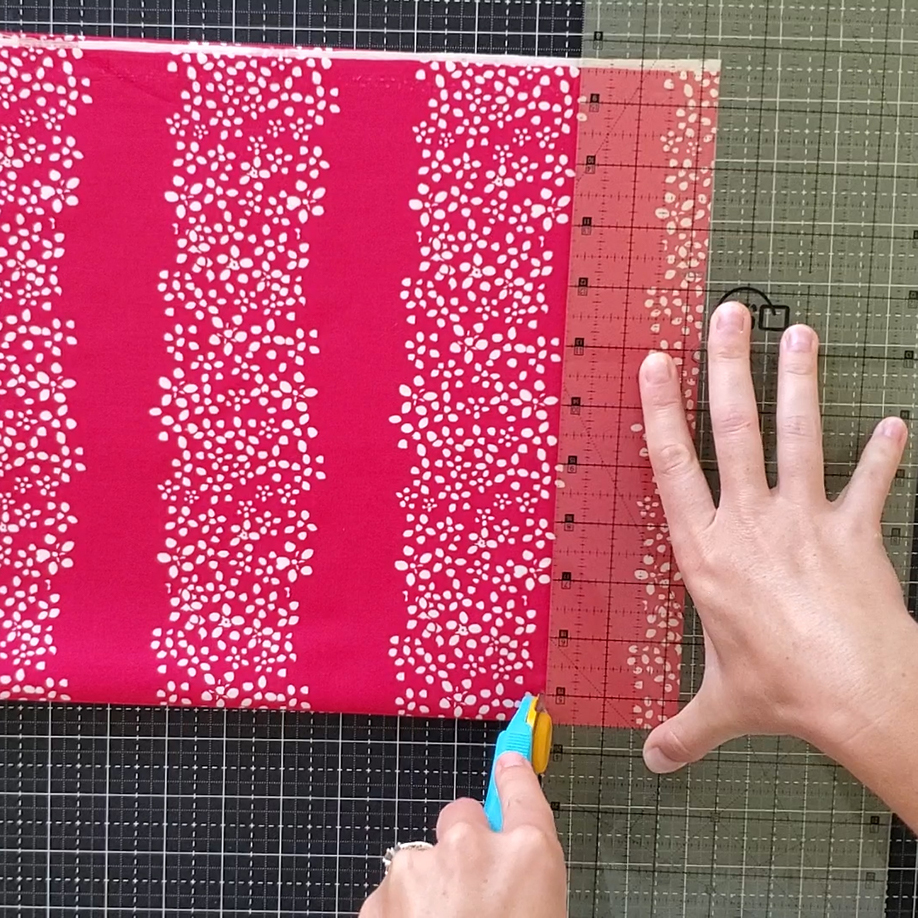
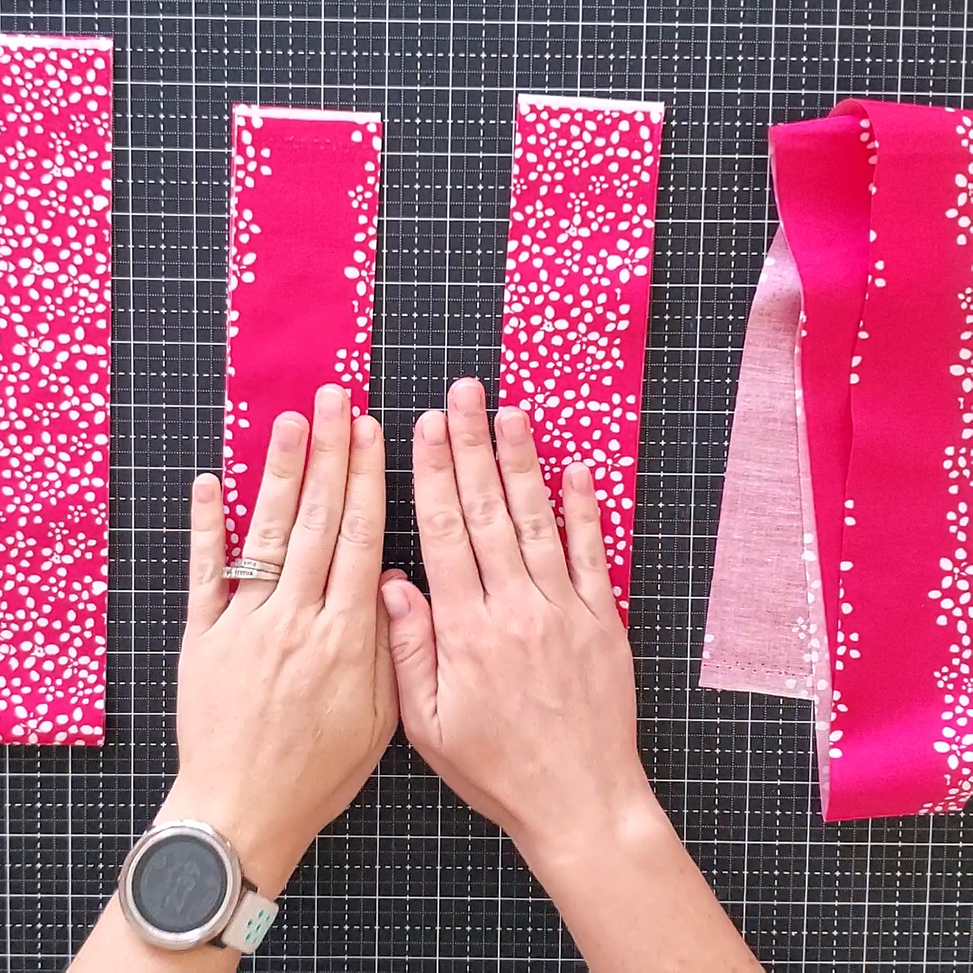
First, cut your strips as long as possible.  Usually, this is width of fabric (from one selvage to the other). Cut the strips your desired width (I default to 2.5 inches, but many quilt patterns call for 2.25 inches). 

Now we need to stitch them together!

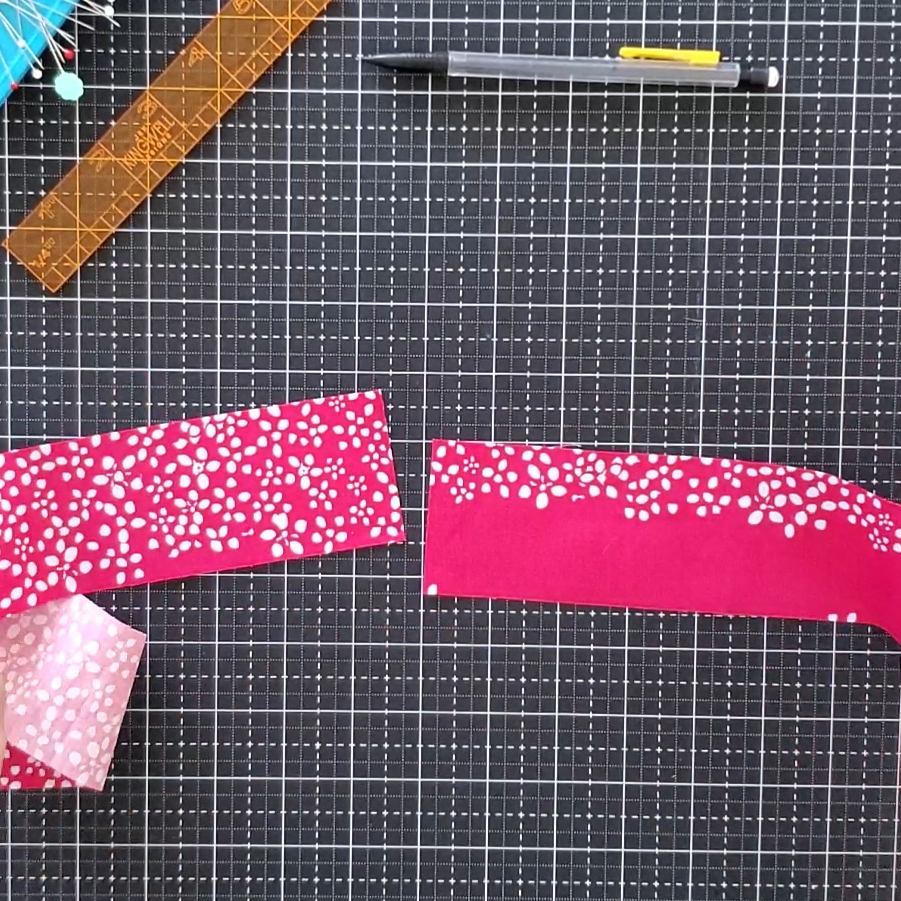
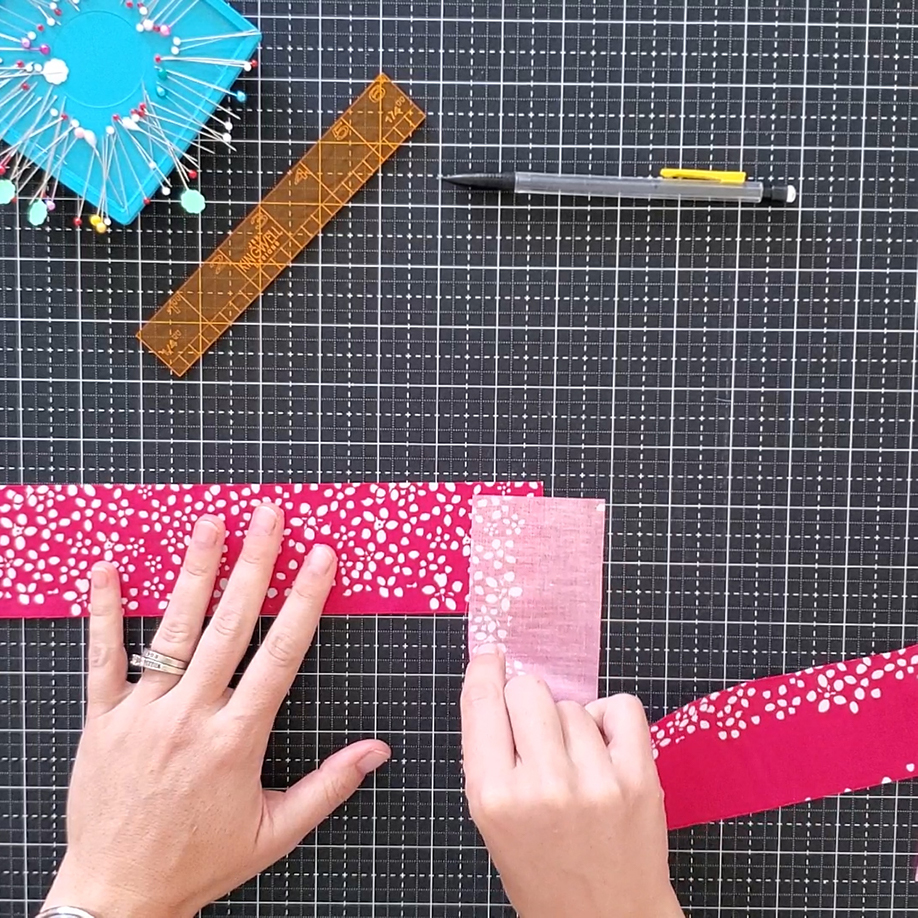
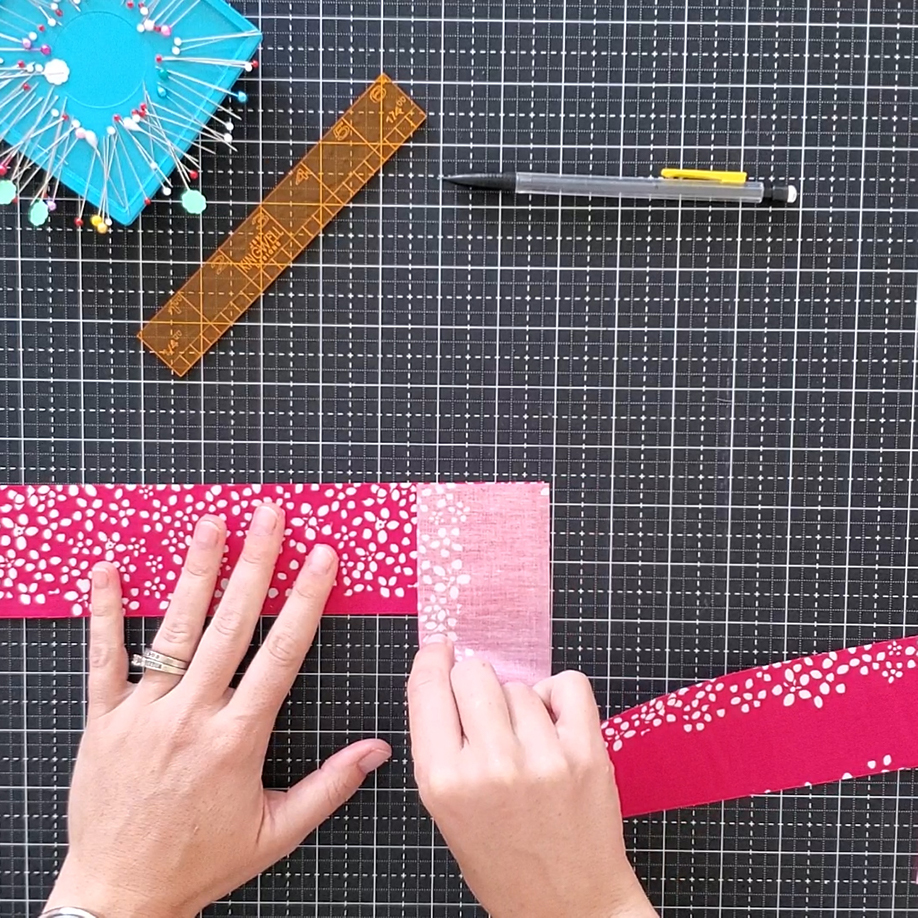
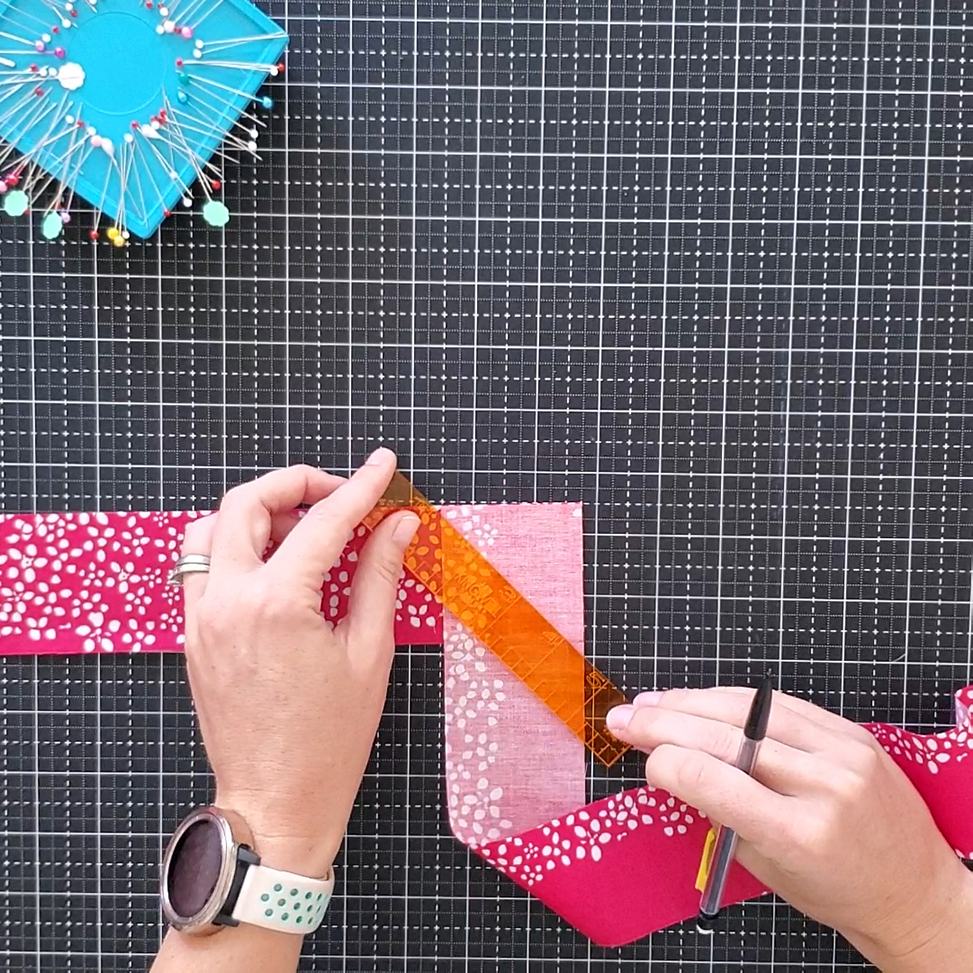
Take two strips and align them right sides together, perpendicular to one another.Align the edges as shown, and mark the bottom right edge of the bottom strip on the top strip.  Then, using a small ruler, draw a line from the top left corner of the top strip to that dot.

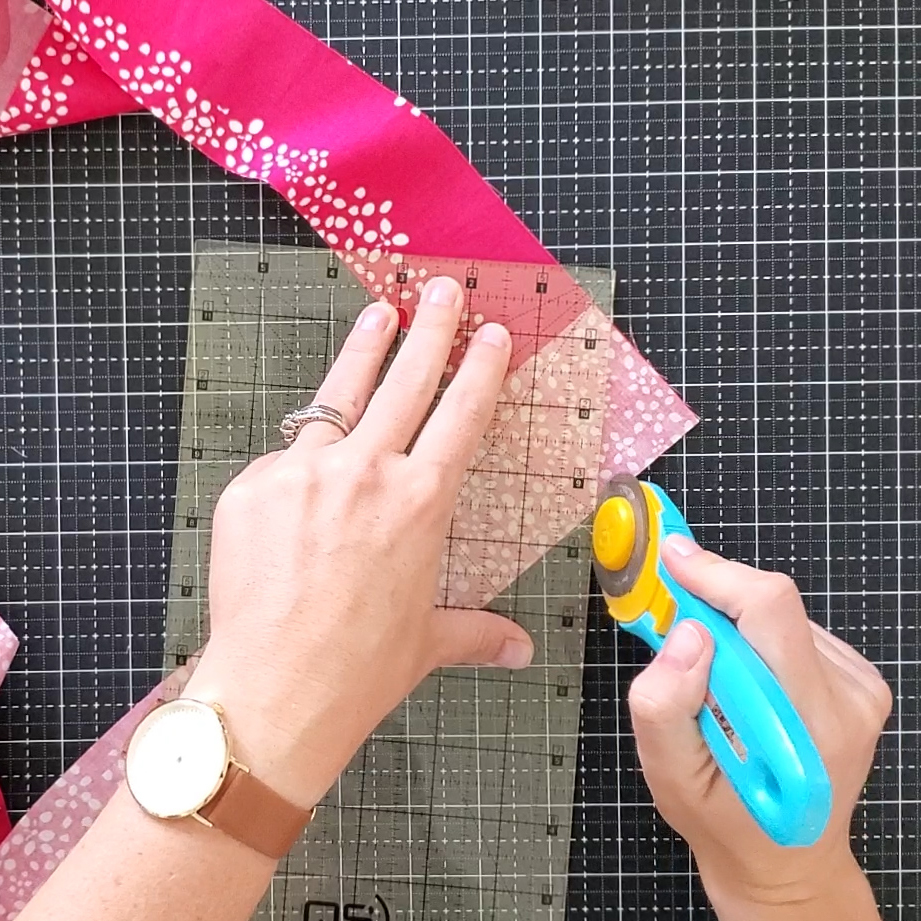
Do this for all the strips, creating one long strip. Sew along these marked lines. 

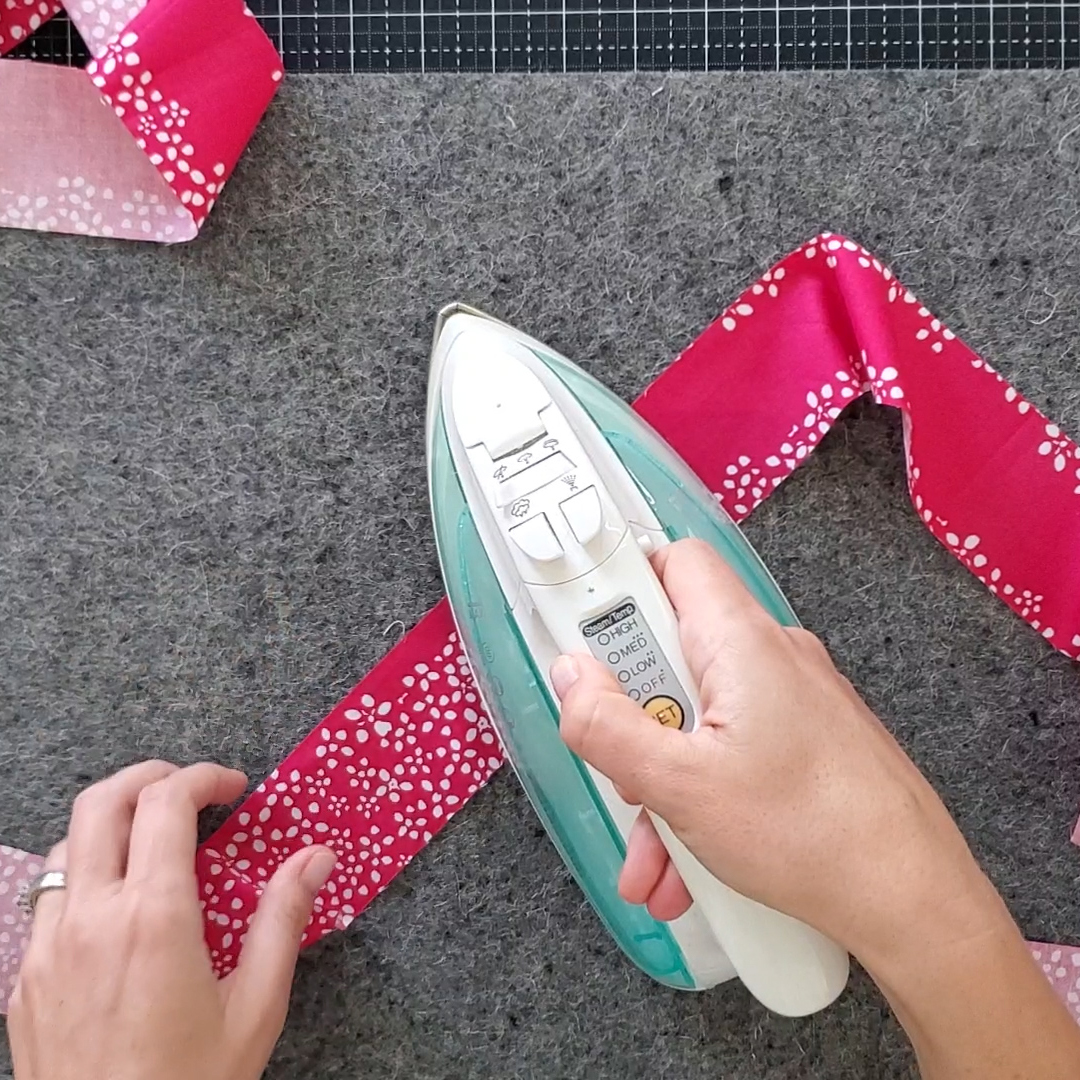
Trim off a quarter inch seam allowance. Press the seam open.

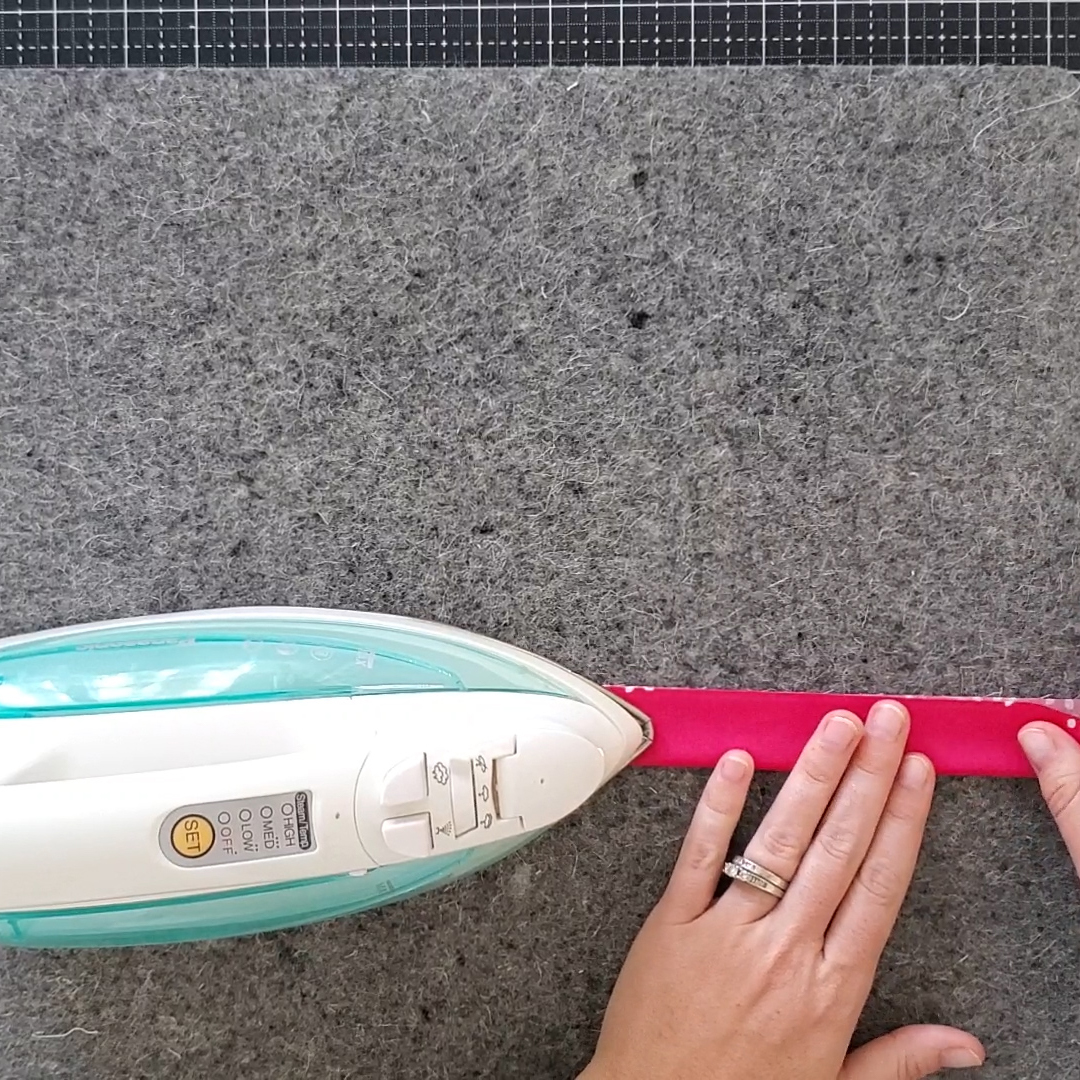
Fold the strip width wise and press, creating a crease along the half of the strip.

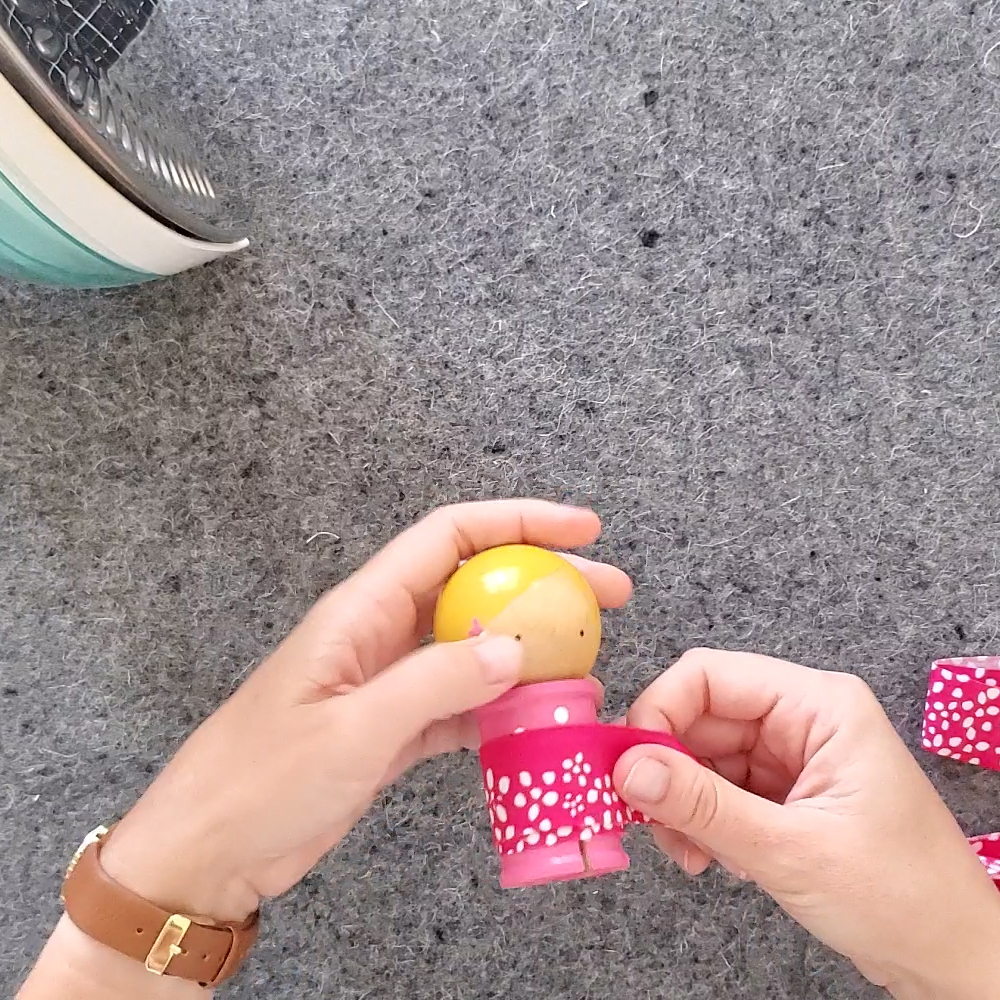
I like to use Binding Babies to organize my binding strip, especially for larger quilts.

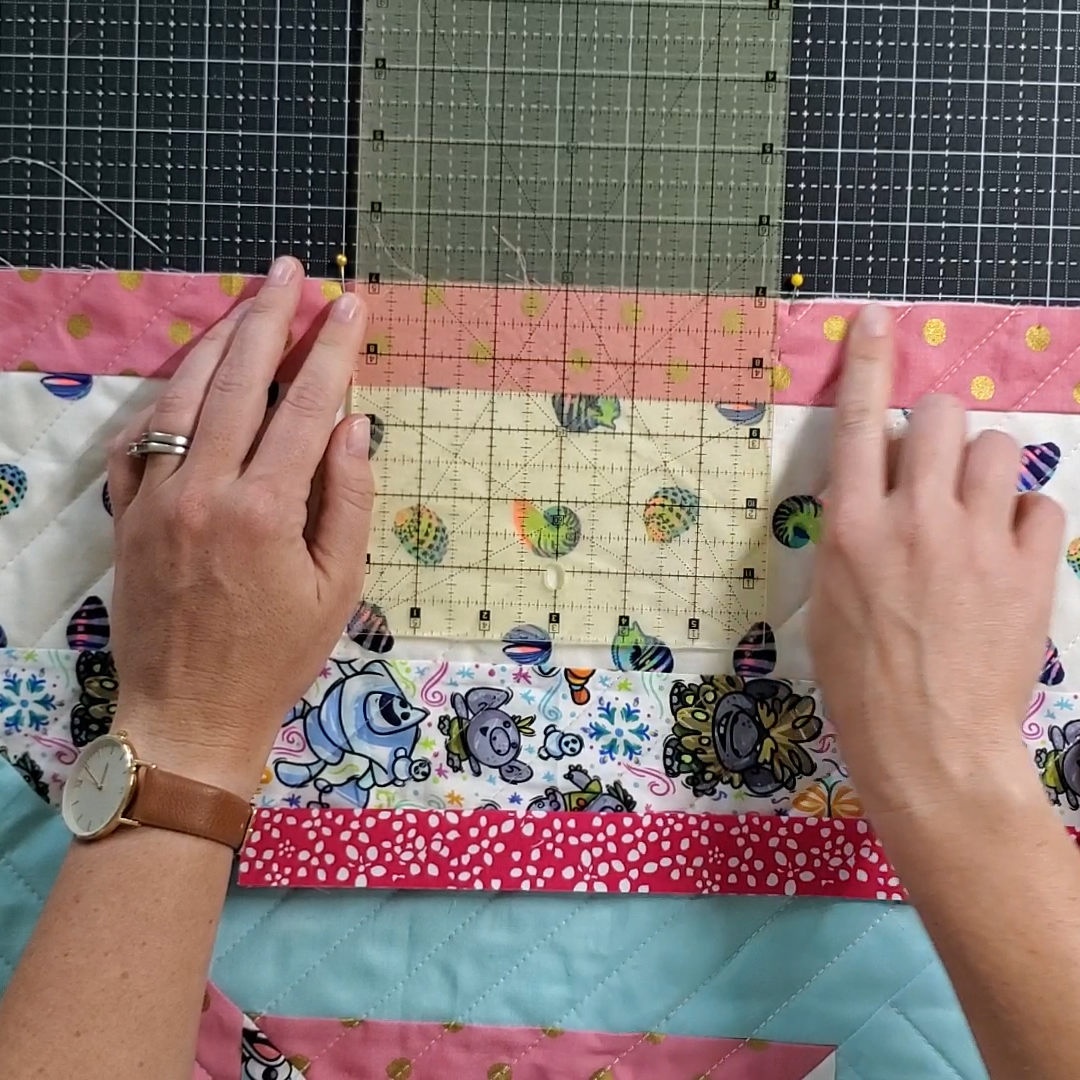
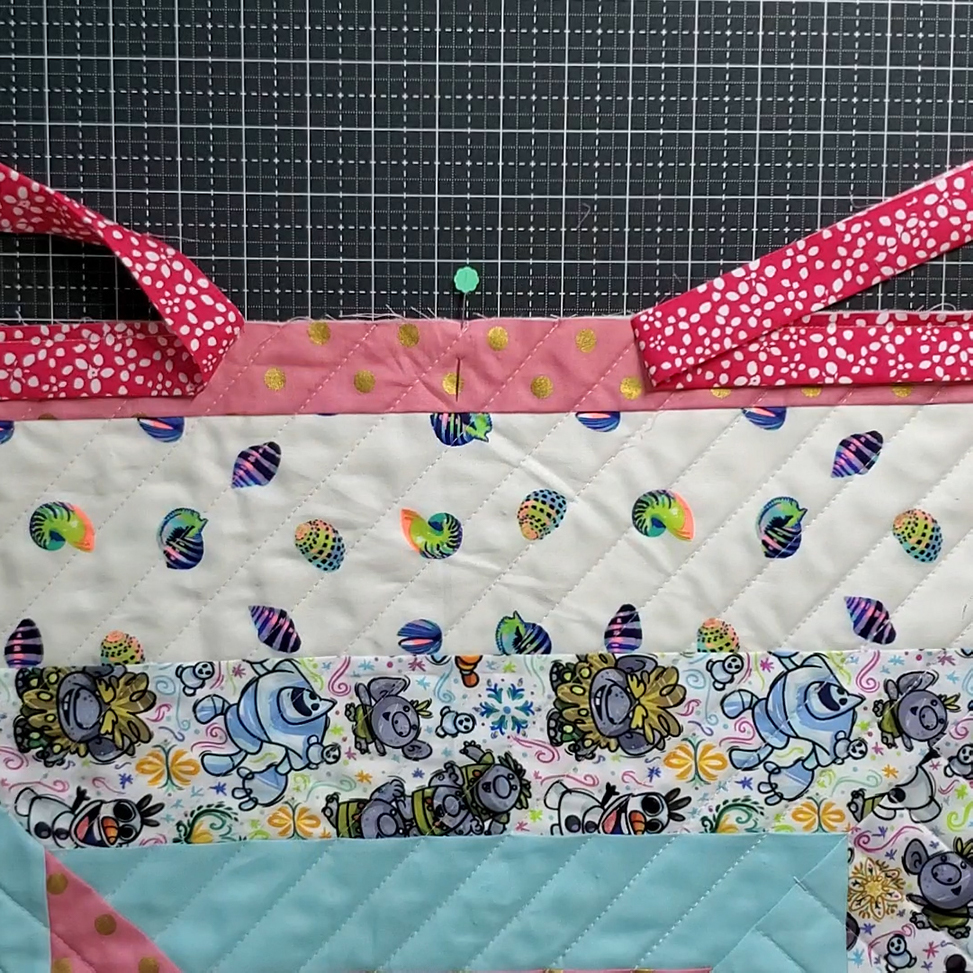
Lay your quilt top side up .  Along the middle of one edge, mark a 6-10 inch opening. Use two pins to mark the ends.

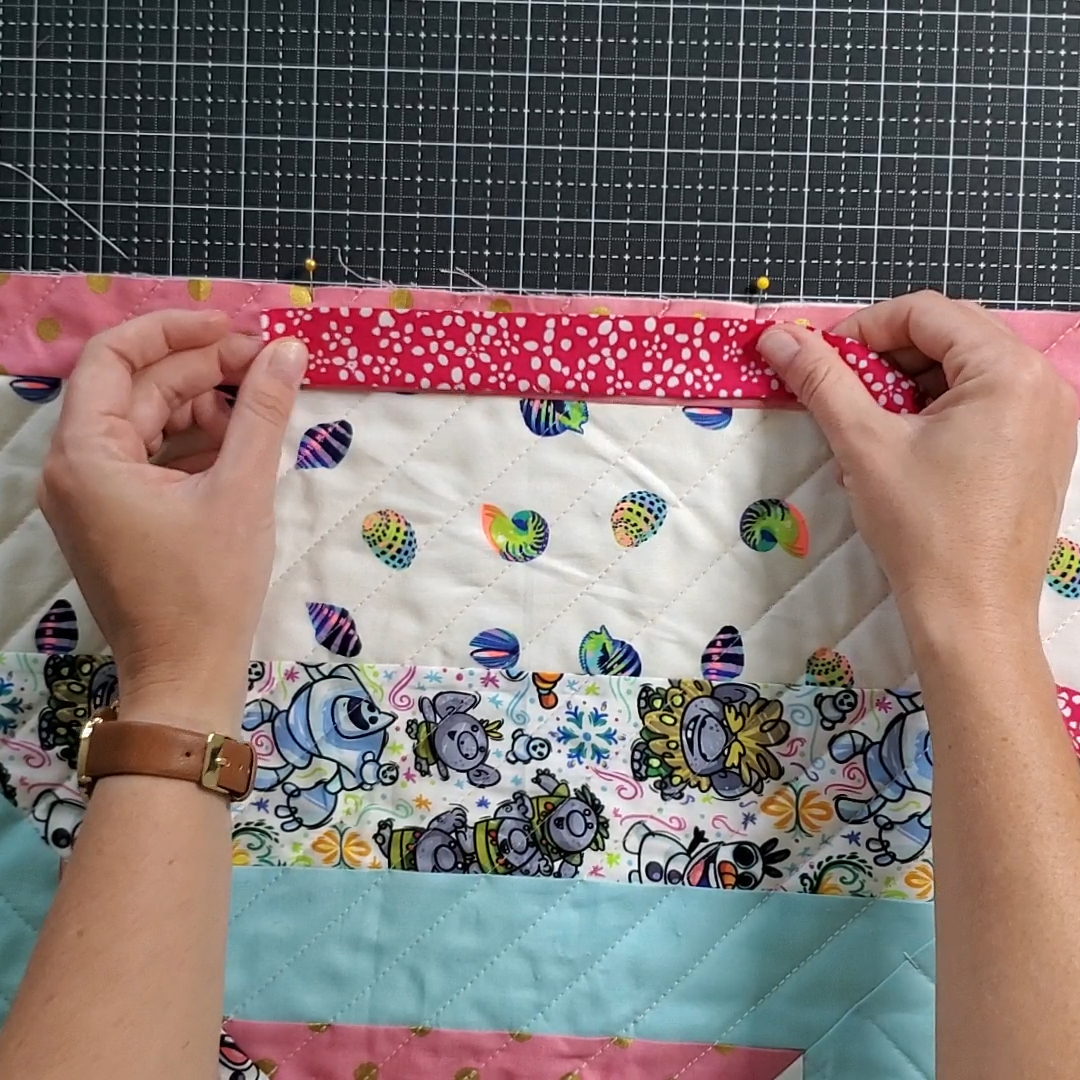
Lay your binding strip down with raw edges against raw edges of the quilt. The tail of your binding should cover the opening marked with pins. Pin the binding to the pin on the right side.  This is where we will begin sewing.

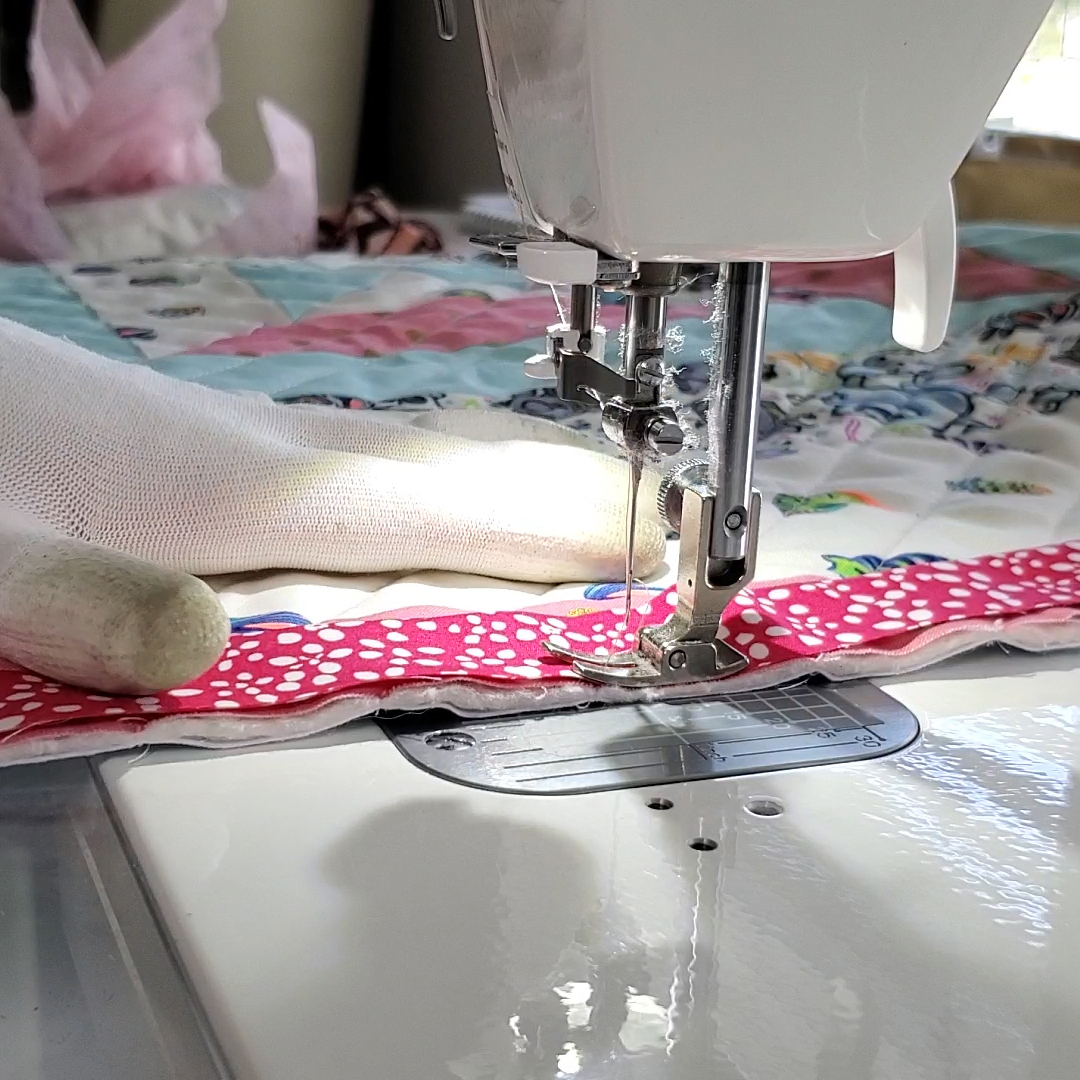
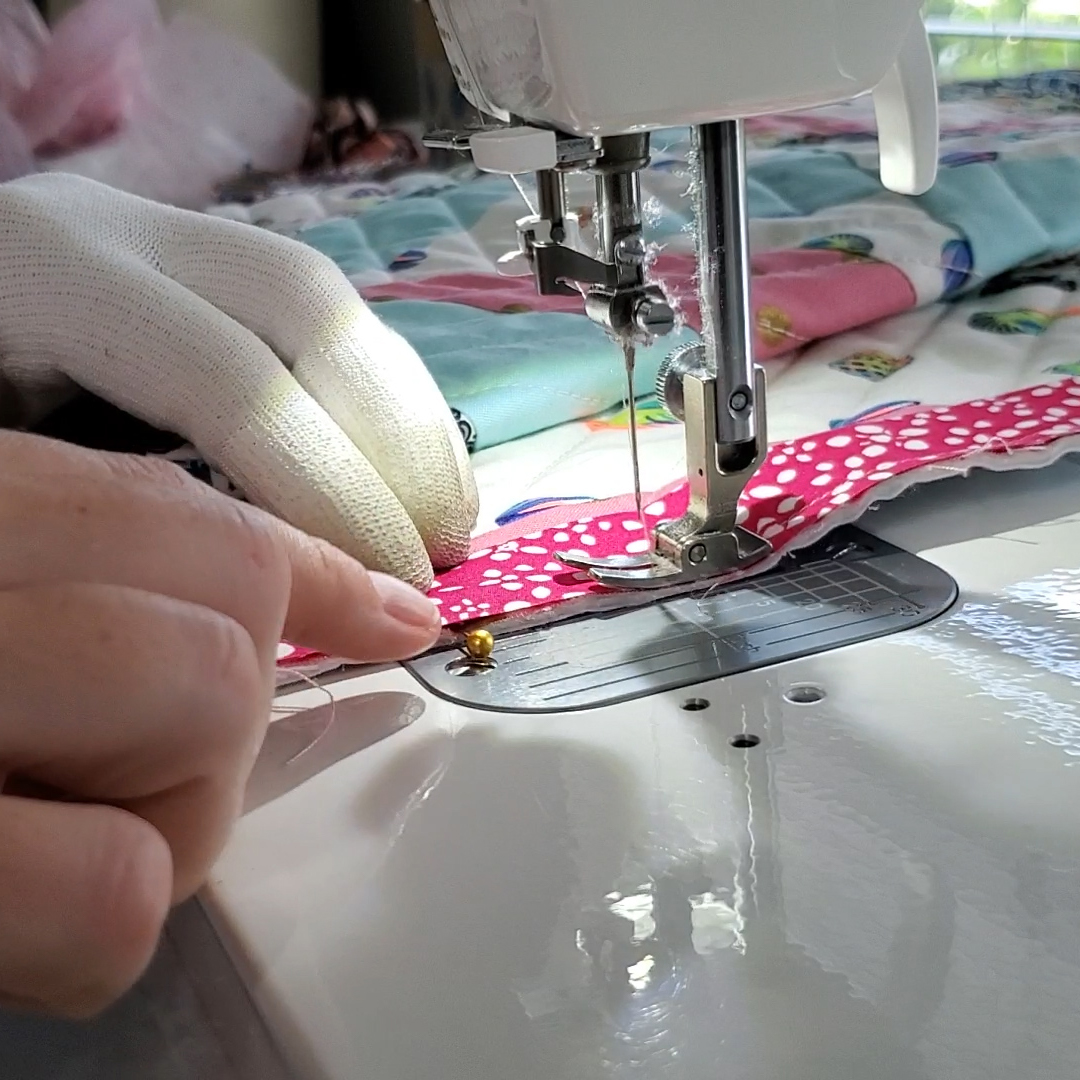
Starting at the pin on the right side, remove the pin and stitch on the binding (remember to back stitch), using a quarter inch seam allowance. 

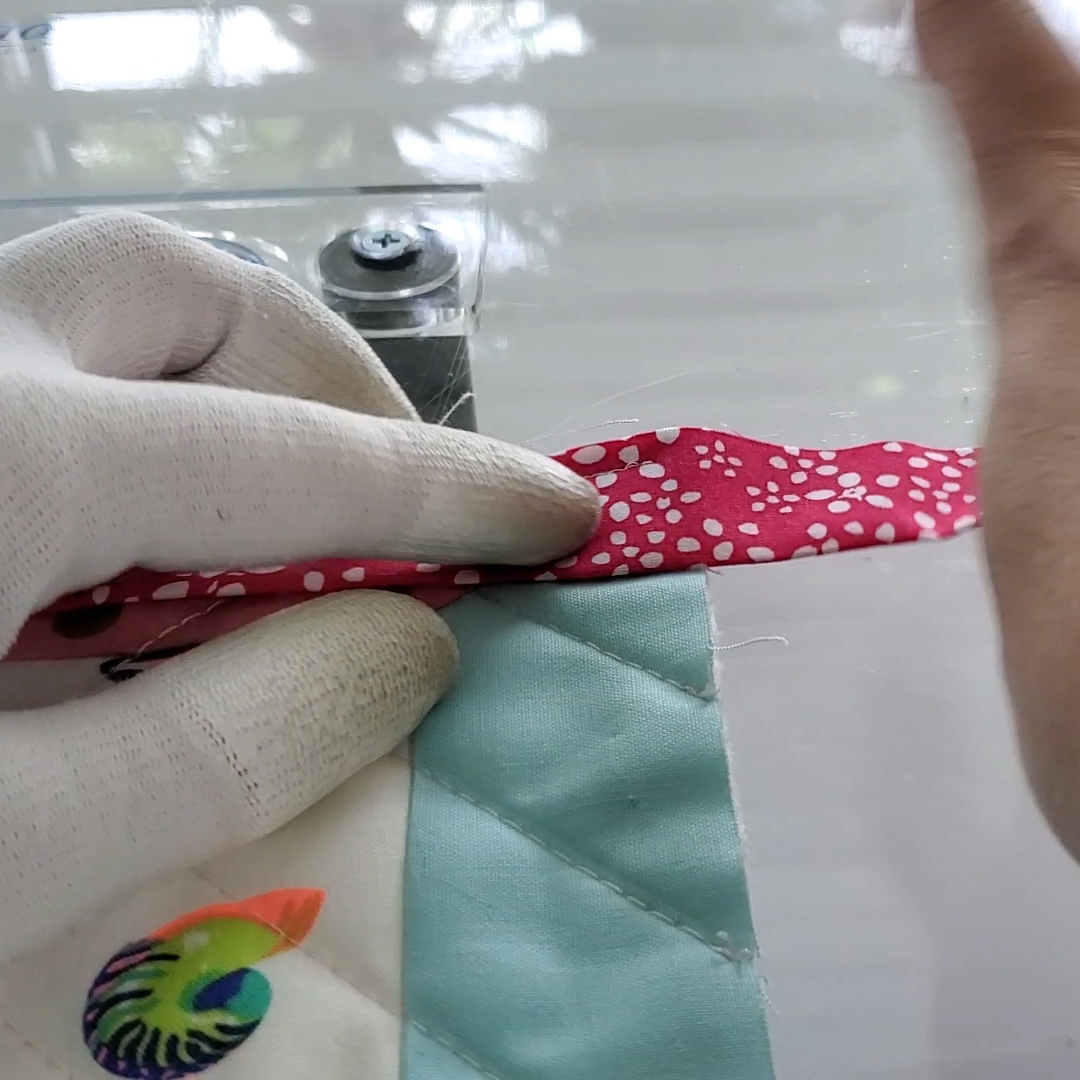
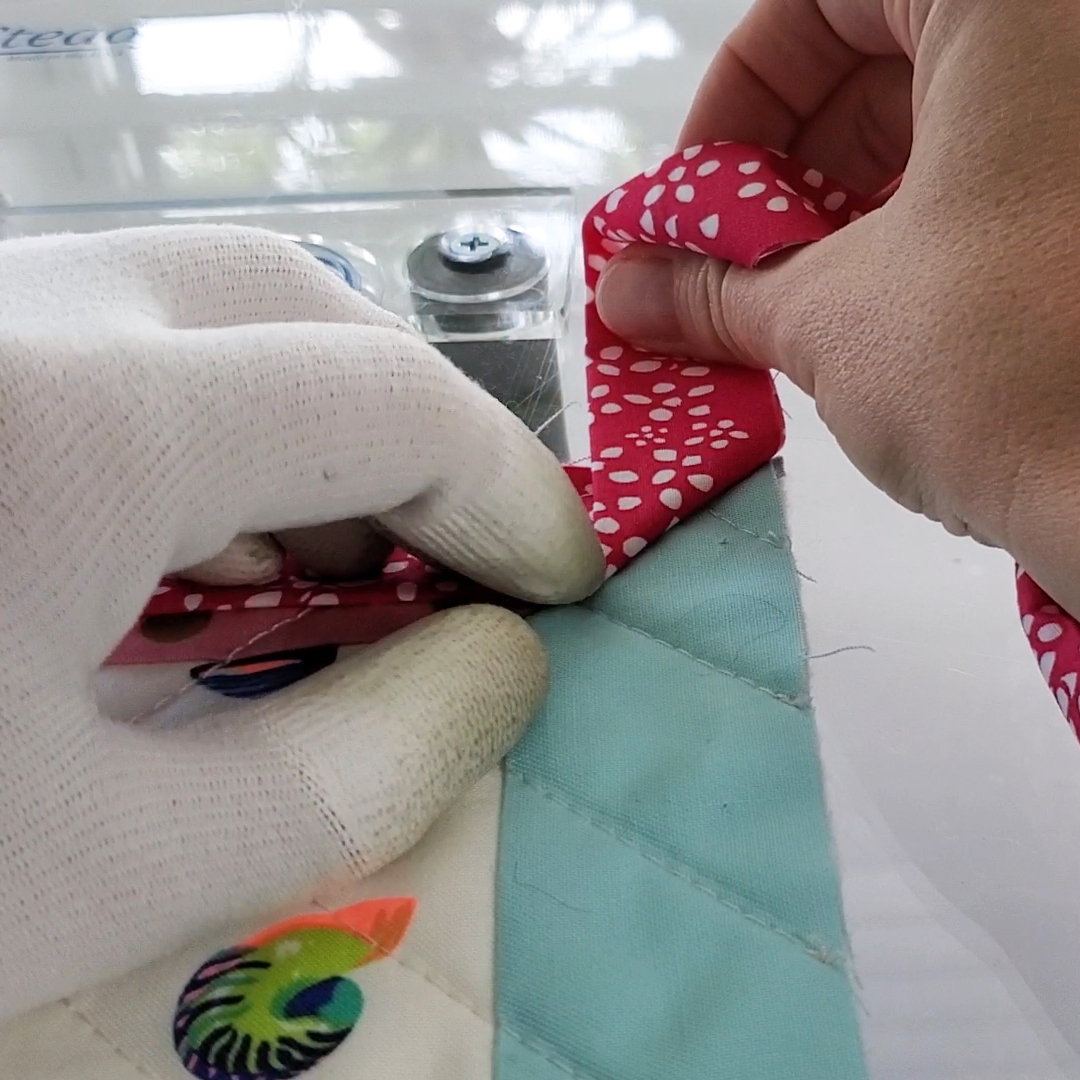
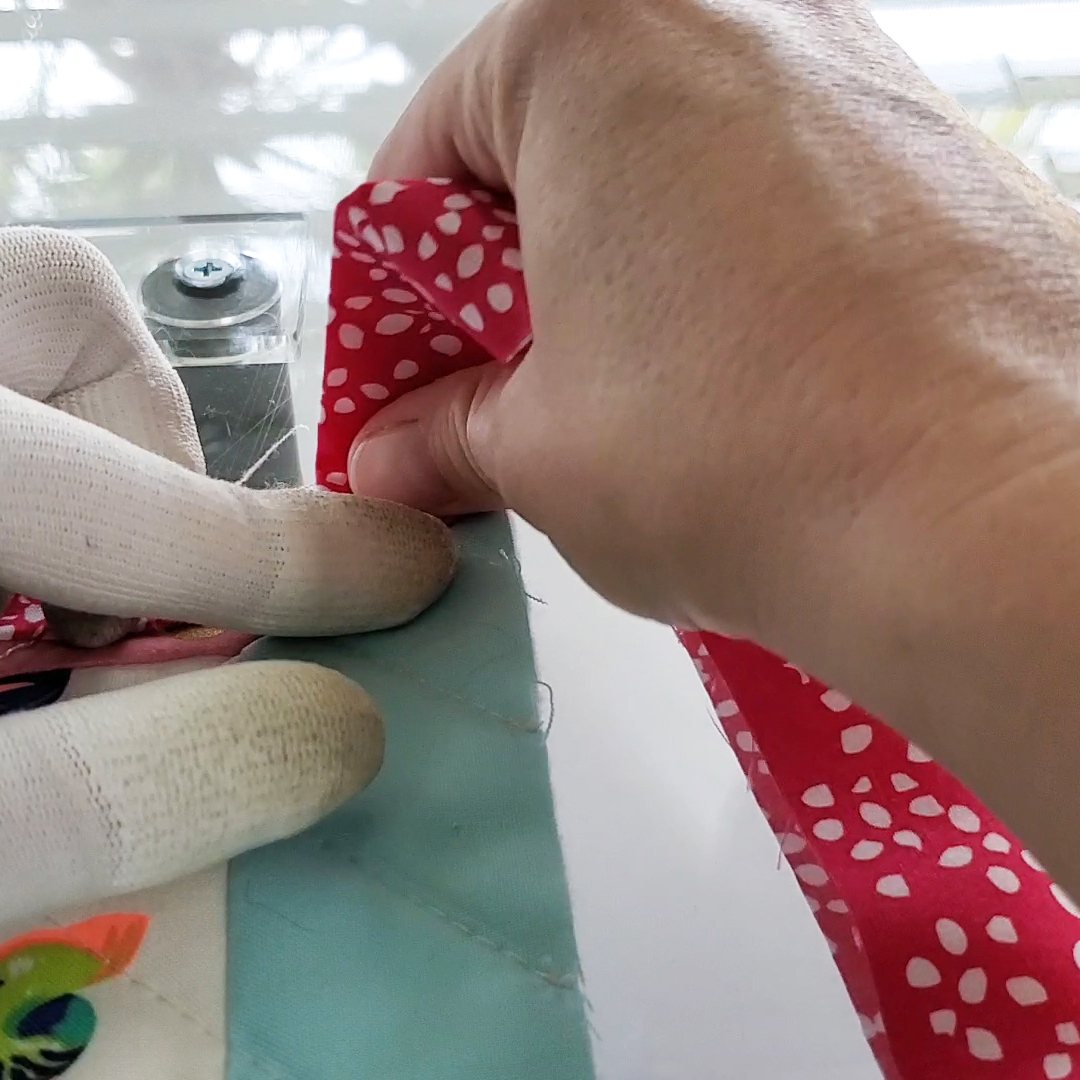
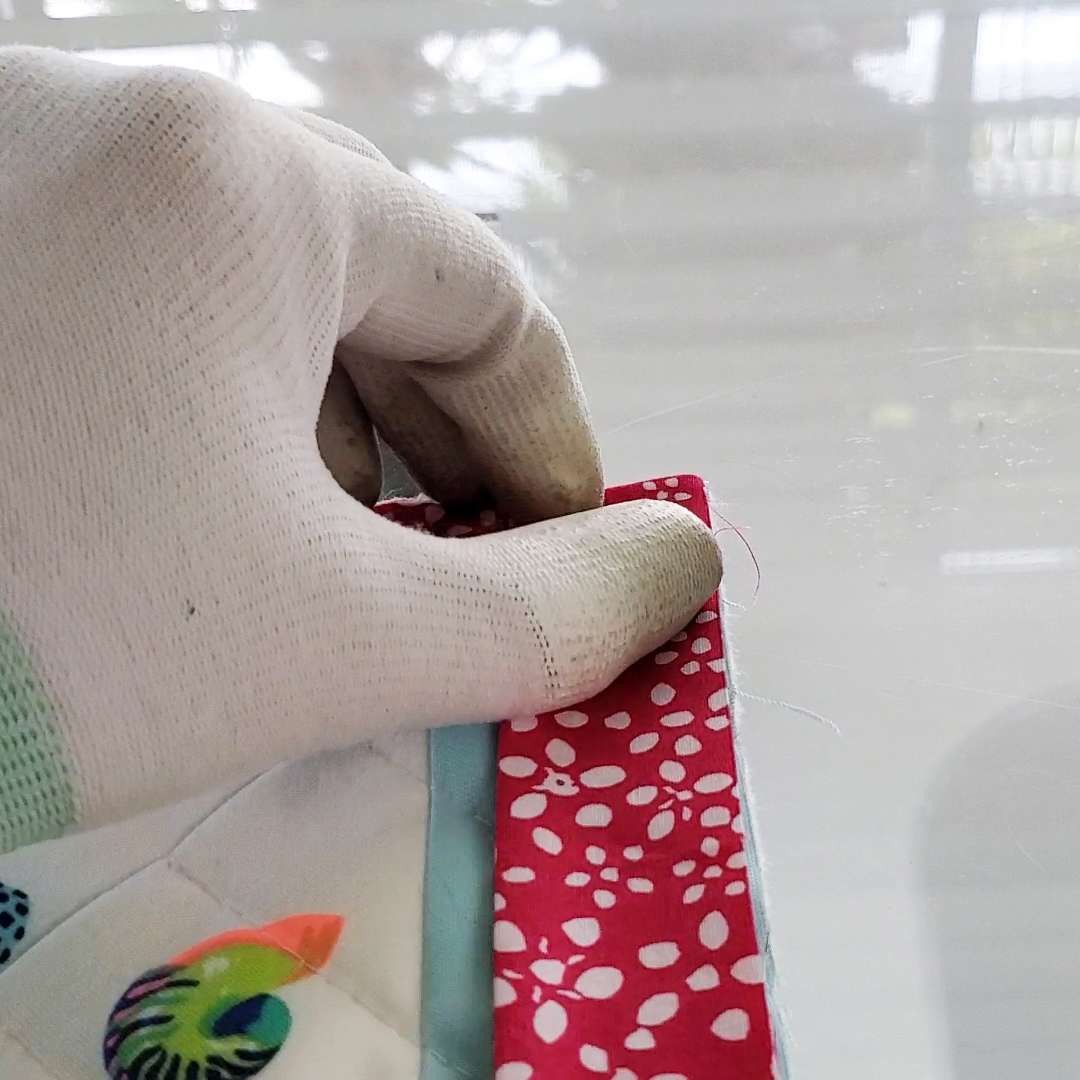
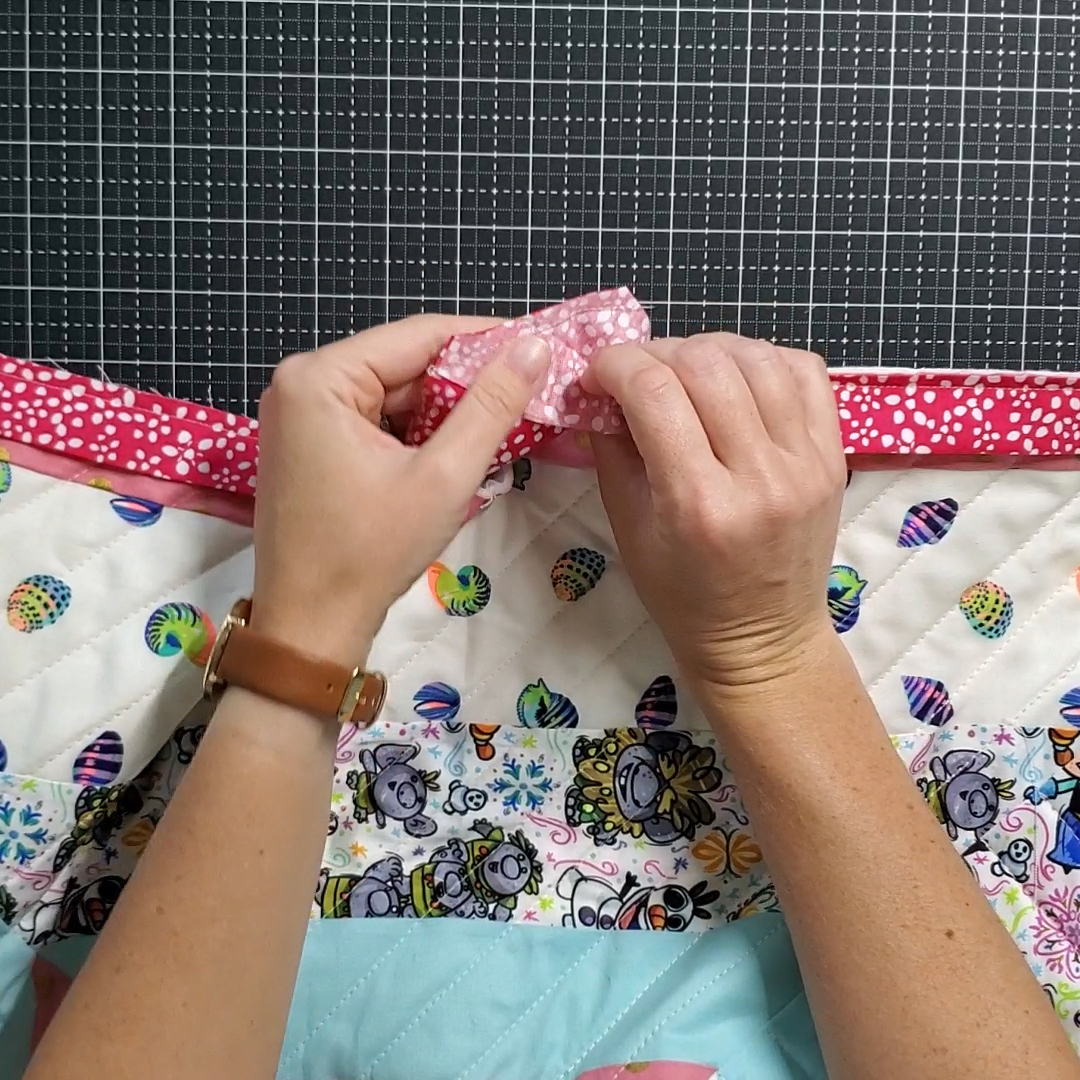
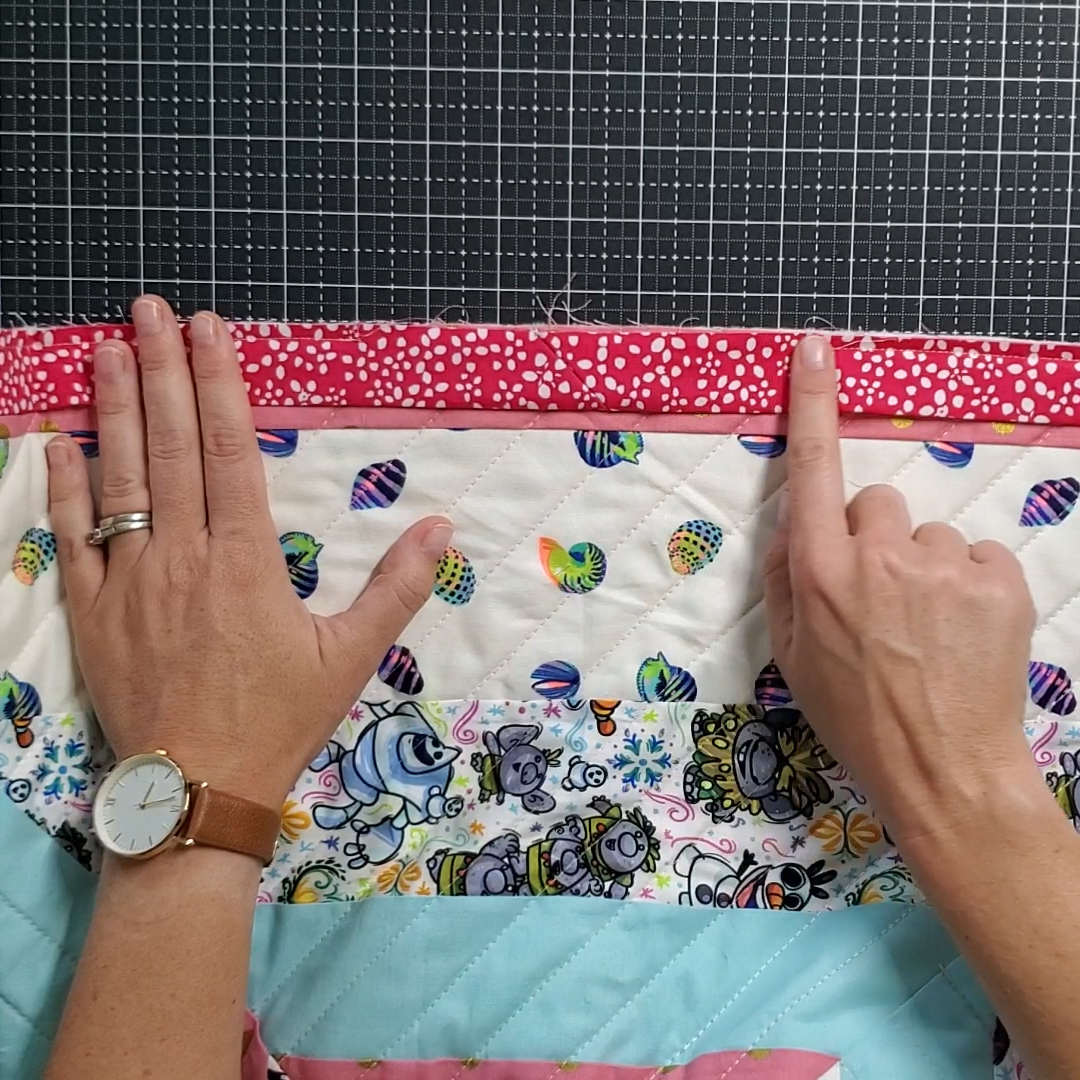
Stop about a quarter inch away from the edge. Cut the machine thread and pull quilt out. With the sewn edge laying left to right (corner stopped at on the right) pull the binding straight up. This should create a 45 degree angle on the binding. Use your finger to hold this in place.

Keeping that 45 degree angle, fold the binding straight down, aligning the raw edge with the raw edge on the right side of the quilt. Clip this corner in place, and return to the machine.

Make sure to backstitch at the start, and continue sewing. Do this for each corner.

Once you have reached the other pin mark for the opening, backstitch and cut the thread.

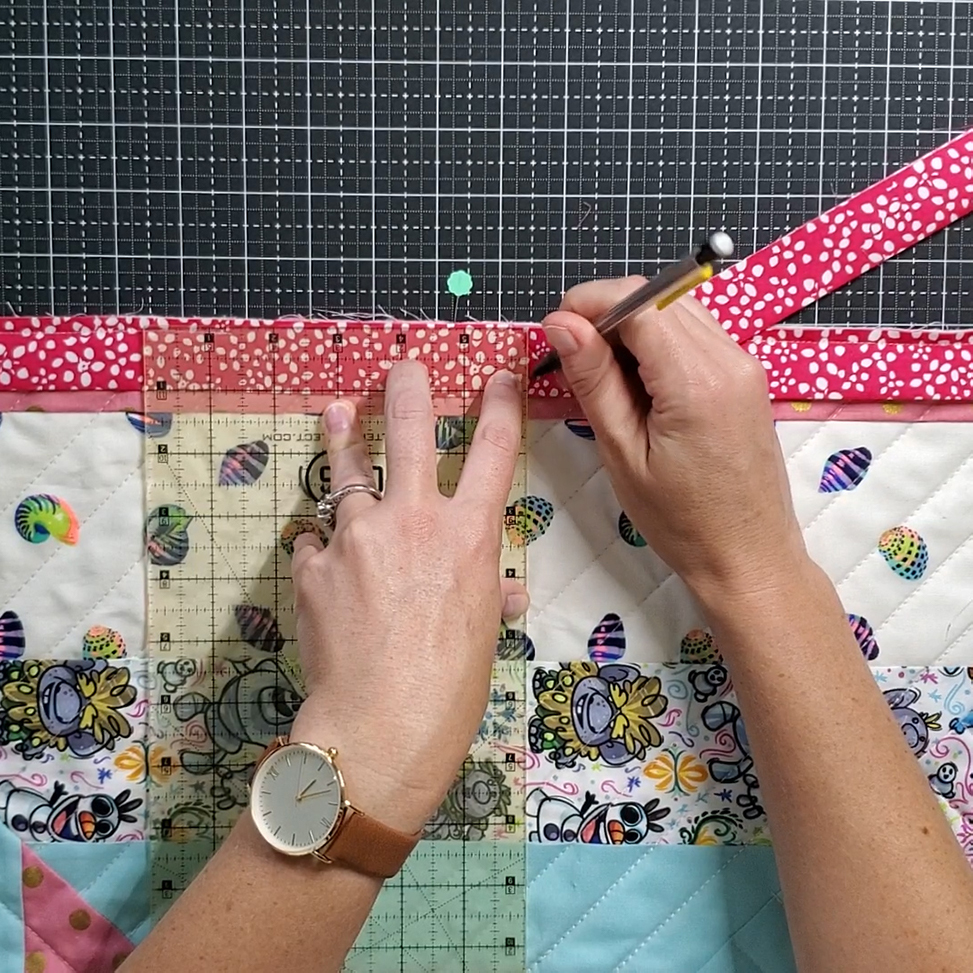
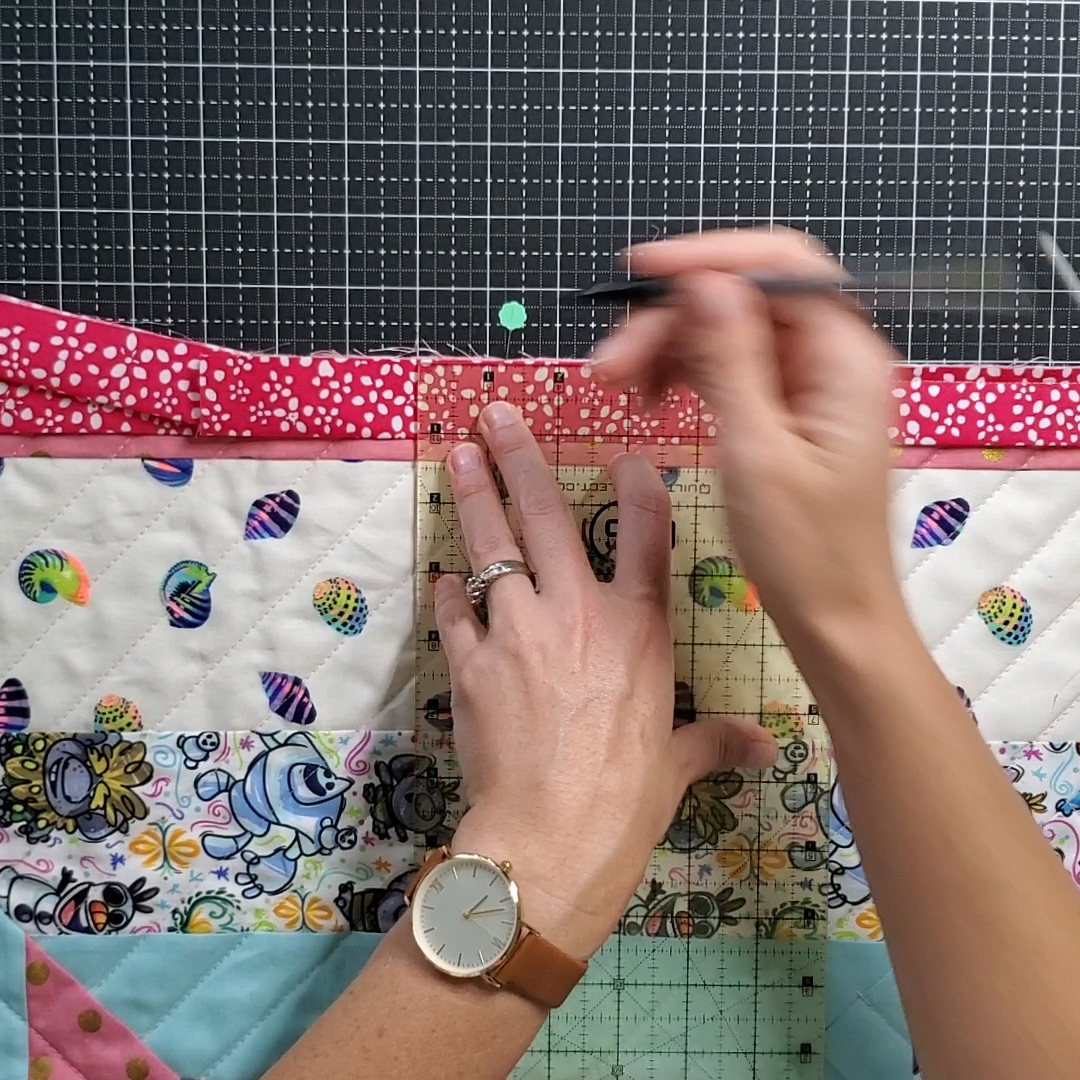
Lay your quilt with binding open. Mark a spot in the center of the opening, on the quilt. 

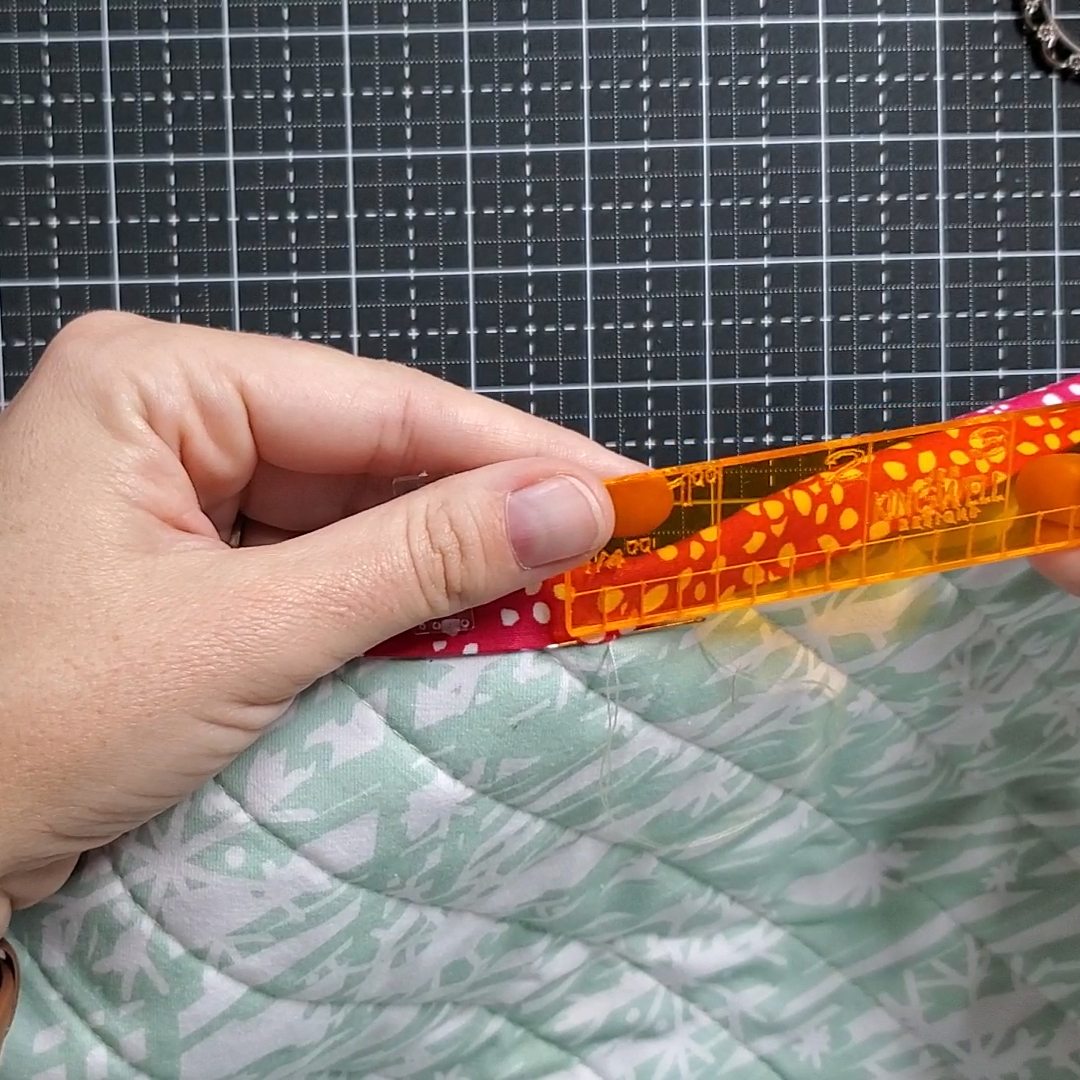
Take your binding on the left side, and lay over the pin. Mark (binding width)/2 to the right of the pin. [If using 2.5 inch binding, this will be 1.25 inches, for example]. Pull binding back to the left. 

Take the binding on the right and lay over the opening. Mark (binding width)/2 to the left of the pin, on the binding. [If using 2.5 inch binding, this will be 1.25 inches, for example]. Pull binding back to the right. 

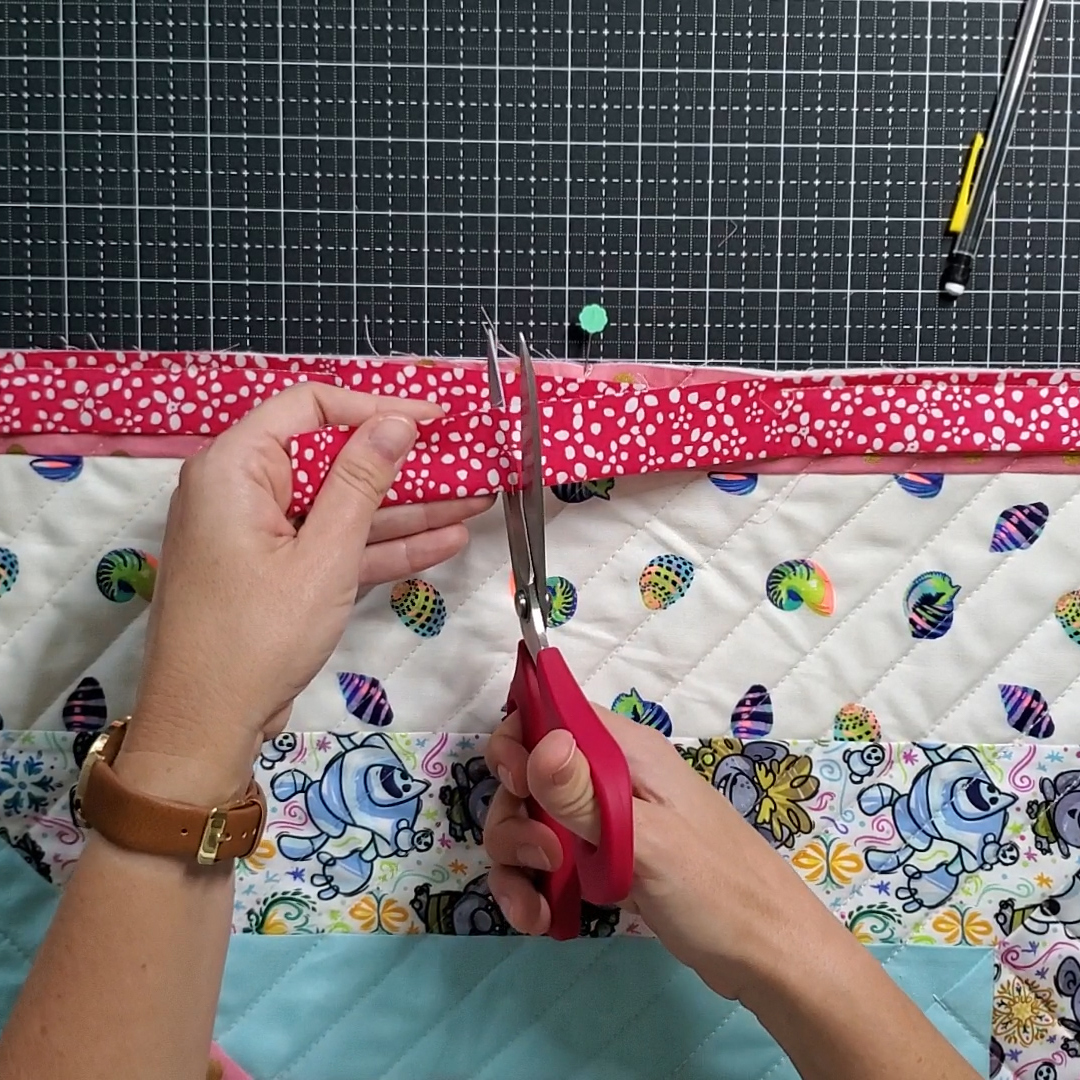
Cut both ends of binding on these marks.

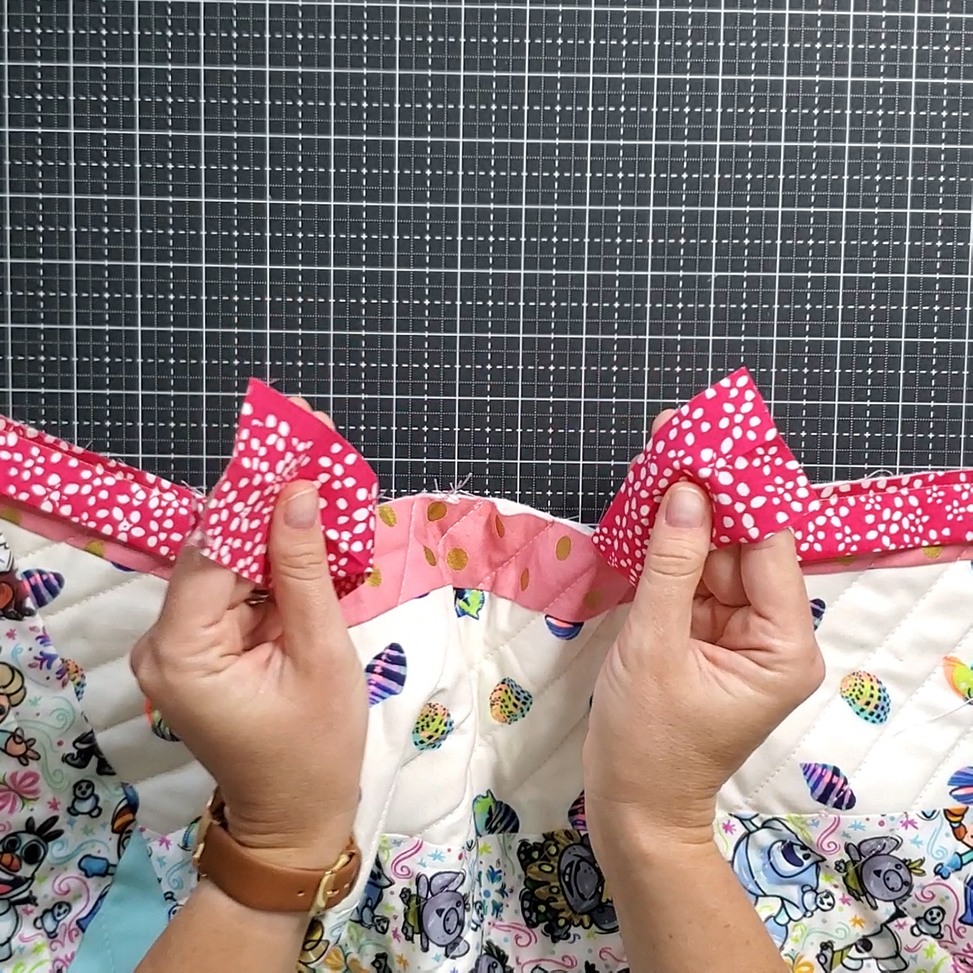
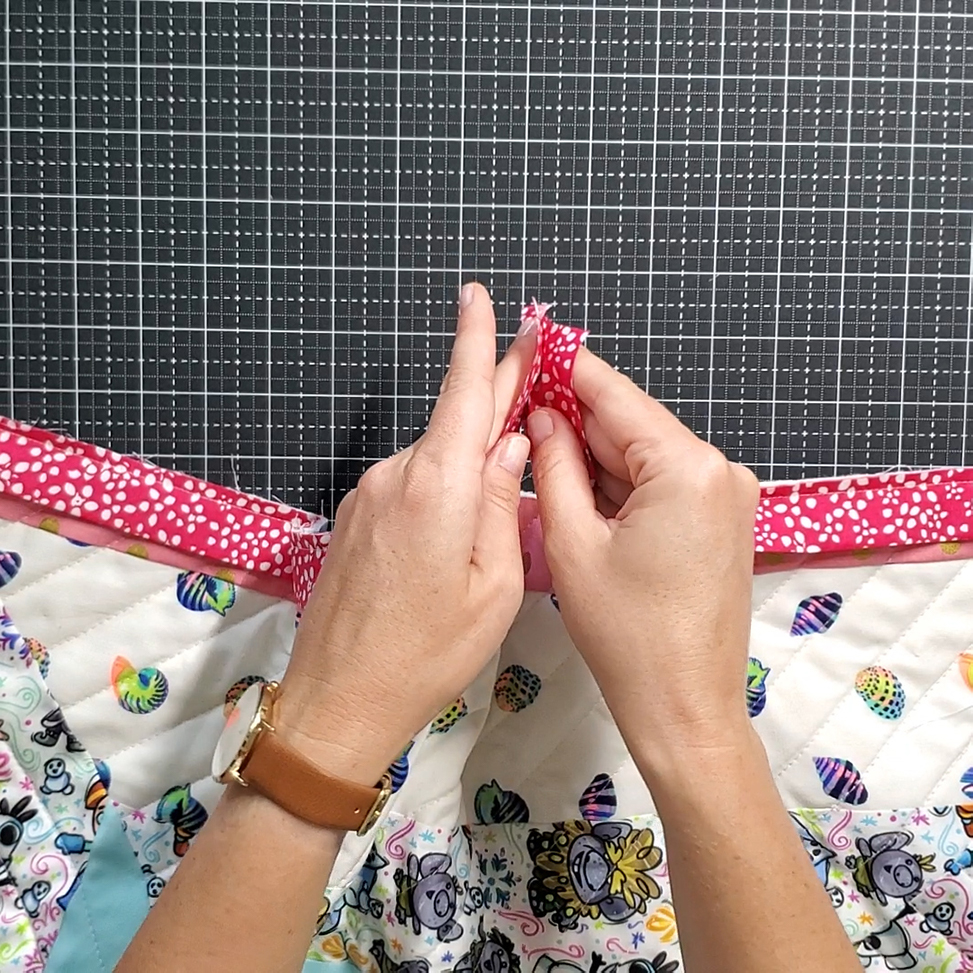
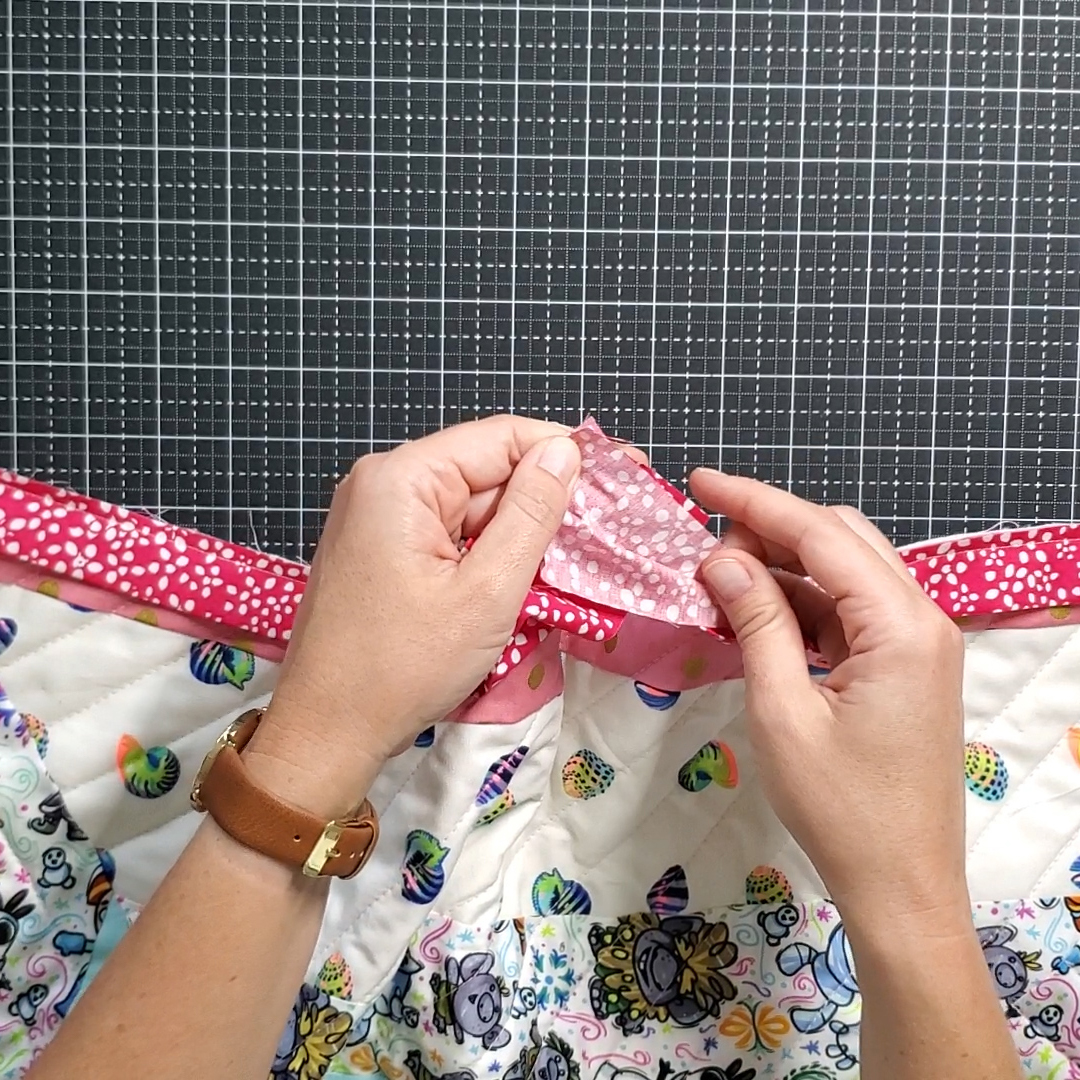
Pull the two ends together, with creases on the bottom. Open and press right sides together. Twist the ends so they are perpendicular (refer to the video for help with this step). 

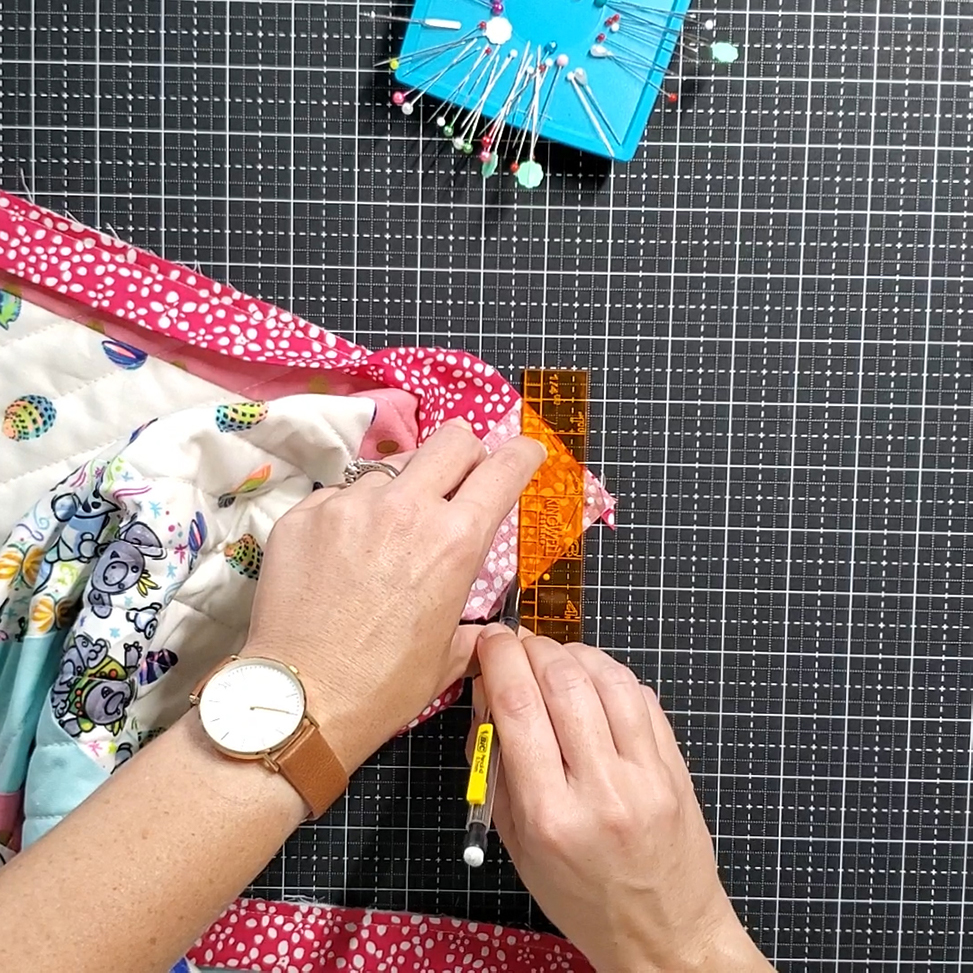
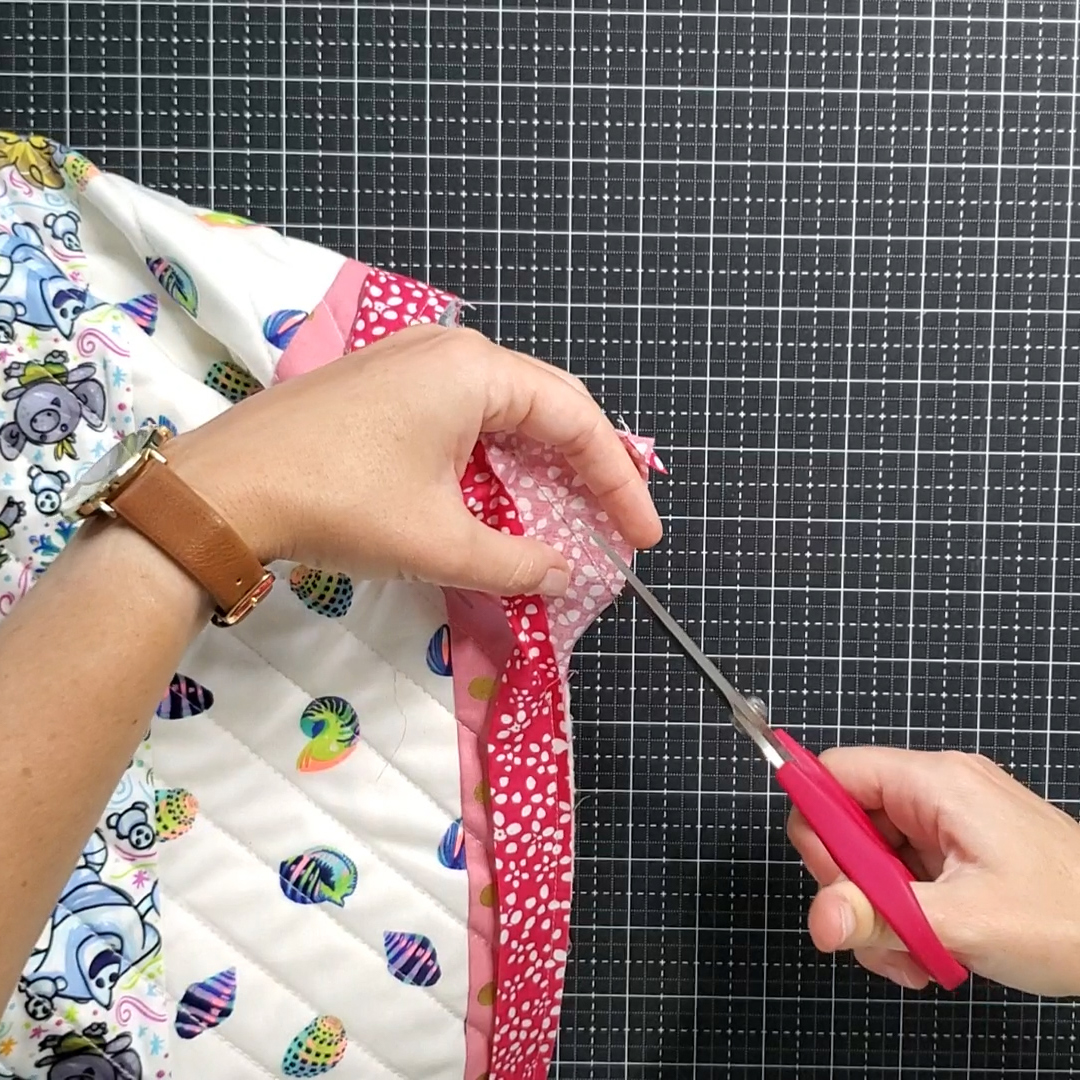
We are going to sew these two ends together just like we did when sewing the strips together to make a longer binding strip. Draw a line from top left corner on the top binding end to bottom right of the bottom binding end. Sew along this line, and then cut off a quarter inch seam allowance.

Open and fold along the original crease.  This should perfectly cover the opening, with raw edges of binding along raw edges of the quilt. Stitch this opening closed using a quarter inch seam allowance.

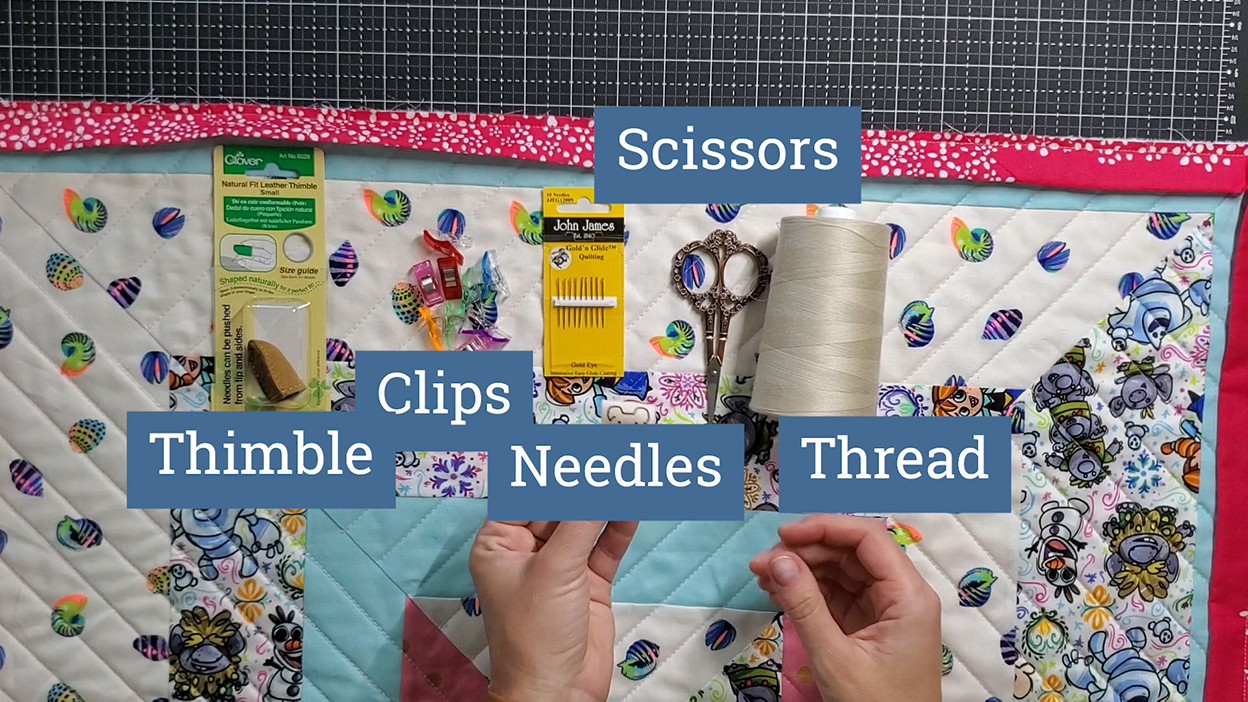
Hand binding the back requires the following tools. 

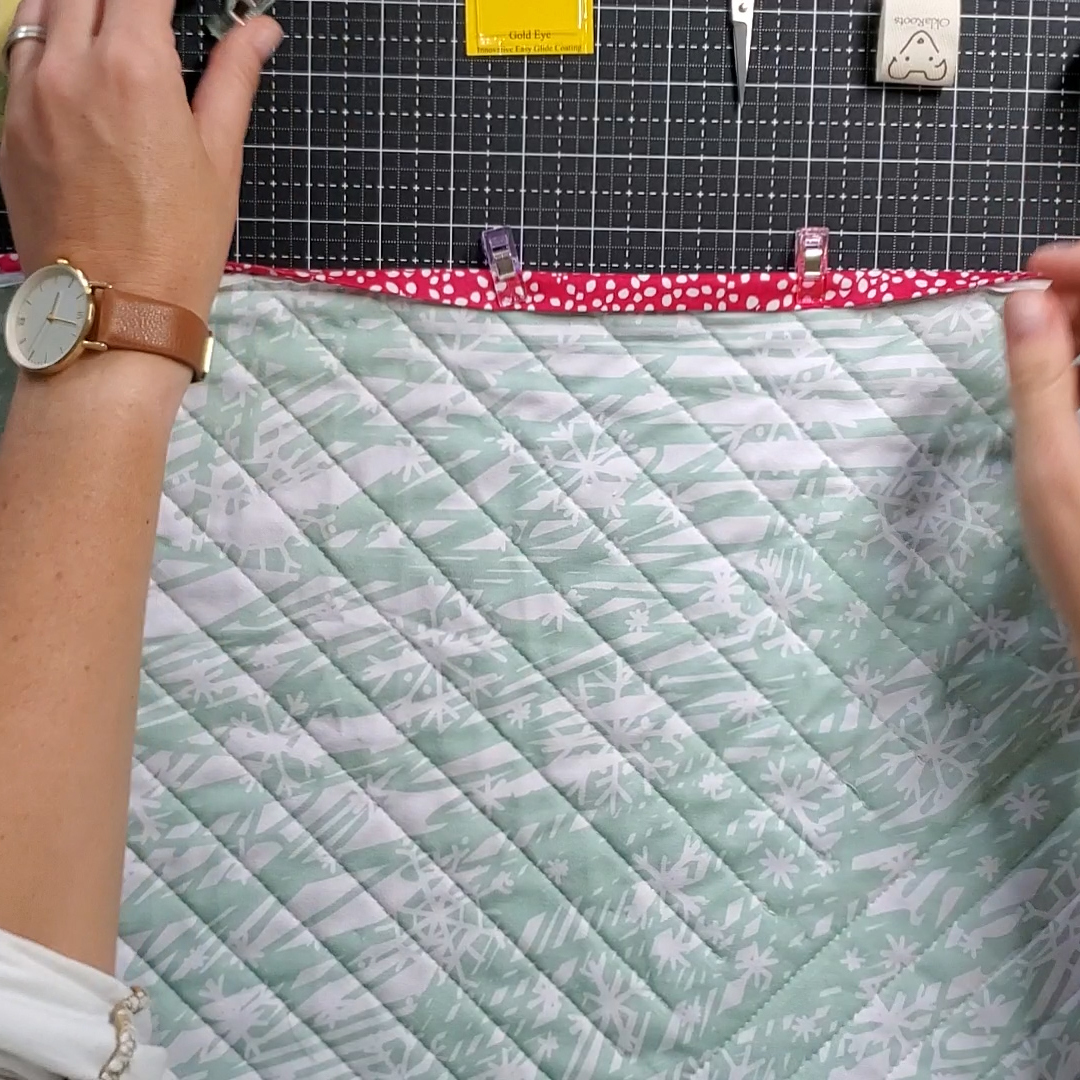
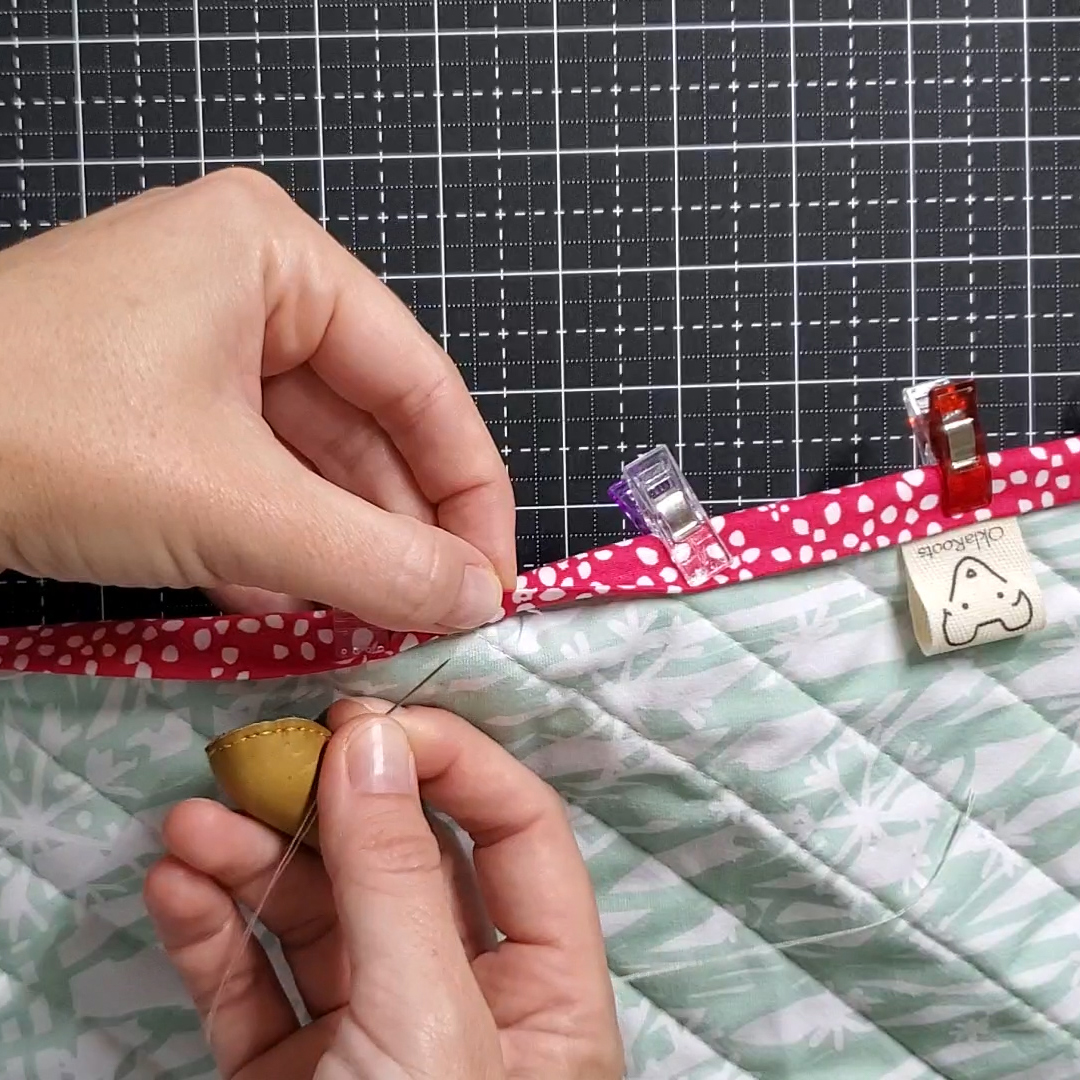
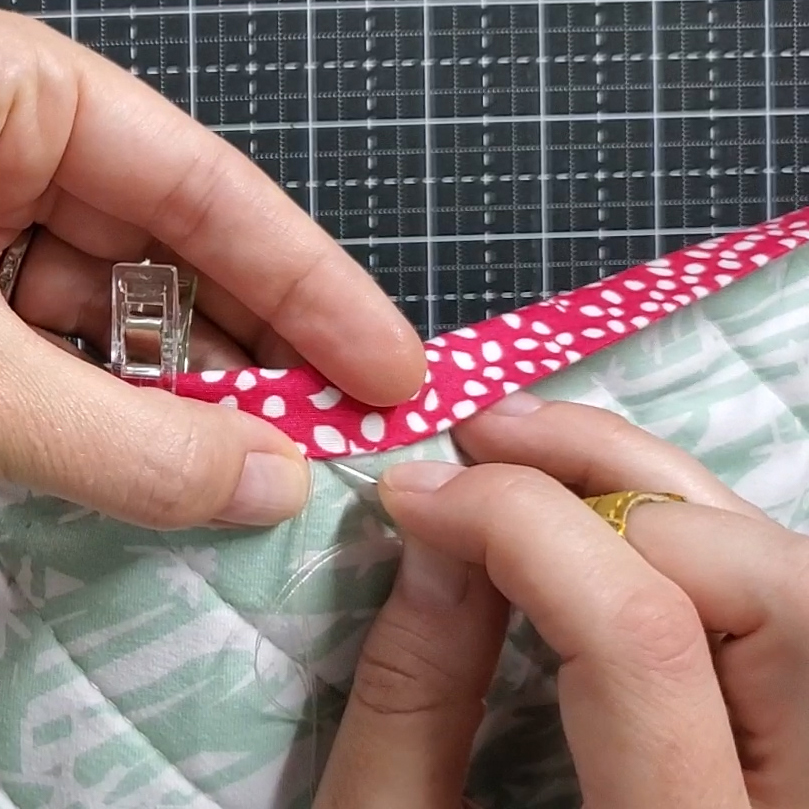
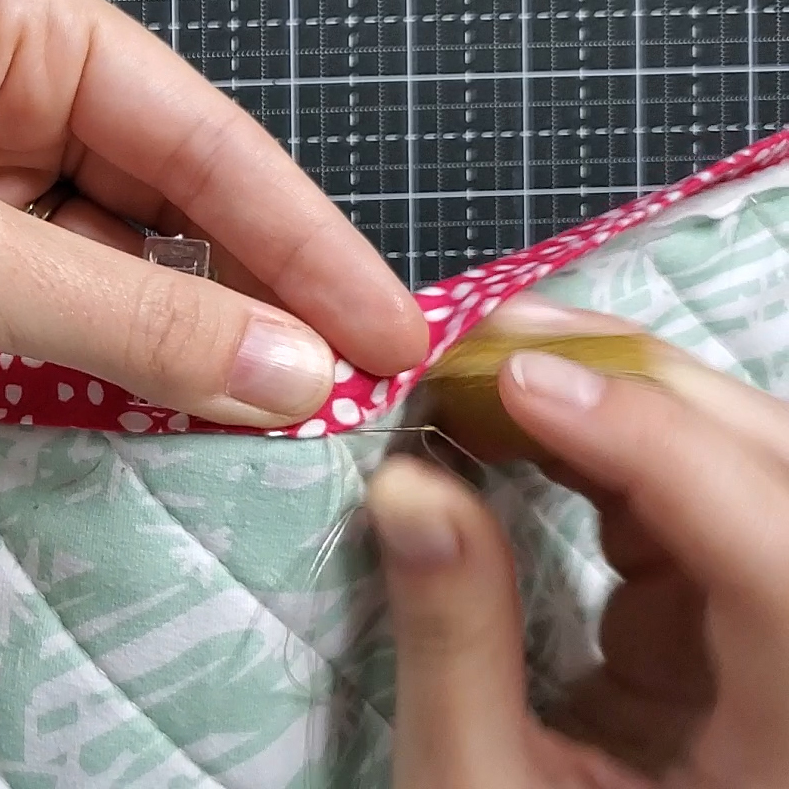
Lay the quilt back side up. Wrap the binding around to cover the seam and pin in place using the clips. Double thread your needle and knot the end. Pull the needle through the backing fabric, close to the seam, and through the binding. The needle should come out of the binding in the crease. 

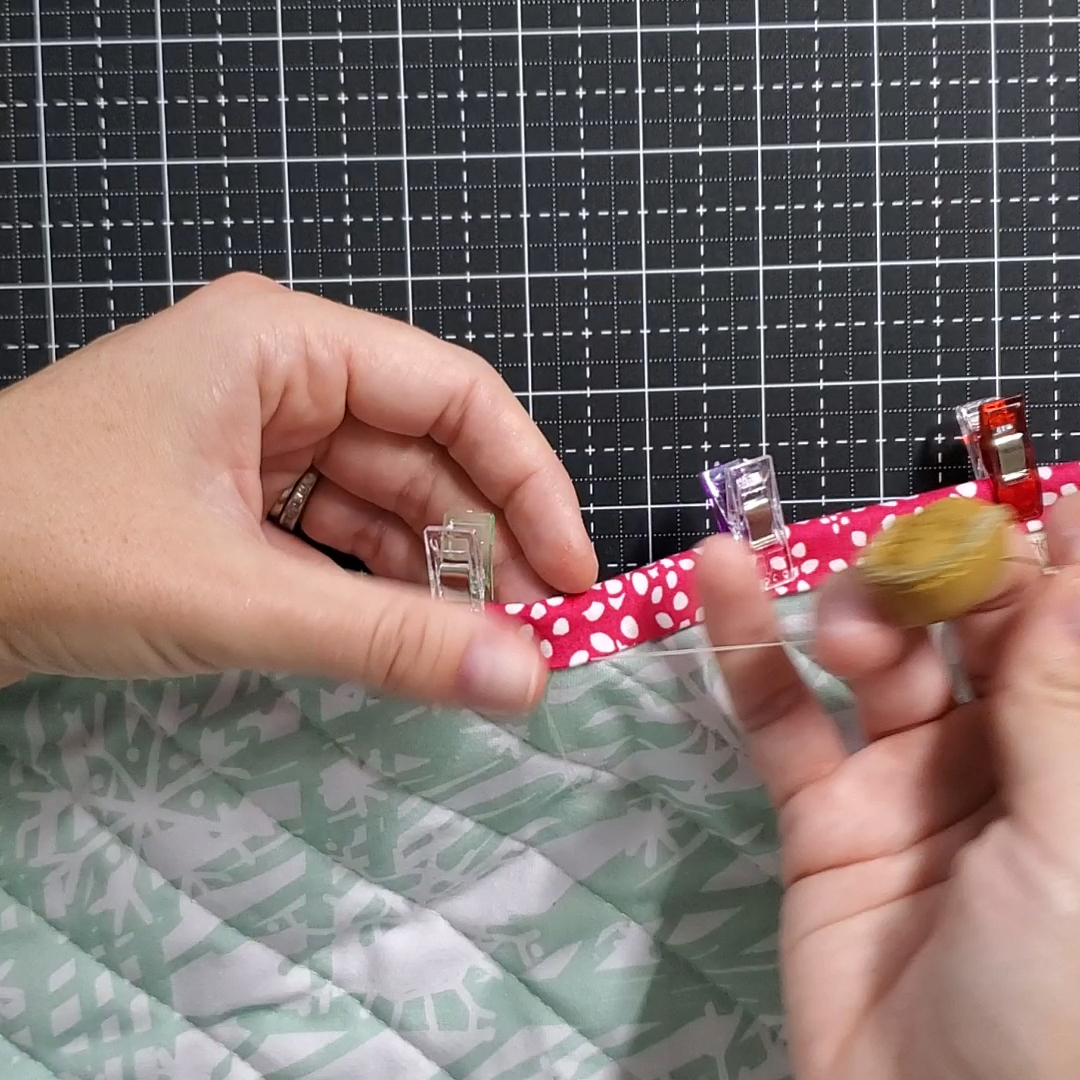
Decide which direction you will be sewing. In my photos, I am working from right to left. Insert the needle close behind where the thread came out of the binding. Push the needles into the backing fabric and then through the binding in front of where the thread came out previously, through the crease. My stitches are about a quarter inch long. 

Remember, when sewing this you will always insert the needle slightly behind where it came out, and then pull the needle out of the crease in front. Think 1 step back, 2 steps forward. 

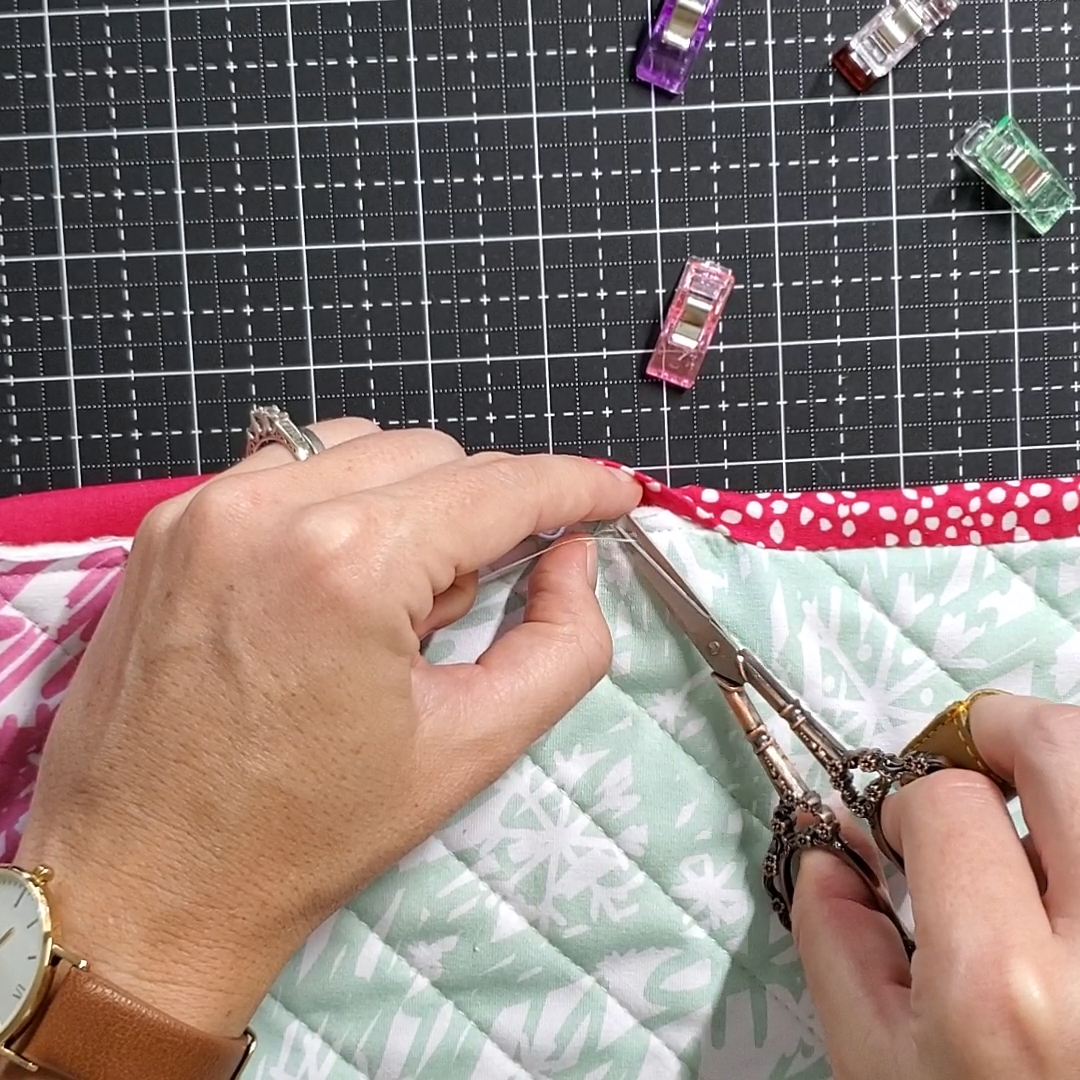
Once your thread has shortened knot it off and pull through the backing fabric, close to the seam. 

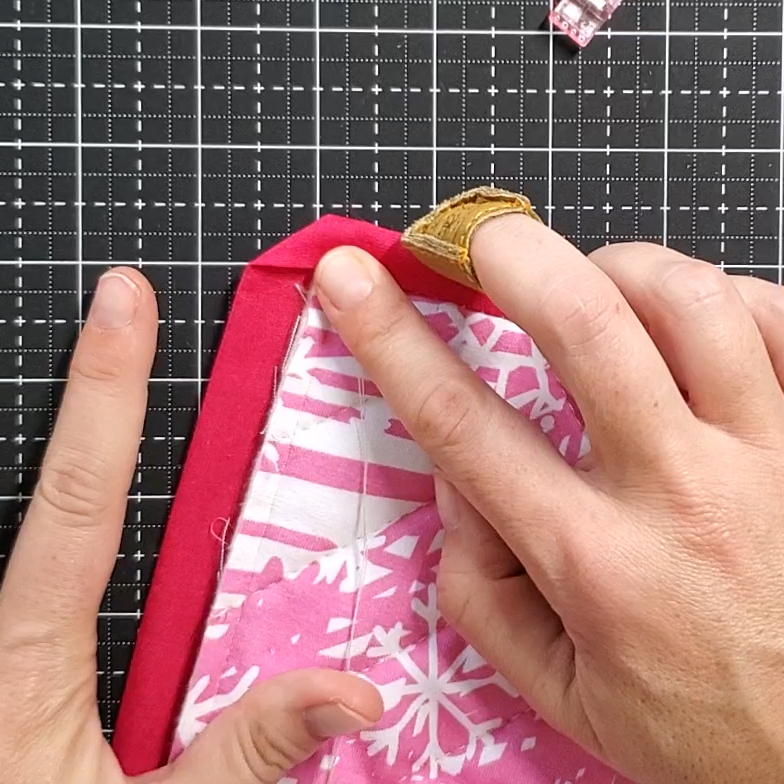
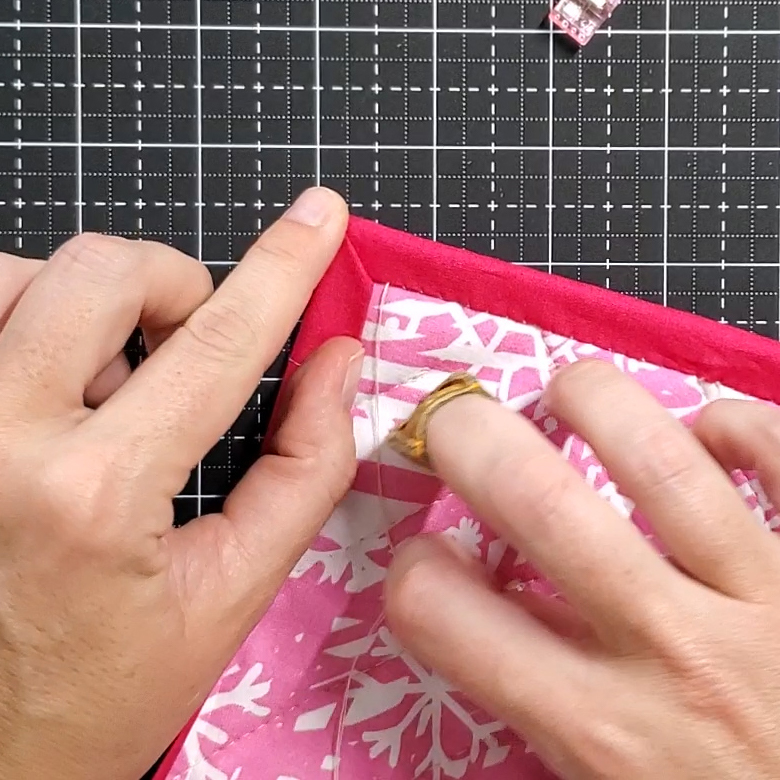
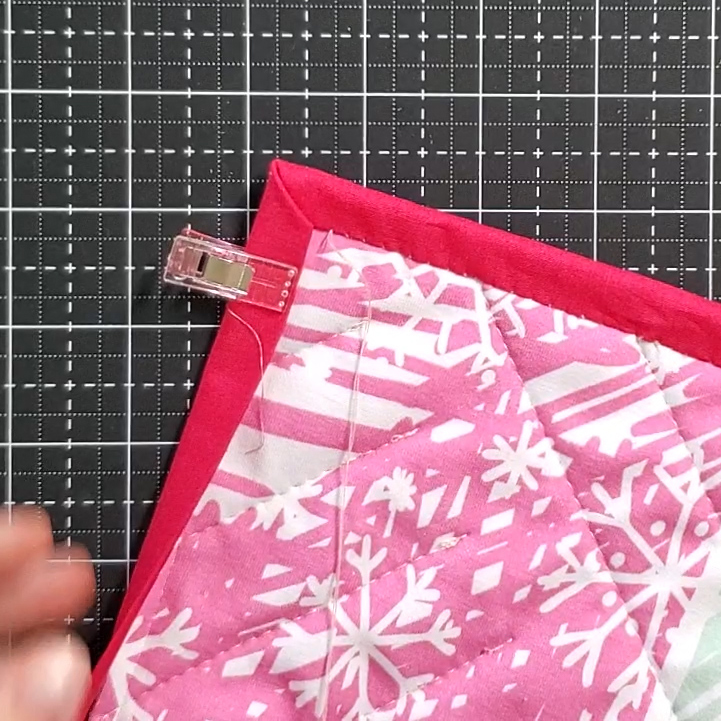
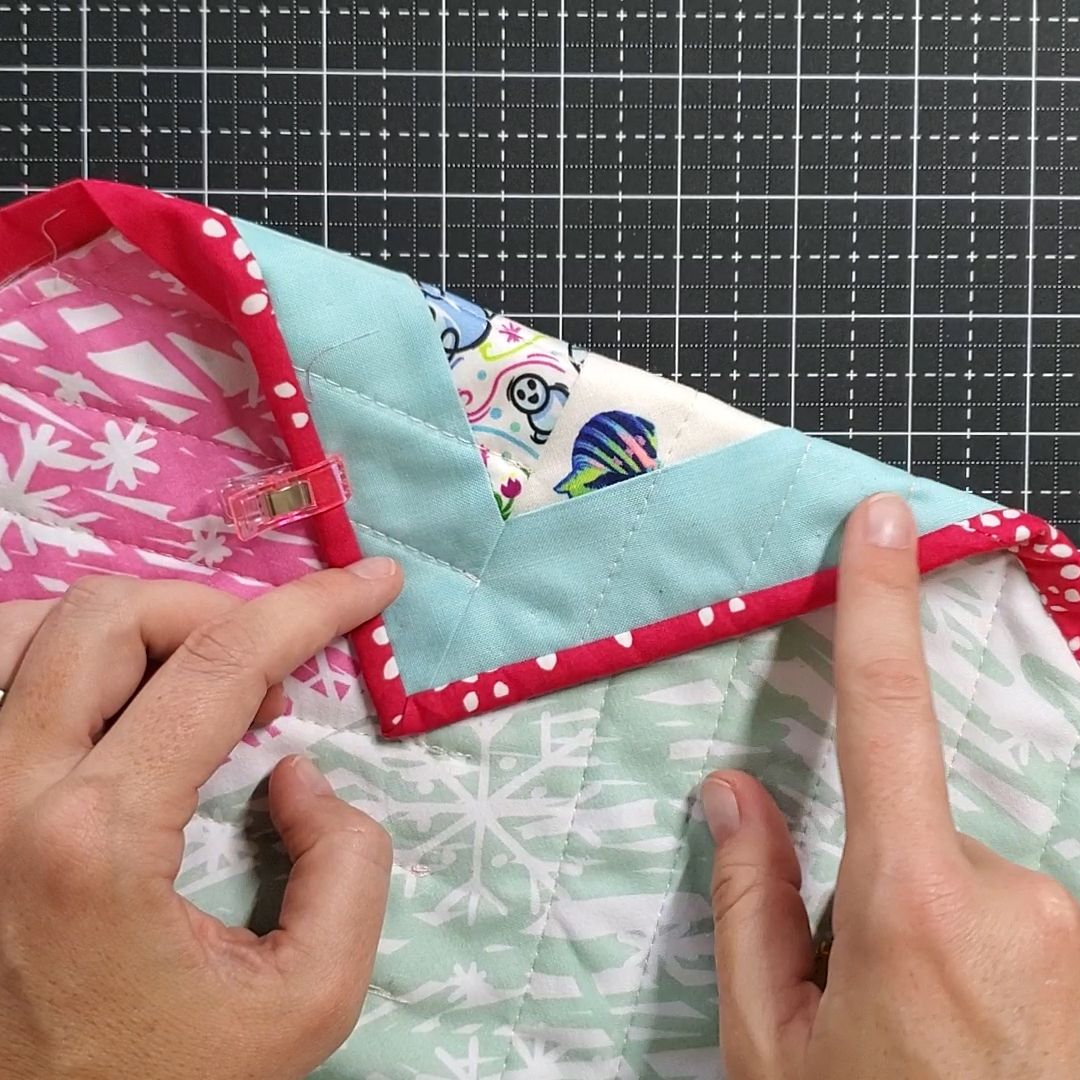
When working with corners, fold down the side you are sewing and leave the next side open. This will create a 45 degree angle on the binding. Then, fold over the next side, so the 45 degree angle now points into the center of the quilt. Adjust as needed to get both edges lined up. Use clips to hold in place.

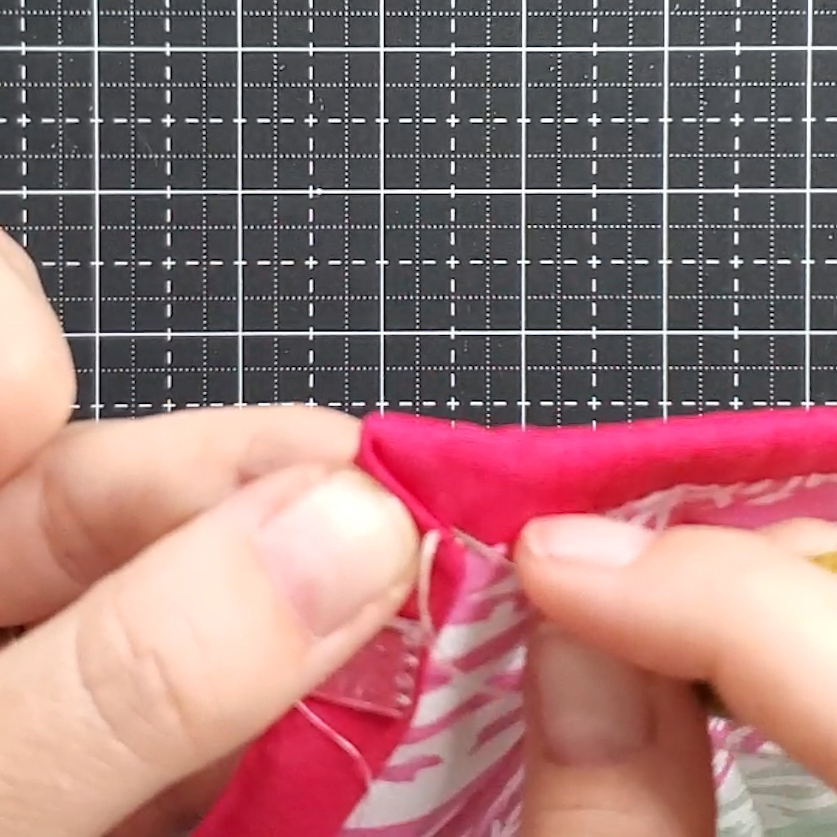
Sew along the binding into the corner, the same way you have sewn the binding on to the quilt. When at the tip of the corner, insert the needle into the binding and push it through the corner towards the middle of the quilt.  Pull out in the crease and then continue along the next edge.  Do this for each corner.

And that is how I bind my quilts! It takes a bit, but my quilts in general take a bit more time. I love getting the quilts done and binding attached to the front during the warmer months. Then once cool weather comes I have a nice stack to hand bind while watching some awesome fall shows!  Another bonus: I get a LOT of quilts completed in a short amount of time (or so it appears).

Happy sewing! Don’t forget to use #OklaRootsTuts in any of your social media postings you want me to see!

Do you have a different way of binding your quilts?? Let’s hear them!

« Previous Page
Next Page »

Primary Sidebar

Recent Posts

  • The Bag Maker’s Companion – An All New Sewing Book!
  • 2025 ByAnnie SewPINK Blog Hop – Making The Zip It Up 2.0
  • 2026 OklaCruise!
  • January 2025 Livestream
  • 2024 ByAnnie #SewPink Breast Cancer Awareness

Instagram

oklaroots

Comment CLEAR and I’ll message you a link to the p Comment CLEAR and I’ll message you a link to the pattern!

Full tutorial available for free on the OklaRoots Youtube Channel ❤️

I’m using all Liberty of London cotton lawn for the top portions and binding from @duckadillyfabrics , @patternsbyannie clear vinyl and Soft and Stable foam. 

Templates available in @shopoklaroots 

#oklarootstuts #pattern #sewing #handmade #tutorial
We are making the CUTEST bag this week! The Walt We are making the CUTEST bag this week! 

The Walt Crossbody from @minnieinthemountains is absolutely adorable and I love the two size options. I’m also so grateful to Jen for sharing with us how to make the ears and the bow. I’ll be using that on future bags!

Have fun with this one!

#oklarootstuts #handmade #parkbag #magical #sewing
About time we made a wallet! This week we’re sewi About time we made a wallet!

This week we’re sewing up the Ellie Wallet from @sewfisticatedsg and it’s one of the best BEST and EASIEST wallets I’ve made 😱

This is also Augusts @bagmakingbeesclub box and we’ve got bonded nylon, faux leather and ripstop!

Comment WALLET and I’ll message you a direct link to the tutorial 🥰

#oklarootstuts #handmade #bagmakingbees #wallet #sewing
Month 1 of @duckadillyfabrics Regent Street BOM is Month 1 of @duckadillyfabrics Regent Street BOM is complete! 

I love how we’re starting out with simple rectangles. This makes it great for those of us (me) who are still newer to foundation paper piecing. 

It’s a big block with lots of beautiful fabric! I can’t wait to see this come together ❤️

[This is an 18 month block of the month, all foundation paper pieced, all @libertylondon fabric]

#quilting #libertyoflondon #fpp #handmade #quilt
Free pattern alert! This week’s tutorial is going Free pattern alert! This week’s tutorial is going over the fun and chic Haley Wristlet from @kaurthreads . I love how adaptable this pattern is: easily make it a crossbody, add card slot pockets, and an embroidery design to the exterior… so many creative opportunities!

This is also the July/August Bag Making BABE Box from @bagmakingbeesclub , a great sew for those newer to bag making or wanting to try out bonded nylon and water resistant canvas. I love how simple and classic it turned out 🖤💜.

Have a great start to August!

#oklarootstuts #bagmakingbeesclub #kaurthreads #handmade #zipperpouch
Just trying to eat up my expensive scraps any way Just trying to eat up my expensive scraps any way I can… 🥴
Do you do anything with smalls scraps? I toss most, but for my really special materials (Harris Tweed, Liberty, etc) I’m always trying to find creative ways to use them.

Ok back to bags!
Testing out the fully lined fabric version of the Testing out the fully lined fabric version of the Babi Boxy Crossbody (a pattern originally designed for clear vinyl) is finally a success!

I’ll have a full video tutorial AND written instructions available soon ❤️❤️❤️

#oklarootstuts #handmade #sewing
My masterpiece(s) of 2026! The stunning Andy Backp My masterpiece(s) of 2026! The stunning Andy Backpacks!! 

I’m so stinking proud of these. And I’m still not sure how @uhohcreations was able to write a pattern for this that makes it easy for us to create our own. The math and shapes and intricacies of this, but then the easy way the pattern explains each step. I still don’t know how I ended up sewing this, and I made it TWICE! Pattern magic I tell you!

And sadly, the @bagmakingbeesclub Mega Box which supplied all the materials for each bag is no longer available for order 😭. Be sure to check out all the beautiful nylon materials you can put together to make your own Andy at @wondergroundfabrics 🥰

I feel like a bag warrior after making these 💪💪

#oklarootstuts #bagmakingbeesclub #backpack #sewing #bagmaker
Here’s our second week in the UK in 90 seconds! We Here’s our second week in the UK in 90 seconds! We loved every minute and feel so grateful to have this experience. We are already saving up to go back! 

Most of this week was spent in Edinburgh Scotland ❤️

Here’s a list of our favorite places to visit!
Stayed at the Caledonian
Red Squirrel Pub (so good!)
Edinburgh Castle
The Real Mary Close Tour
Islander Bag Making
Makars Mash
Calton Hill
Mary’s Milk Bar
All the Cadbury

#Travel #scotland #edinburgh
Follow on Instagram

Recent Posts

  • The Bag Maker’s Companion – An All New Sewing Book!
  • 2025 ByAnnie SewPINK Blog Hop – Making The Zip It Up 2.0
  • 2026 OklaCruise!
  • January 2025 Livestream
  • 2024 ByAnnie #SewPink Breast Cancer Awareness

Instagram

oklaroots

Comment CLEAR and I’ll message you a link to the p Comment CLEAR and I’ll message you a link to the pattern!

Full tutorial available for free on the OklaRoots Youtube Channel ❤️

I’m using all Liberty of London cotton lawn for the top portions and binding from @duckadillyfabrics , @patternsbyannie clear vinyl and Soft and Stable foam. 

Templates available in @shopoklaroots 

#oklarootstuts #pattern #sewing #handmade #tutorial
We are making the CUTEST bag this week! The Walt We are making the CUTEST bag this week! 

The Walt Crossbody from @minnieinthemountains is absolutely adorable and I love the two size options. I’m also so grateful to Jen for sharing with us how to make the ears and the bow. I’ll be using that on future bags!

Have fun with this one!

#oklarootstuts #handmade #parkbag #magical #sewing
About time we made a wallet! This week we’re sewi About time we made a wallet!

This week we’re sewing up the Ellie Wallet from @sewfisticatedsg and it’s one of the best BEST and EASIEST wallets I’ve made 😱

This is also Augusts @bagmakingbeesclub box and we’ve got bonded nylon, faux leather and ripstop!

Comment WALLET and I’ll message you a direct link to the tutorial 🥰

#oklarootstuts #handmade #bagmakingbees #wallet #sewing
Month 1 of @duckadillyfabrics Regent Street BOM is Month 1 of @duckadillyfabrics Regent Street BOM is complete! 

I love how we’re starting out with simple rectangles. This makes it great for those of us (me) who are still newer to foundation paper piecing. 

It’s a big block with lots of beautiful fabric! I can’t wait to see this come together ❤️

[This is an 18 month block of the month, all foundation paper pieced, all @libertylondon fabric]

#quilting #libertyoflondon #fpp #handmade #quilt
Free pattern alert! This week’s tutorial is going Free pattern alert! This week’s tutorial is going over the fun and chic Haley Wristlet from @kaurthreads . I love how adaptable this pattern is: easily make it a crossbody, add card slot pockets, and an embroidery design to the exterior… so many creative opportunities!
This is also the July/August Bag Making BABE Box from @bagmakingbeesclub , a great sew for those newer to bag making or wanting to try out bonded nylon and water resistant canvas. I love how simple and classic it turned out 🖤💜.

Have a great start to August!

#oklarootstuts #bagmakingbeesclub #kaurthreads #handmade #zipperpouch
Just trying to eat up my expensive scraps any way Just trying to eat up my expensive scraps any way I can… 🥴

Do you do anything with smalls scraps? I toss most, but for my really special materials (Harris Tweed, Liberty, etc) I’m always trying to find creative ways to use them.

Ok back to bags!
Testing out the fully lined fabric version of the Testing out the fully lined fabric version of the Babi Boxy Crossbody (a pattern originally designed for clear vinyl) is finally a success!

I’ll have a full video tutorial AND written instructions available soon ❤️❤️❤️

#oklarootstuts #handmade #sewing
My masterpiece(s) of 2026! The stunning Andy Backp My masterpiece(s) of 2026! The stunning Andy Backpacks!! 

I’m so stinking proud of these. And I’m still not sure how @uhohcreations was able to write a pattern for this that makes it easy for us to create our own. The math and shapes and intricacies of this, but then the easy way the pattern explains each step. I still don’t know how I ended up sewing this, and I made it TWICE! Pattern magic I tell you!

And sadly, the @bagmakingbeesclub Mega Box which supplied all the materials for each bag is no longer available for order 😭. Be sure to check out all the beautiful nylon materials you can put together to make your own Andy at @wondergroundfabrics 🥰

I feel like a bag warrior after making these 💪💪

#oklarootstuts #bagmakingbeesclub #backpack #sewing #bagmaker
Here’s our second week in the UK in 90 seconds! We Here’s our second week in the UK in 90 seconds! We loved every minute and feel so grateful to have this experience. We are already saving up to go back! 

Most of this week was spent in Edinburgh Scotland ❤️

Here’s a list of our favorite places to visit!
Stayed at the Caledonian
Red Squirrel Pub (so good!)
Edinburgh Castle
The Real Mary Close Tour
Islander Bag Making
Makars Mash
Calton Hill
Mary’s Milk Bar
All the Cadbury

#Travel #scotland #edinburgh
Follow on Instagram

Recent Posts

  • The Bag Maker’s Companion – An All New Sewing Book!
  • 2025 ByAnnie SewPINK Blog Hop – Making The Zip It Up 2.0
  • 2026 OklaCruise!
  • January 2025 Livestream
  • 2024 ByAnnie #SewPink Breast Cancer Awareness

Copyright © 2026 · OklaRoots

Lexi Theme by Code + Coconut