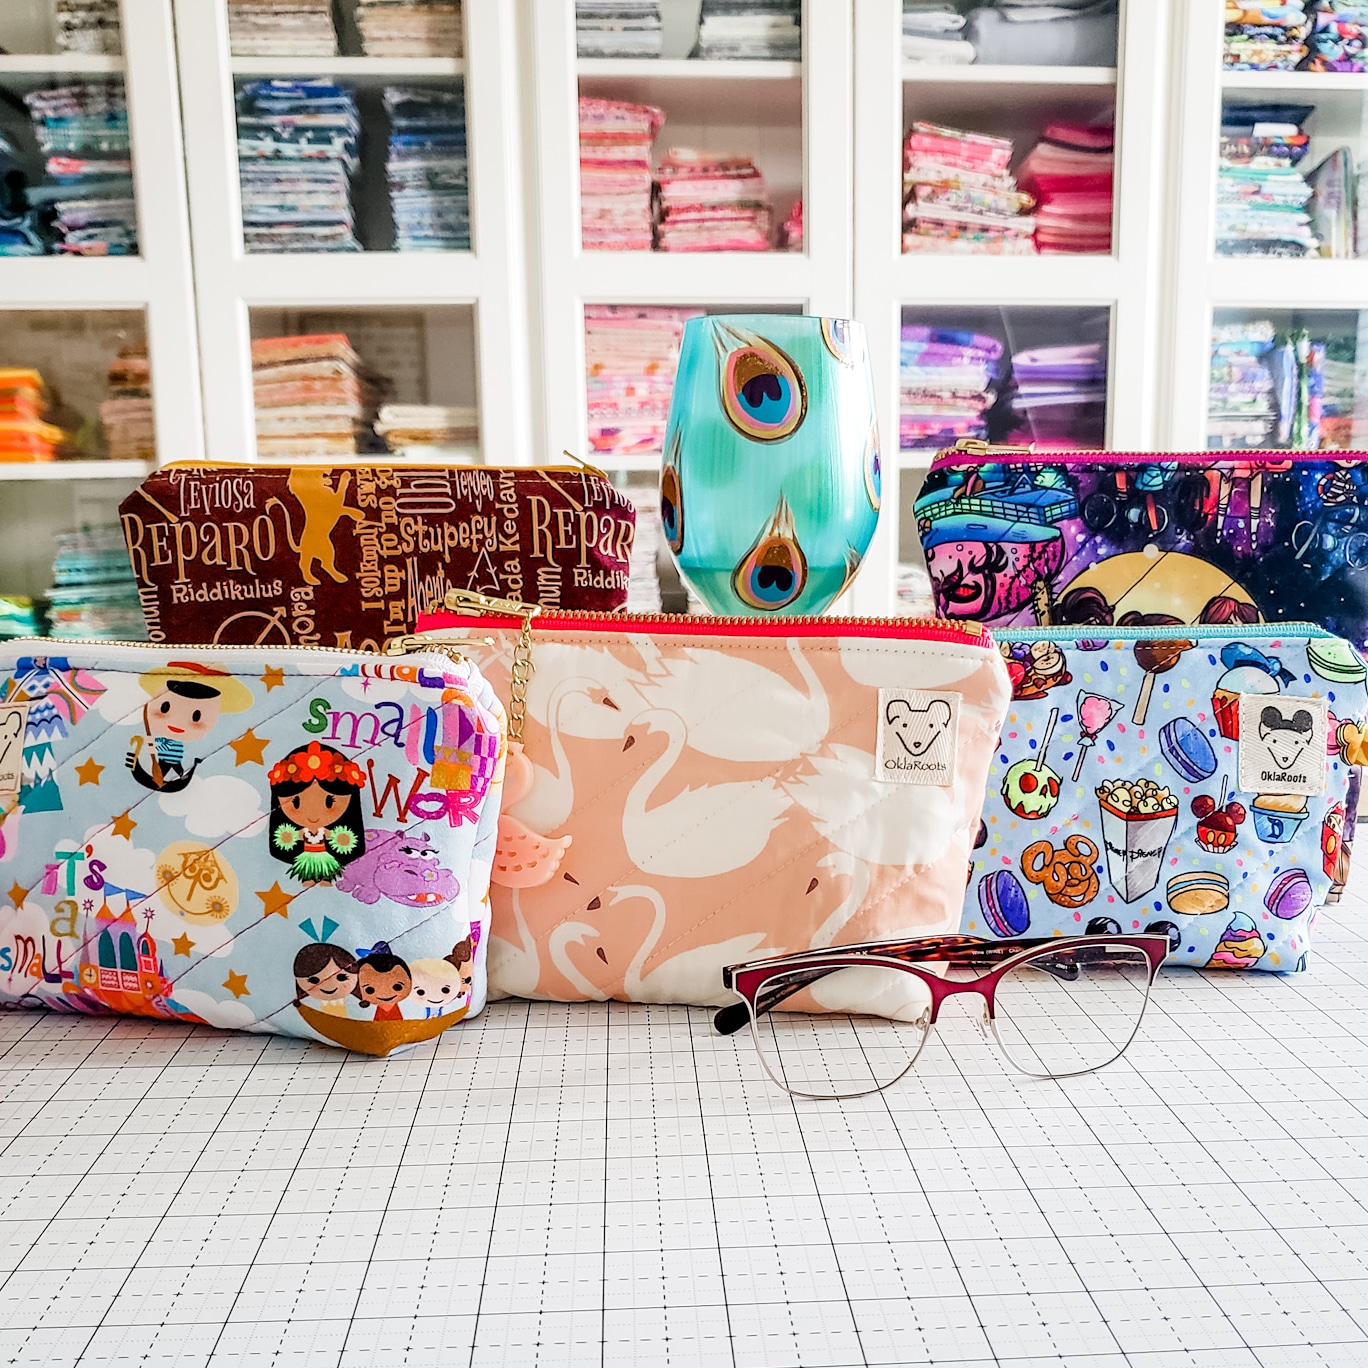
Happy Summer everyone! I hope you're keeping cool with pool time, beach time, drink time.... whatever it takes! I know I'm still eager to soak up some rays, but it's about that time of year to wrap up our summer vacations and focus on getting back to ____________ [fill in the blank - school, work, life...].
More...
In my home, we are focusing on the "reduce" in "Reuse-Reduce-Recycle". Slowly we have been replacing our plastic grocery bags with hand made reusable bags. Replacing disposable k-cups with a couple metal reusable ones. It's hard to do all at once, but if you tackle one object at a time, it's actually totally manageable!
So the next plastics I'm ready to ditch are the plastic zip bags! We go through a lot of them, and we always toss them out after one use (bad bad Jessica!). So how about we make our own bags? We'll make them CUTER, BETTER, and gosh darnit... everyone is going to like them!
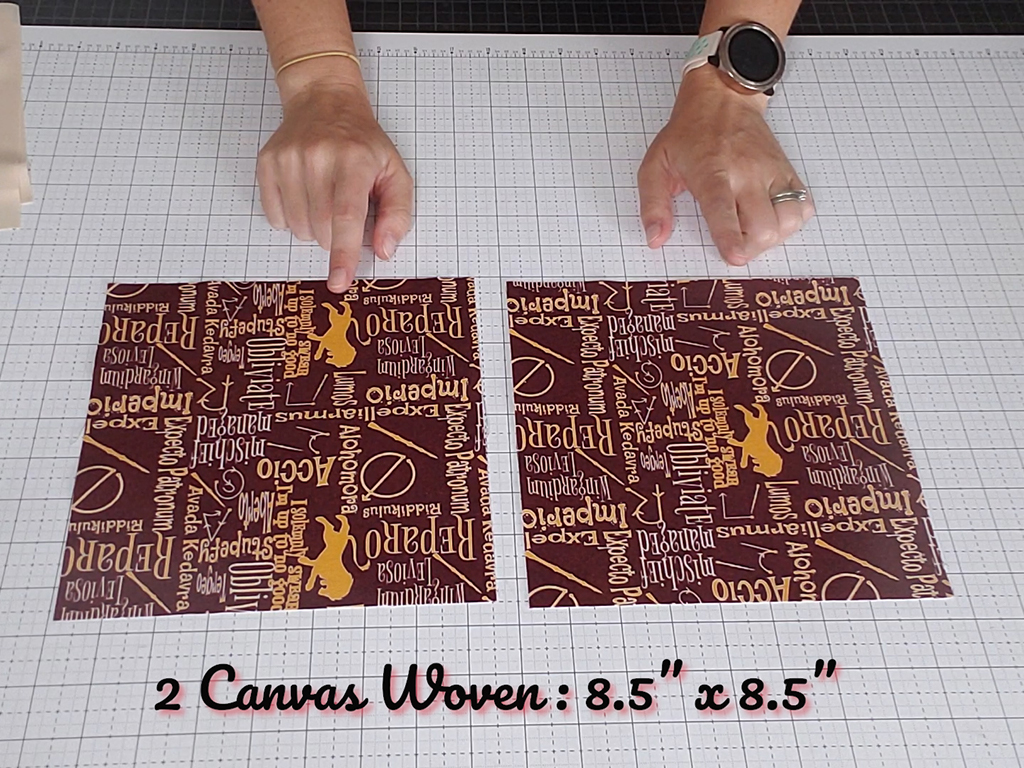
To start out, cut 2 exterior fabric pieces, 8.5"x8.5". You can use canvas if you don't want to interface them. If using quilt cotton, interface with SF101.
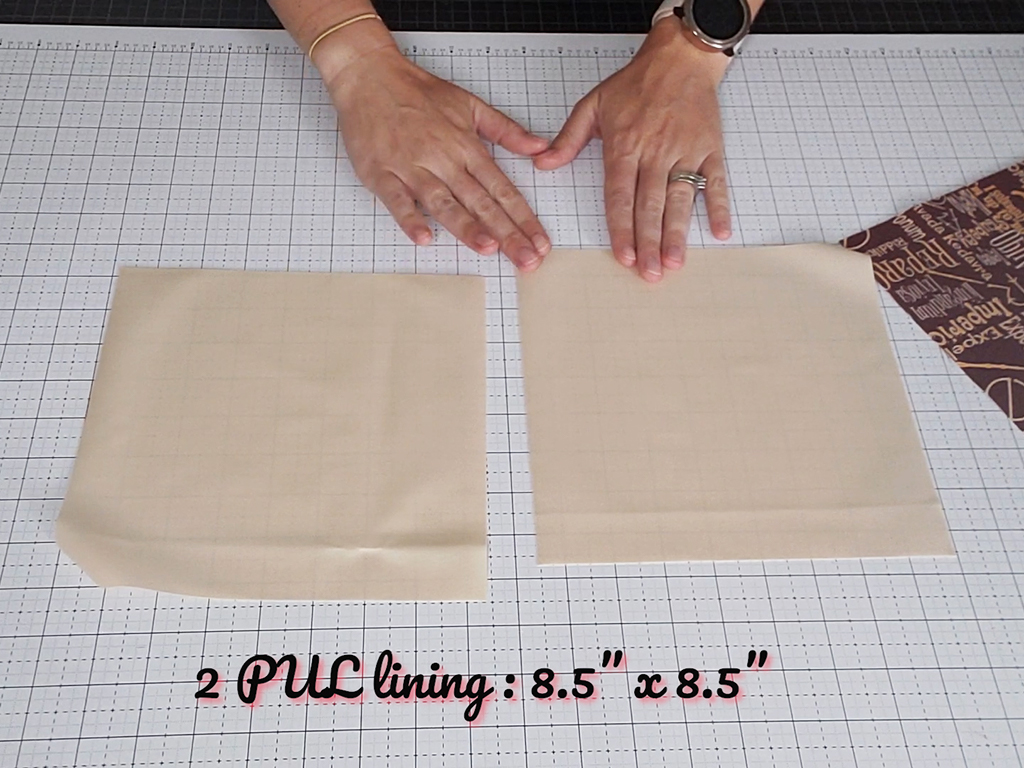
Also cut out your lining (I suggest PUL lining). 2 pieces 8.5"x8.5".
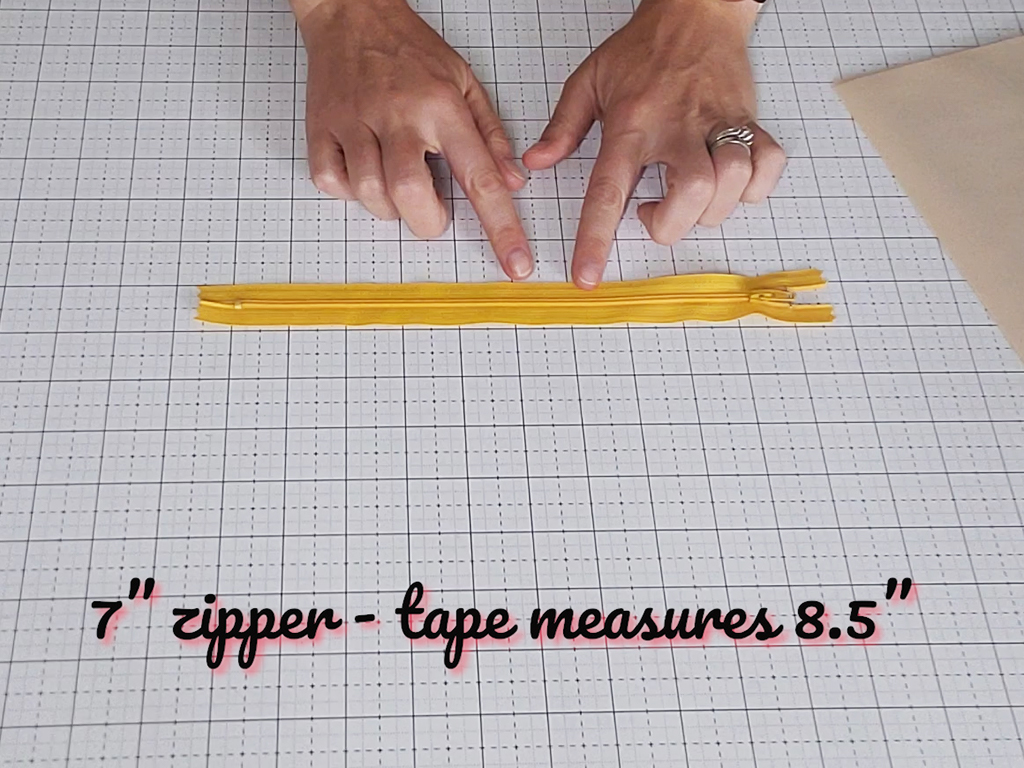
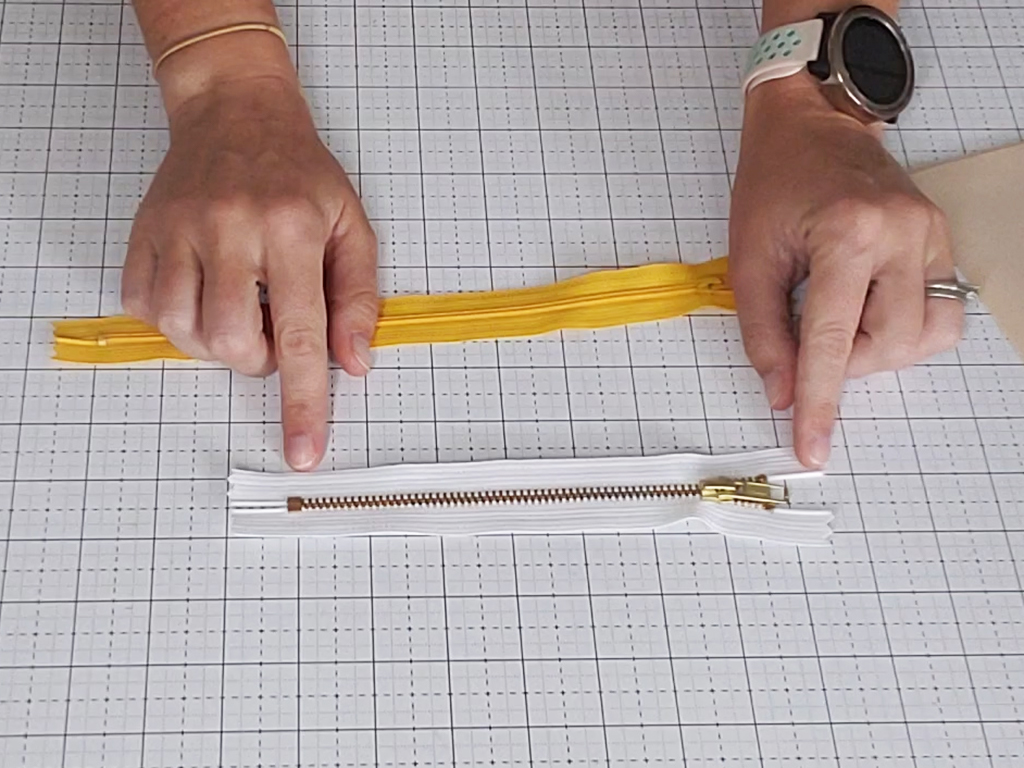
Your zipper tape needs to measure 8.5" long. If using a metal zipper, this will be a 7" zipper. If using a plastic zipper, this will be a 7" zipper or longer (since you can sew over and cut the zipper).
Clip or pin your zipper face down on the right side of the exterior fabric. If using directional fabric, you are attaching the zipper to the top of the panel.
Place the lining right side down on top of the zipper. Add to the clips already in place.
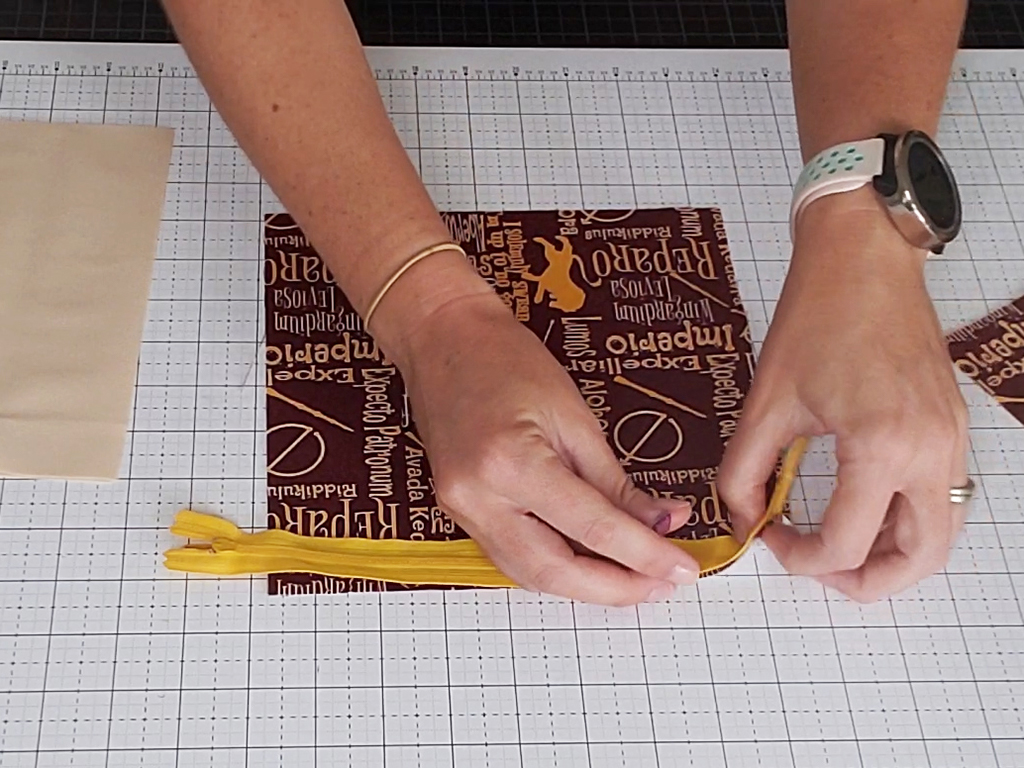
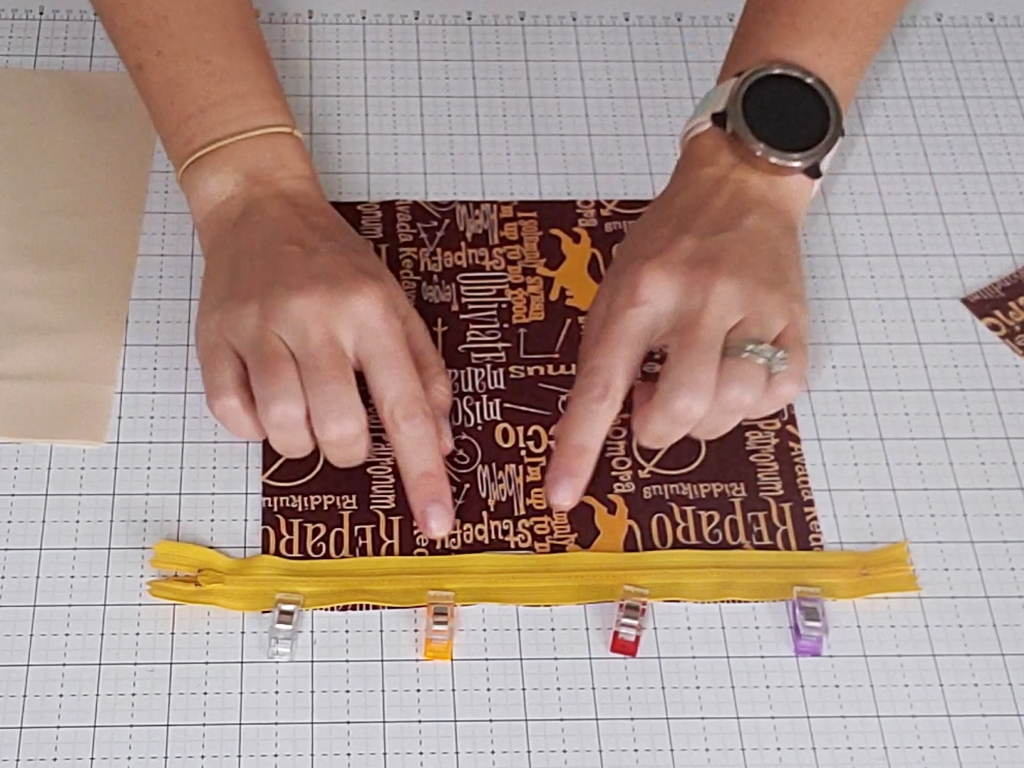
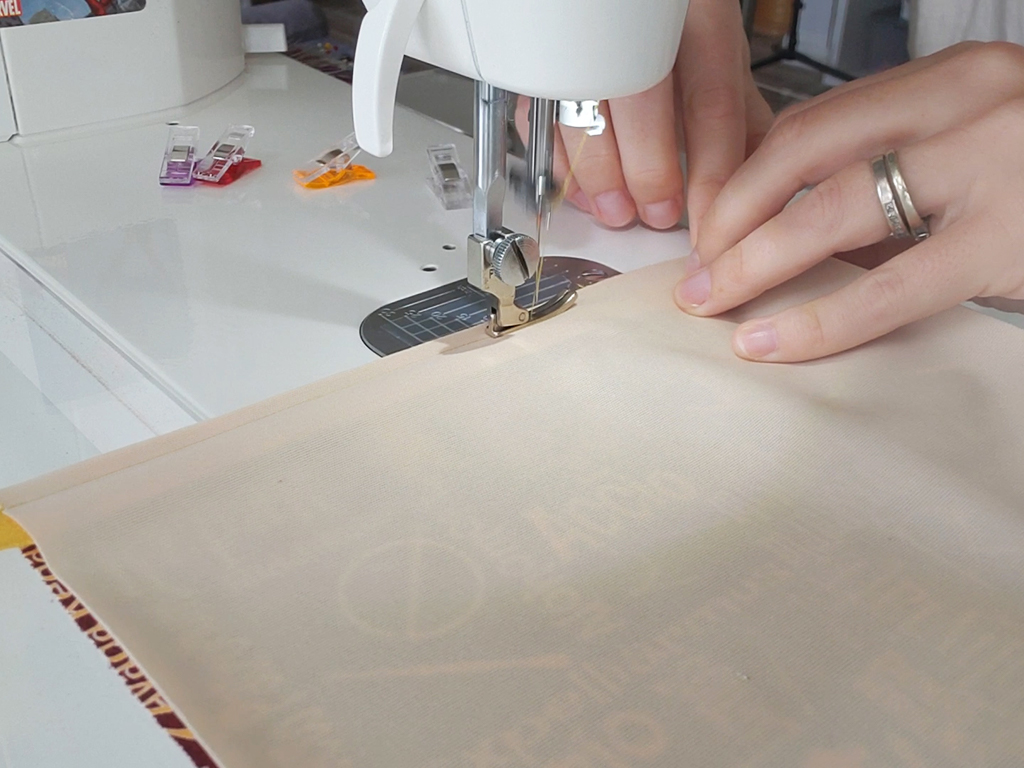
Using your zipper foot, sew a 1/4 inch seam along the zipper. If you are using PUL lining, I suggest using a jersey, knit or universal needle. You want to use a ball point needle that pushes the threads of the PUL fabric to the side, not a sharps needle that will break the threads of the fabric.
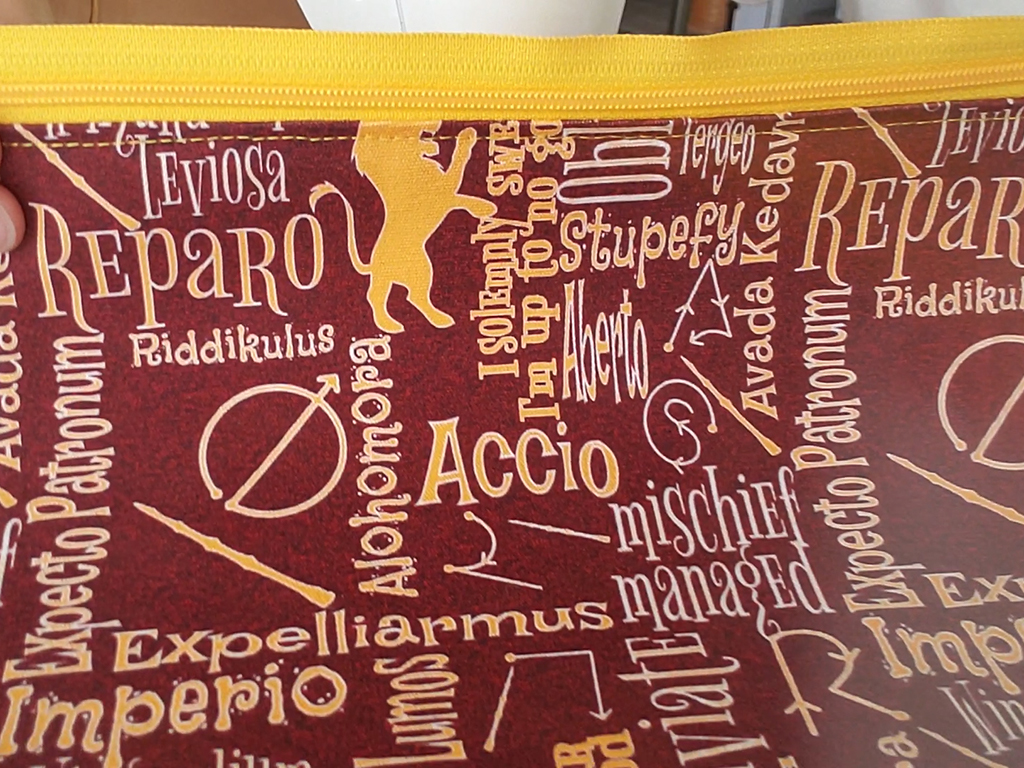
After sewing the exterior-zipper-lining sandwich together, press the fabric right sides out and away from the zipper. Using a 1/8 inch seam allowance and a 3 mm stitch length, top stitch the fabric in place. This is going to prevent the fabric from catching in the zipper pull during normal use.
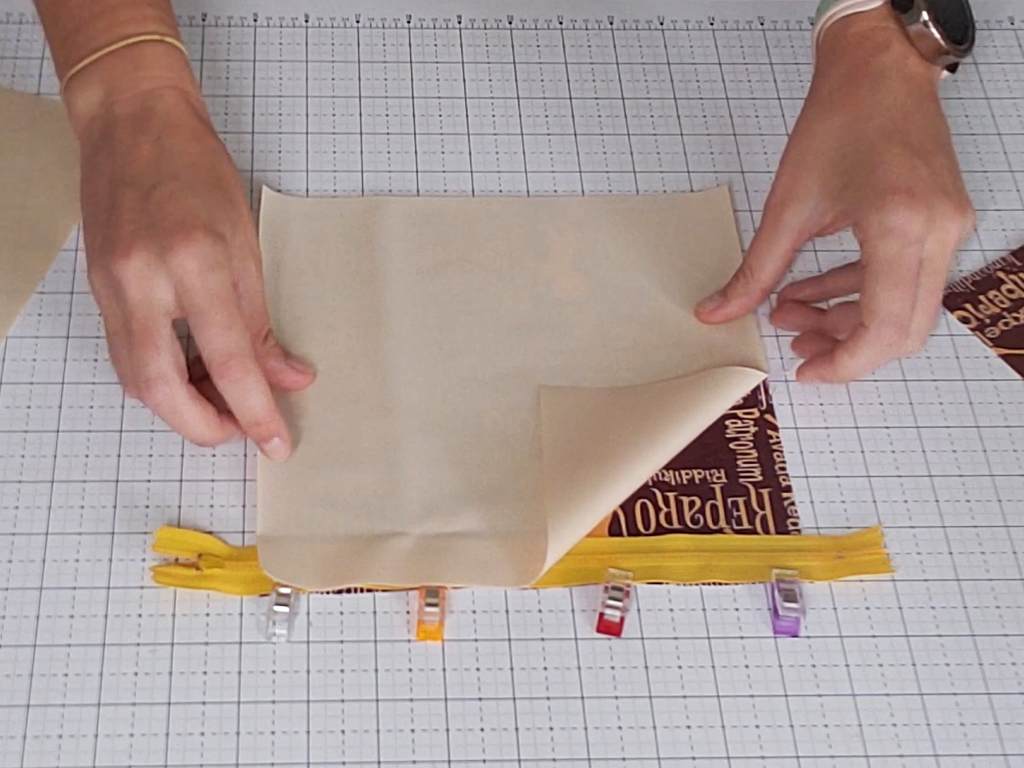
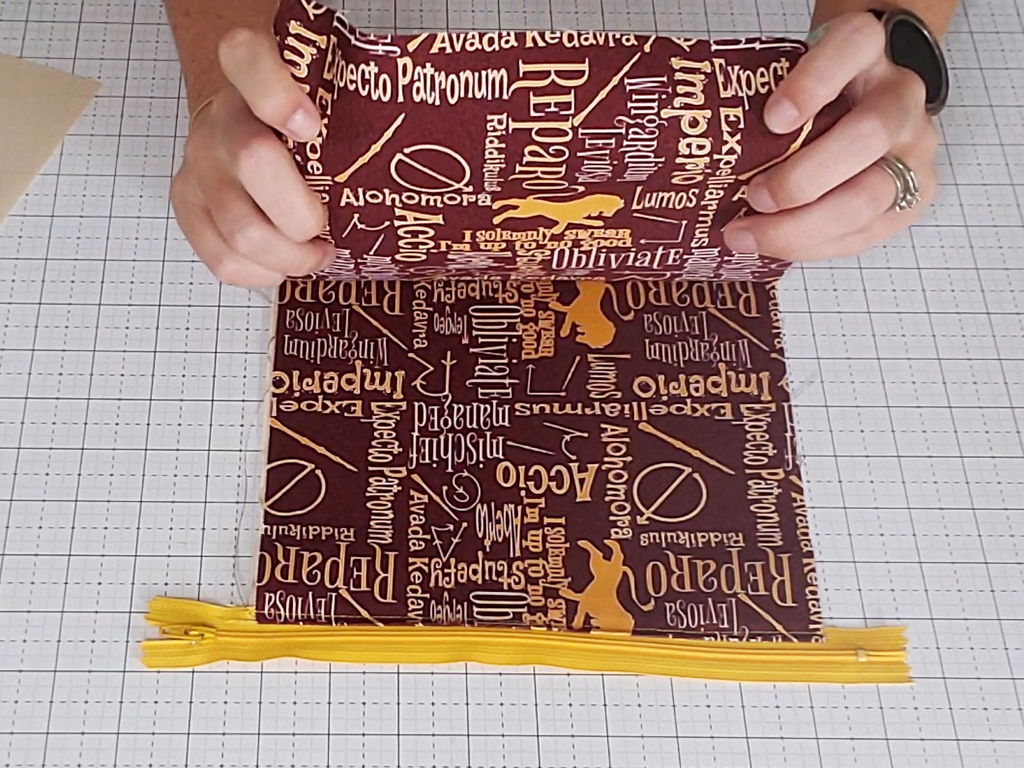
Grab your other exterior piece and lay it down on top of the zipper, right side of fabric against right side of zipper. Your two exterior pieces will be right sides together. Make sure the sides of both exterior pieces line up and the top of the second exterior piece is aligned with the top of the zipper. Clip in place.
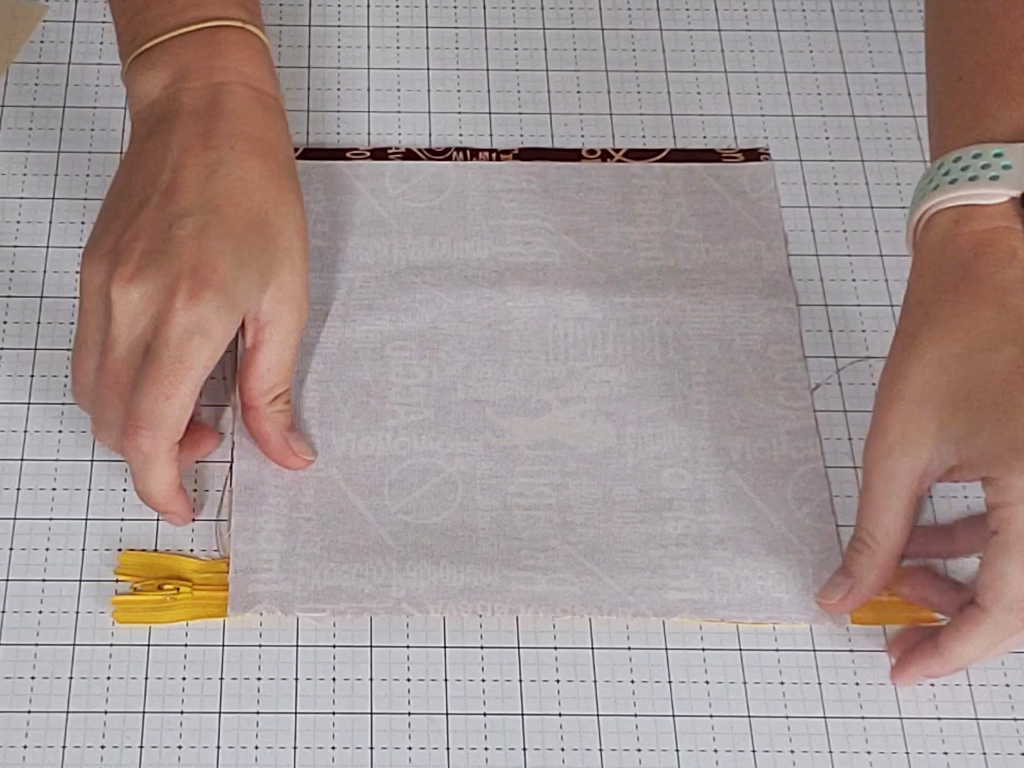
Flip the pouch over so the previously attached lining is now right side up. Take your second lining piece and lay it right side down, lining the top up with the top of the zipper. Make sure the sides are aligned with the sides of the previously attached lining piece. Clip in place.
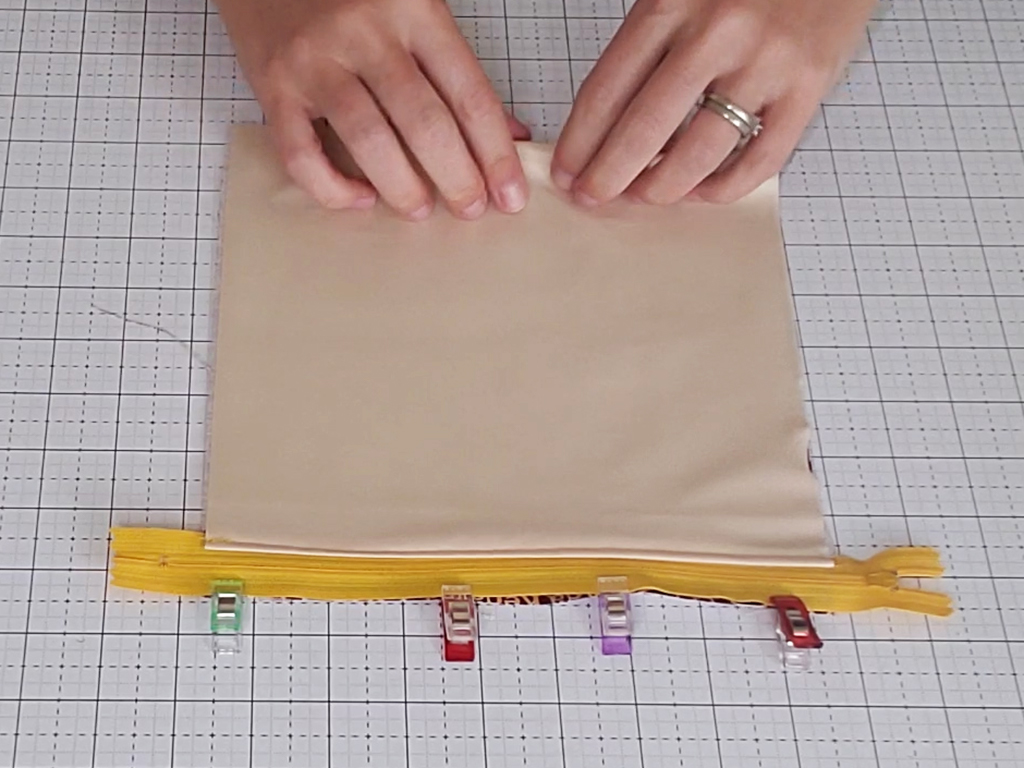
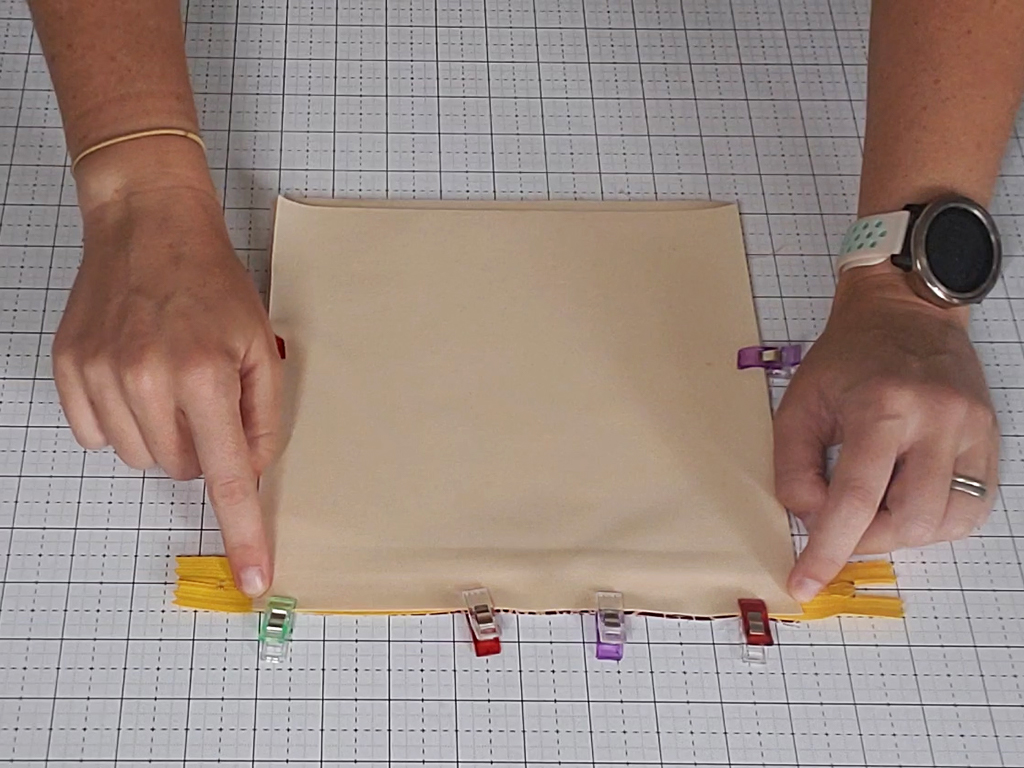
Sew this exterior fabric-zipper-lining fabric sandwich like you did previously. Don't forget to flip right sides out and top stitch before continuing.
We're almost done!
Lay your bag open, so the right sides of the exterior are face up and the right sides of the lining are face down. Pull up your exterior pieces, right sides together. Pull your lining pieces right sides together. Refer to the figures below or the video for help, if needed.
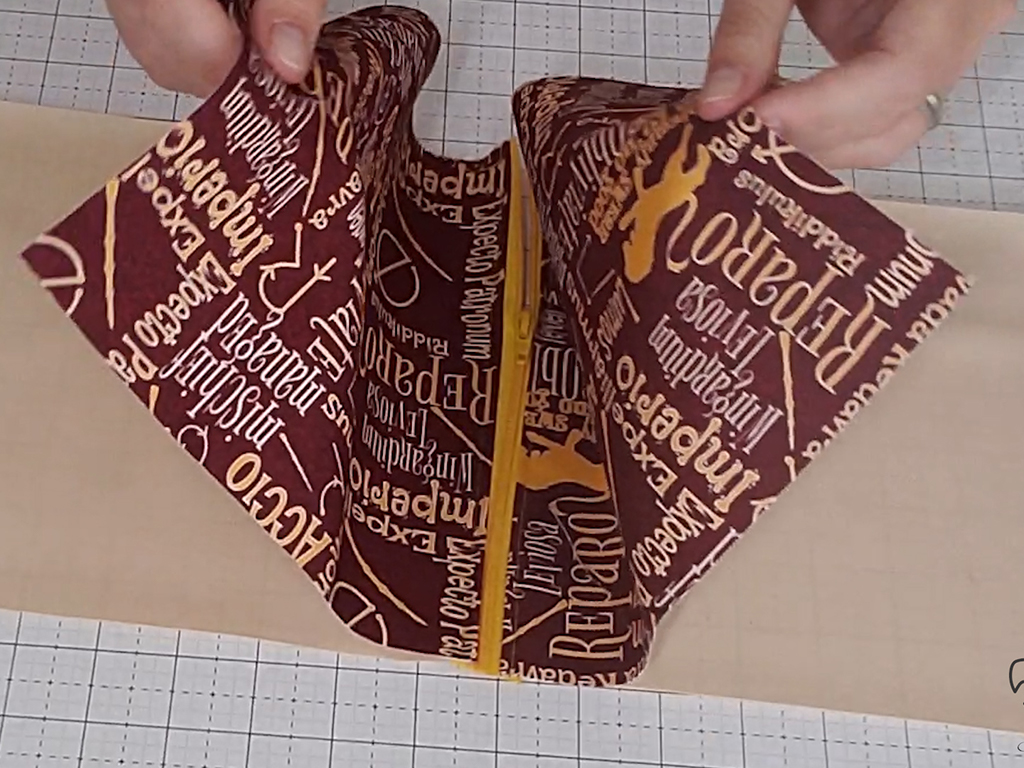
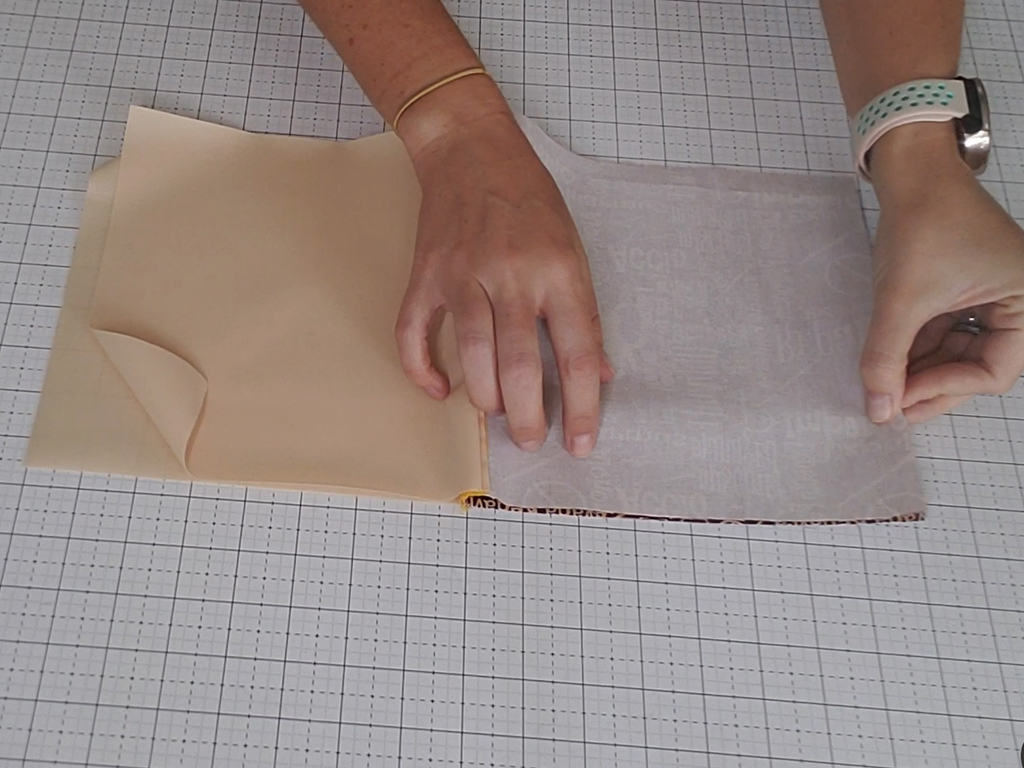
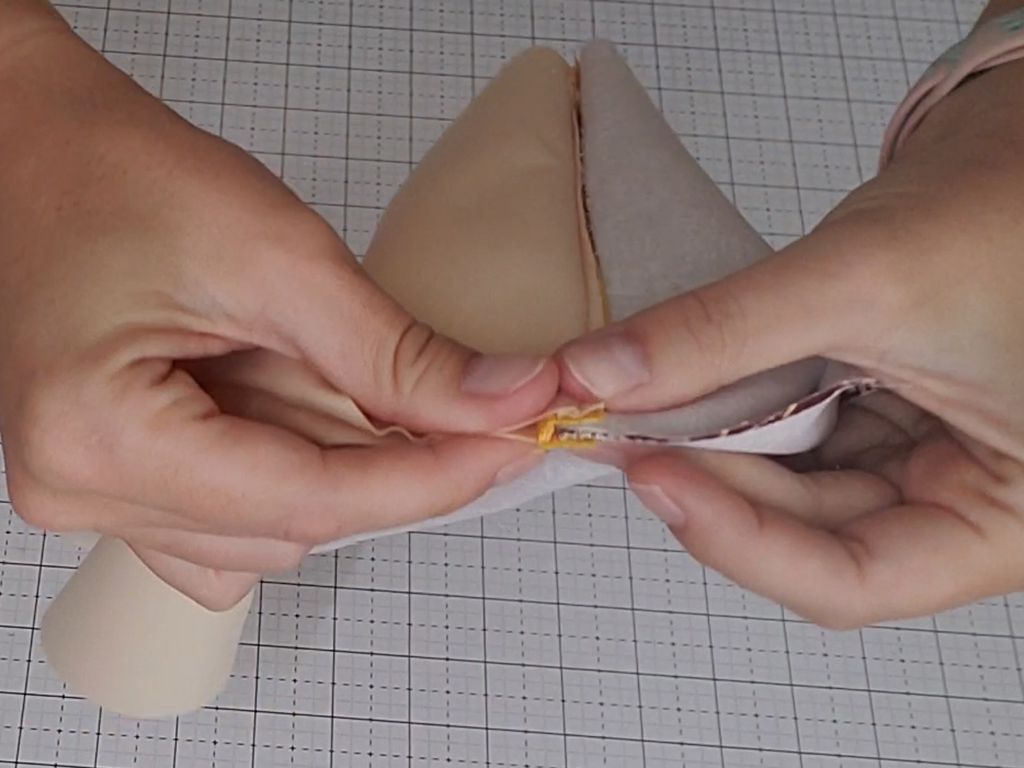
Press the zipper tape towards the lining side. Pin/clip the entire rectangle. Your exterior pieces will be right sides together, your lining pieces will be right sides together and your zipper will be pushed towards the lining side. Mark a 3-4" space on the bottom of the lining panels. This will be where we pull the bag right sides out, in the end.
Make sure to open your zipper half way or more at this point!!
To sew together, start at one end of your opening mark (make sure you backstitch!) and sew around the entire bag, lining and exterior, using a 1/4 inch seam allowance. When you have reached the other mark on the bottom of the lining panel, stop and backstitch. You should now have one large rectangle sewn together, with a small opening on the bottom of the lining panel.
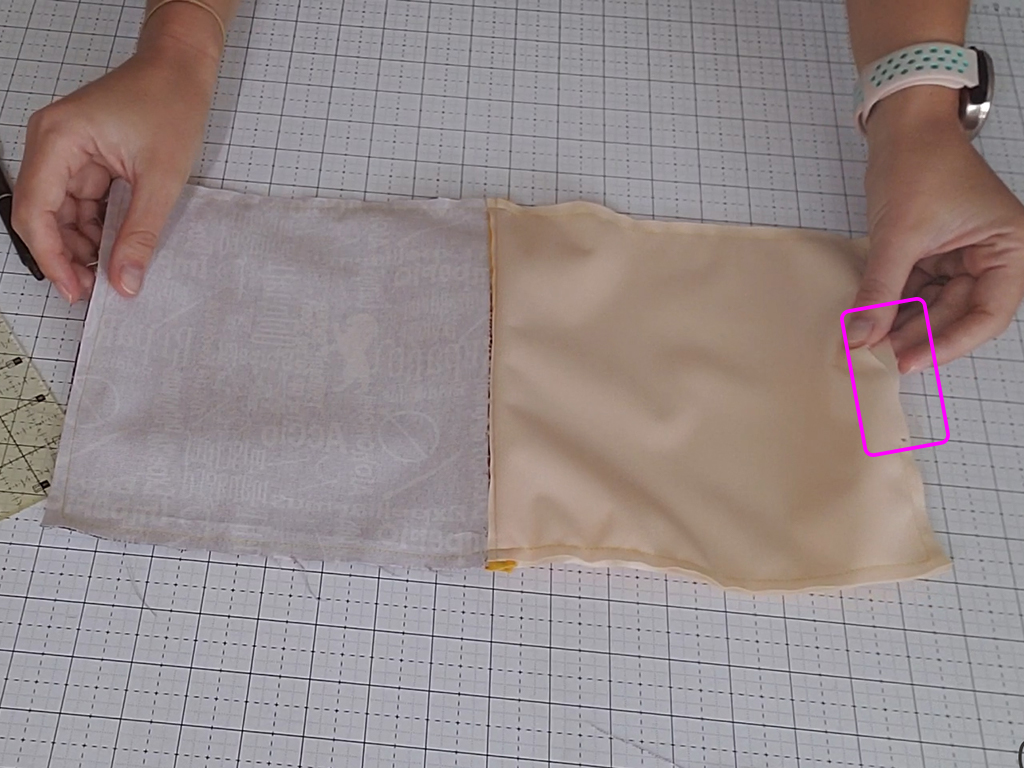
The next step is optional, but makes the bag extremely useful.
Time to box some corners!
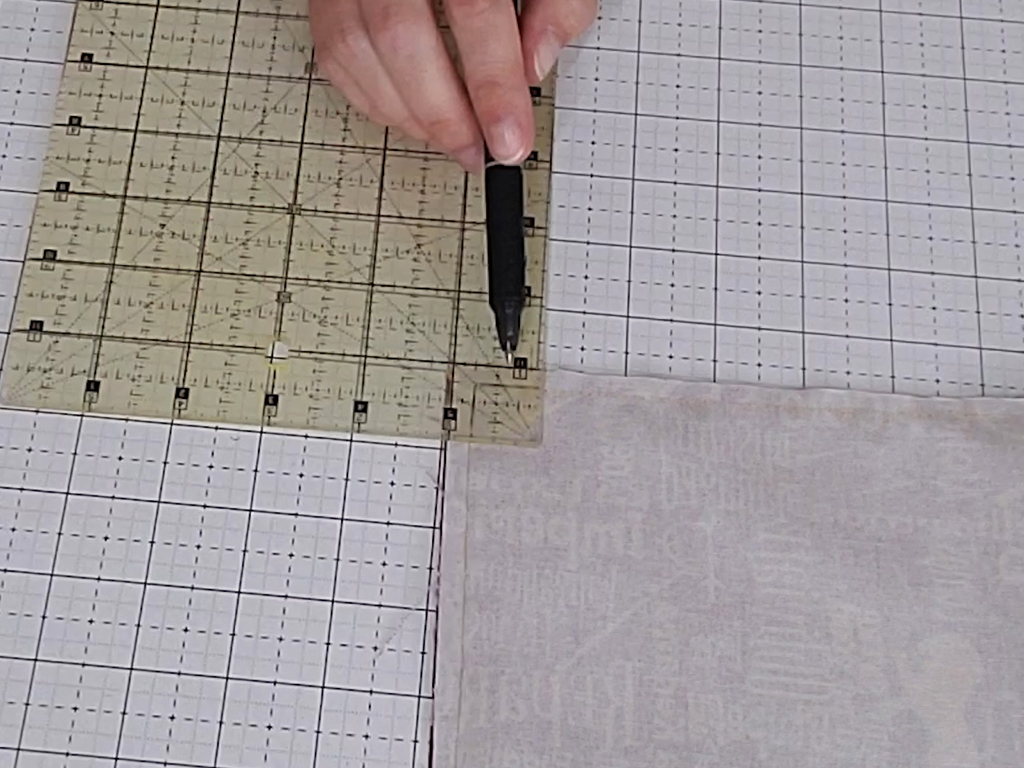
Grab your ruler, and align its 3/4 inch ticks with the stitch lines on any of your four corners. I drew on the stitch lines to help you see this step better.
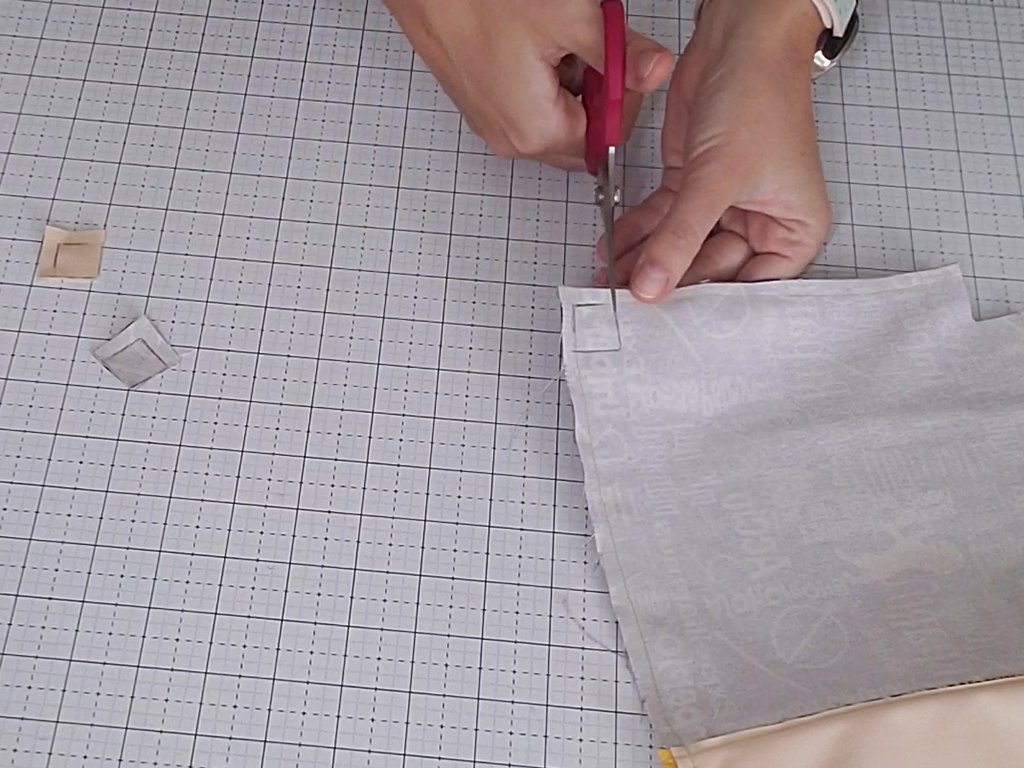
Trace along the corner of the ruler to create a small square on the corner of your bag. Do this for each of the four corners (2 exterior and 2 lining).
Cut these small square off the bag.
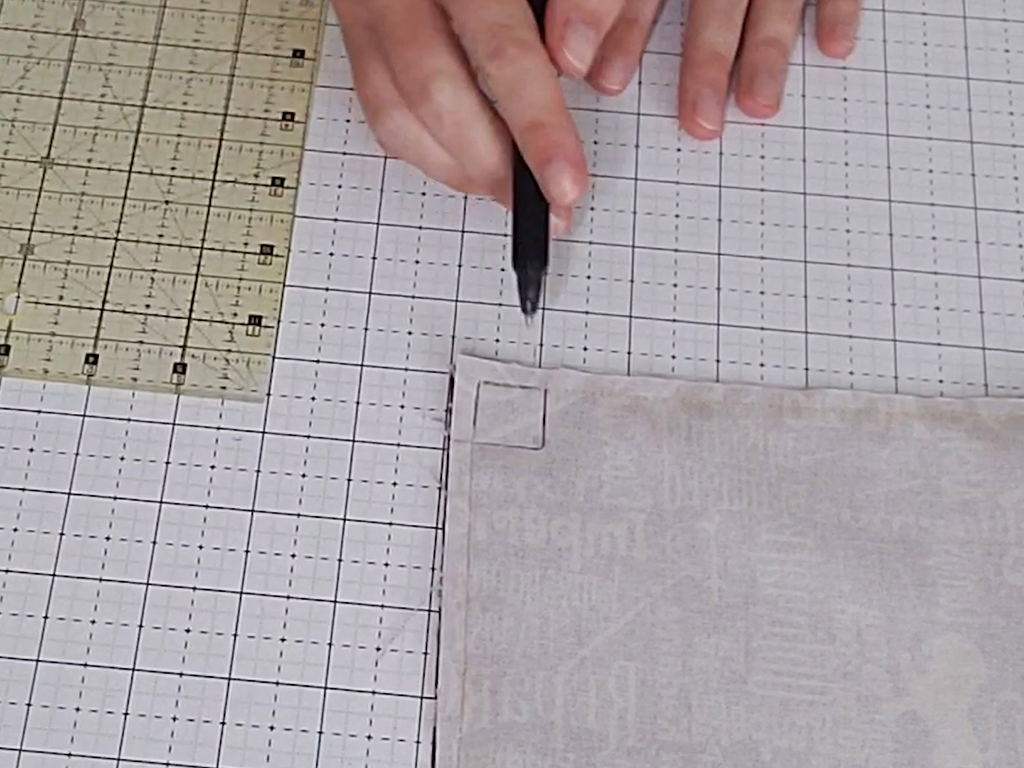
To keep these boxed corners neat, we will nest the seams. Pinch your corner as shown in the photos, aligning one seam on top of the other. Then push one seam to the left and the other seam to the right. This will create a tight nesting, which will guarantee your boxed corners are straight.
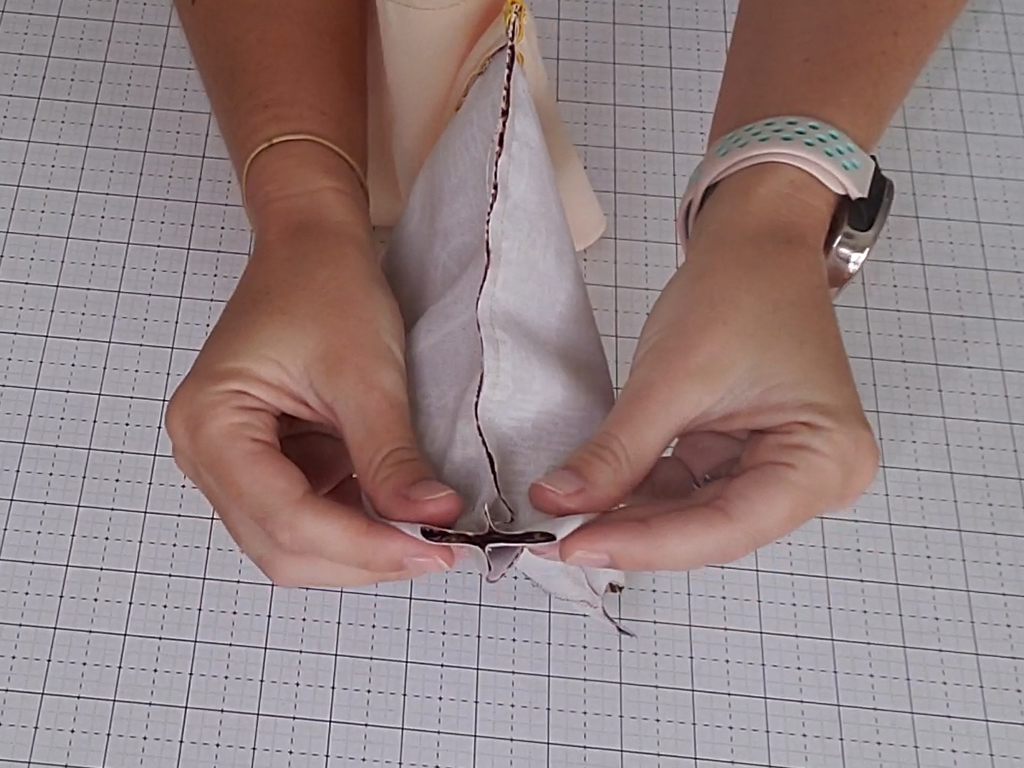
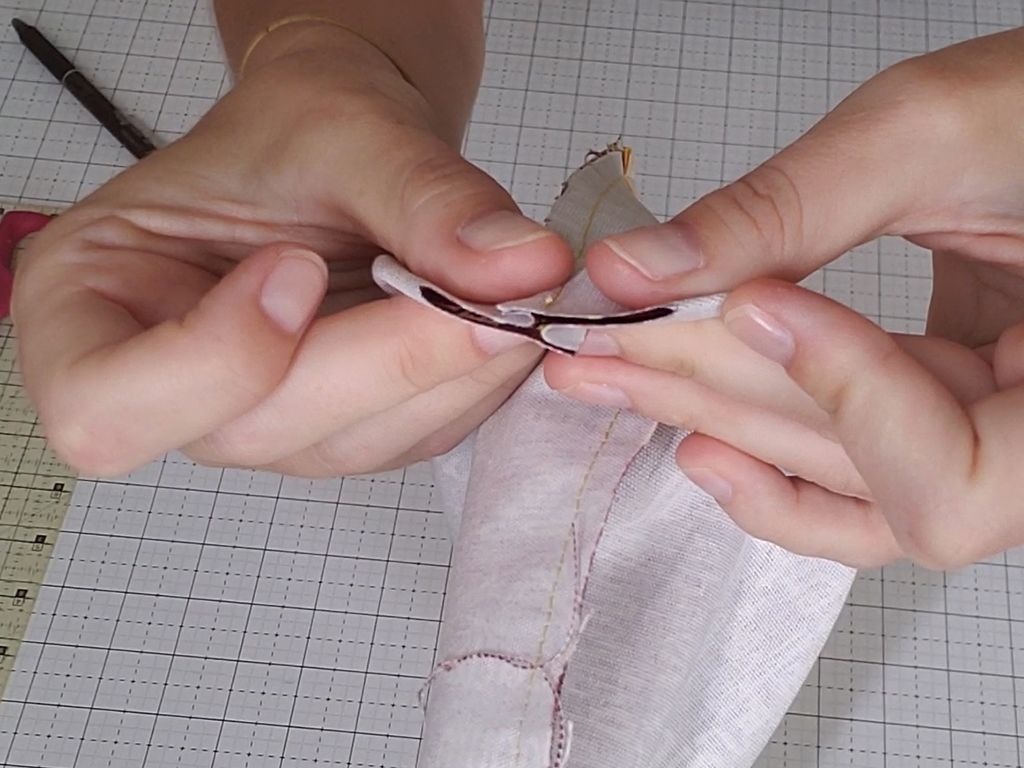
Clip these in place and sew using a 1/4" seam allowance.
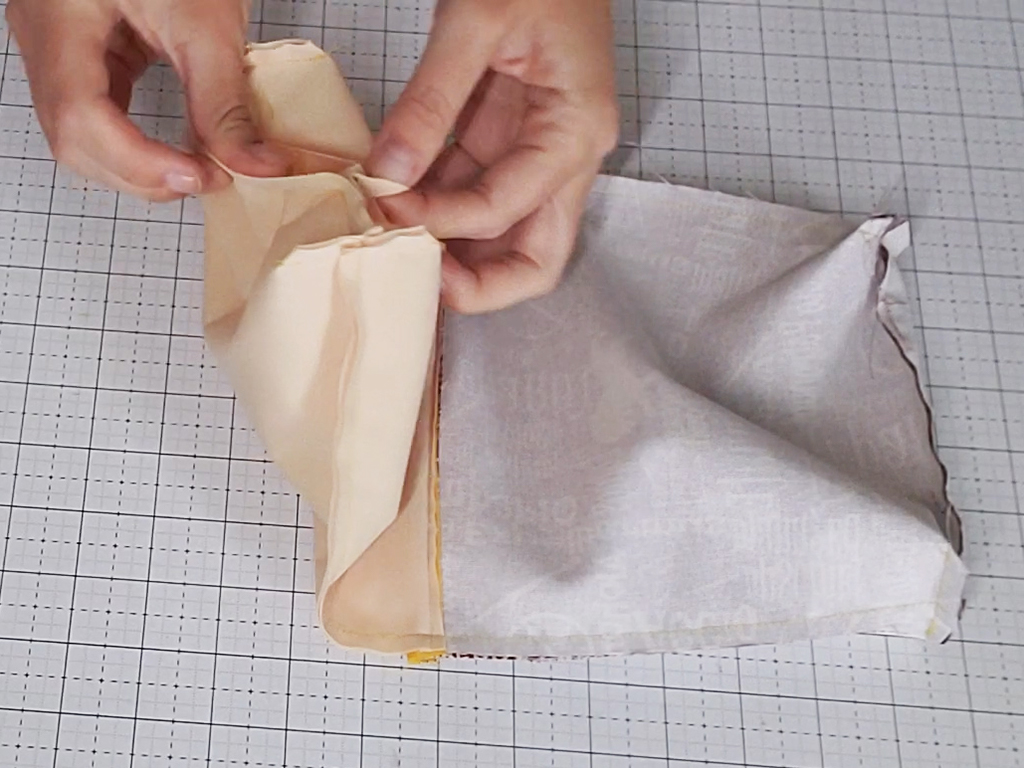
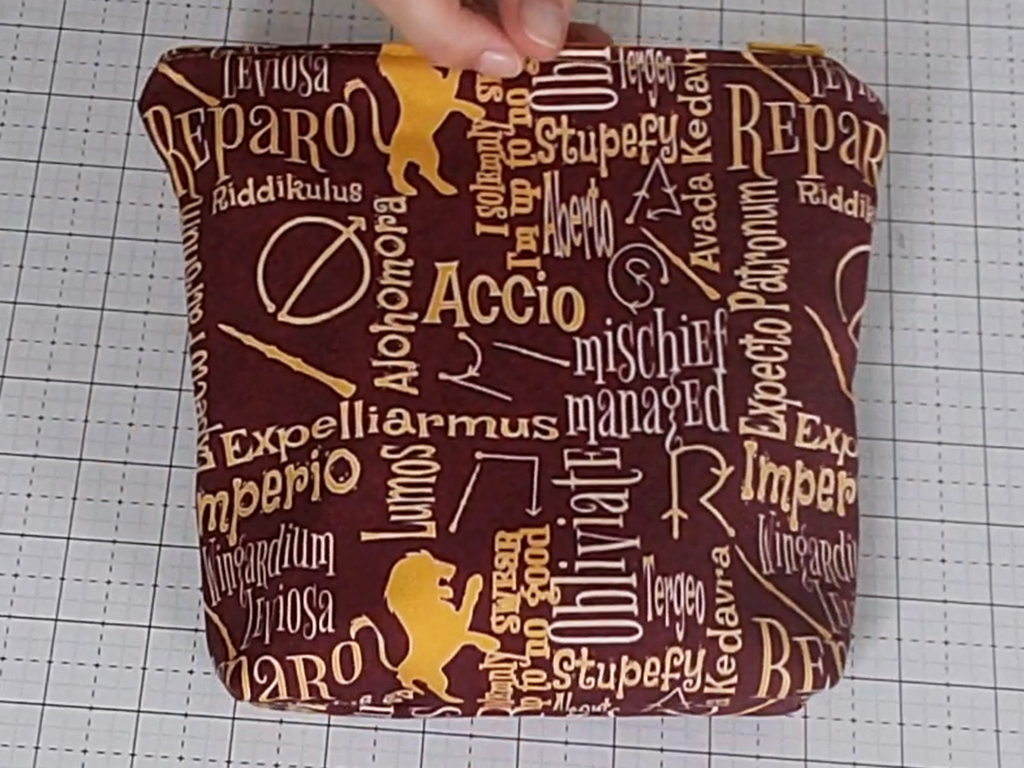
Now it's time to turn out the bag!
Pull the entire bag (exterior, zipper, lining) through the hole in the bottom of the lining panel. Use your hand to push out the corners of the exterior piece to create the boxed corners.
To close the hole in the lining panel, pull the slit open by the corners just a bit. This will cause the folds of the edge of the fabric to fold in, about a quarter inch. Clip in place and then stitch closed this hole with a 1/8 inch seam allowance.
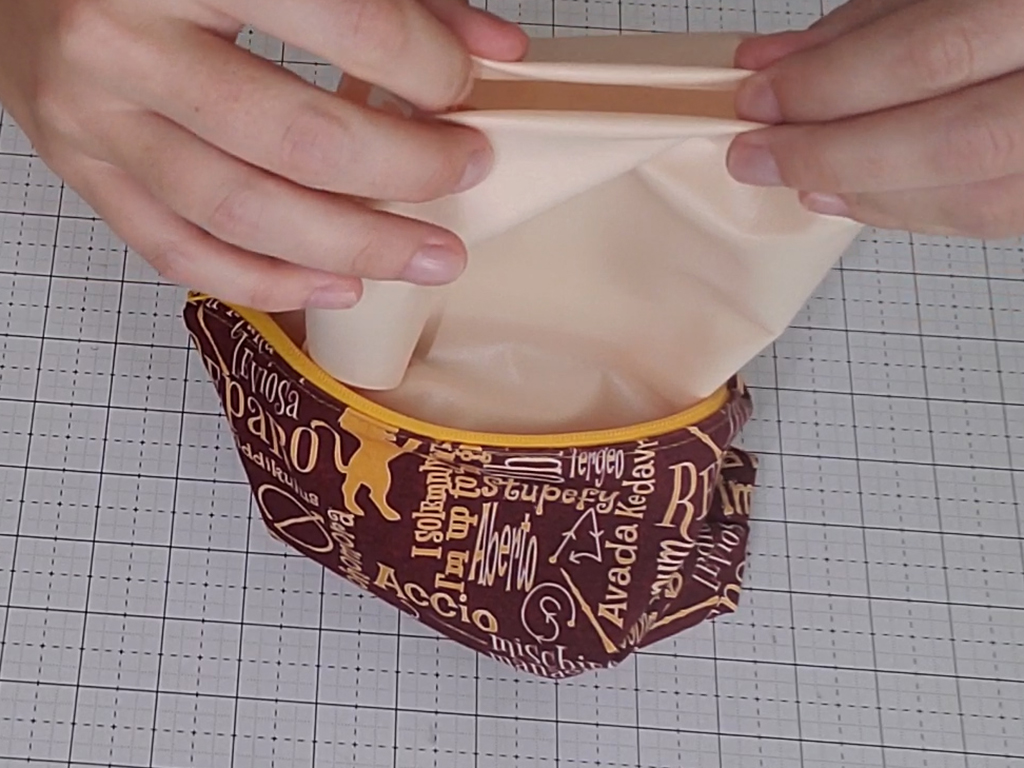
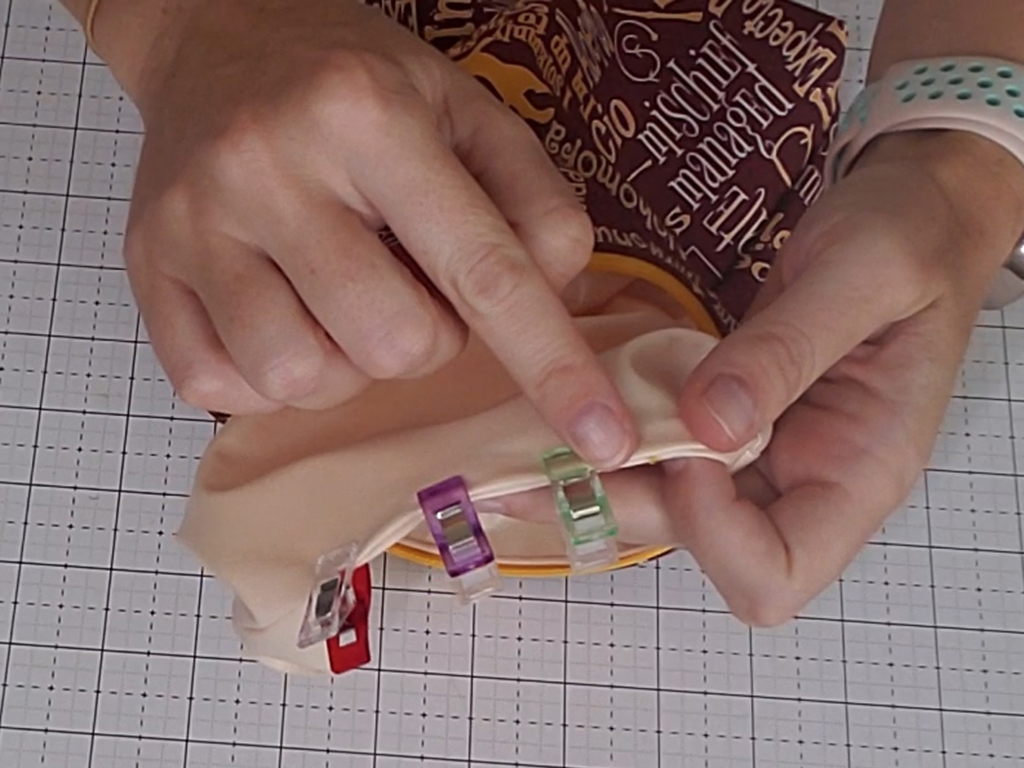
And you are done! The measurements above are for the sandwich size bag. I have also provided a tutorial for a snack sized insulated pouch. Just check out the video below!
Now load them up and get out there!


Nancy Stier | 2nd Sep 19
Hi Jess! I’m Nancy. I’ve been watching your videos and I must congratulate you on what you do! And thank you for teaching me techniques and sharing your knowledge. I am originally from Illinois and living in Mexico for 30 years. It’s a challenge finding suppliers here but I am little by little. I’ve had ups and downs too and I’m really happy leaving corporate world not long ago and sewing in my home studio. I’ve been sewing for $ less than a year and my friends support me a lot buying bags. Thanks again and I wish you great success!
Susie in the country | 25th Sep 19
love on your linktree the “register to vote” tab. thanks for including that. Women should not forget those who came before us and died so we could have the right/privilege. thanks again.
Grace | 5th Dec 19
I want to make a snack bag. The pul fabric at Joanns told me they use it for diapers. Can I use vinyl. I
Jess | 13th Feb 20
Yes, that is what they are traditionally used for. You could definitely use vinyl, or waterproof canvas. Fabric + food is always going to be a difficult thing to navigate. We use PUL in our pouches and are comfortable with them.
Fronie Holliday | 3rd Jan 20
wher to get Disney fab.
Jess | 13th Feb 20
Hi there! I get my fabric from Facebook Groups. Check out Backstitch and Knitorious, they are my favorites.
Lesley | 9th Feb 20
Hi Jess – I have just found your tutorial for the boxy pouch and it is the best I have seen anywhere! Thank you so much for sharing this. I am a returner to sewing after a break of 20 years, so I need to build up my confidence with sewing once more. I feel very confident that I can make a boxy pouch by following your tutorial! I have signed up for more tutorials! Keep them coming! Thank you, 🙂
Jess | 13th Feb 20
Thank you for such kind words! Glad to have you back in the sewing world!
Nedra | 18th Apr 20
Thanks so much for your tutorials. I’ve learned a lot and you inspire me to learn and try new things. Keep up the great work and keep on sewing!
Lori Billings | 21st Aug 21
I just started watching your shows and REALLY Enjoy them. Where can we get the patterns.
I tried to put my email in but it would not let me to stay up to date.
Thank You
Lori
Kendra | 1st Jul 22
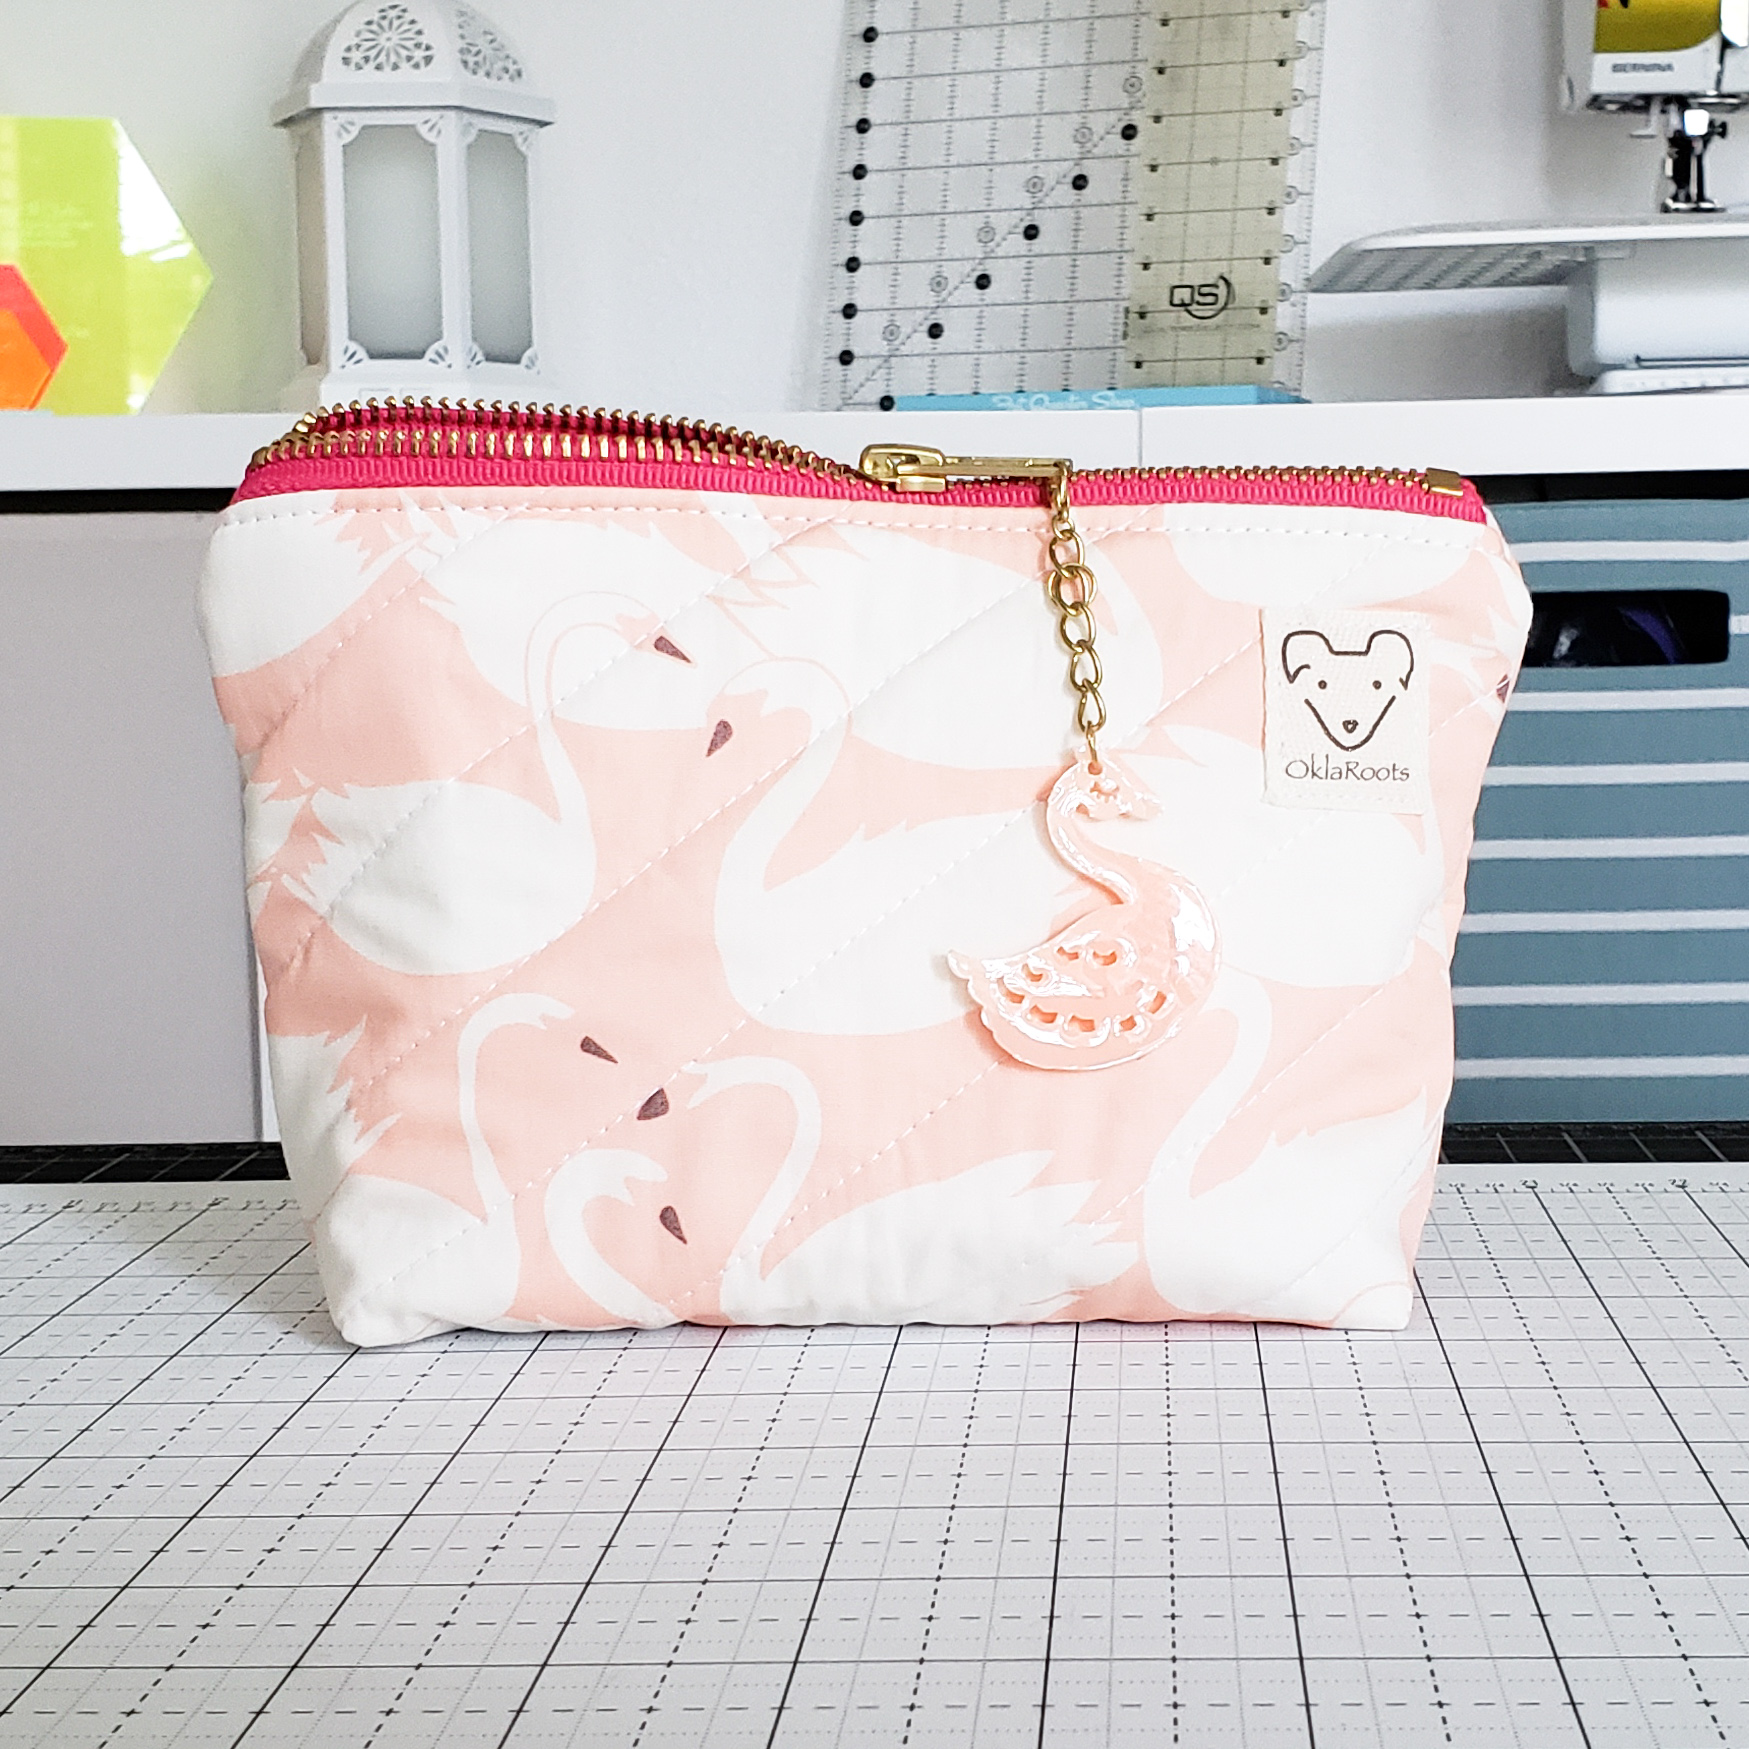
I love this bag! Can you tell me where in the instructions you quilted the fabric? Thanks so much!