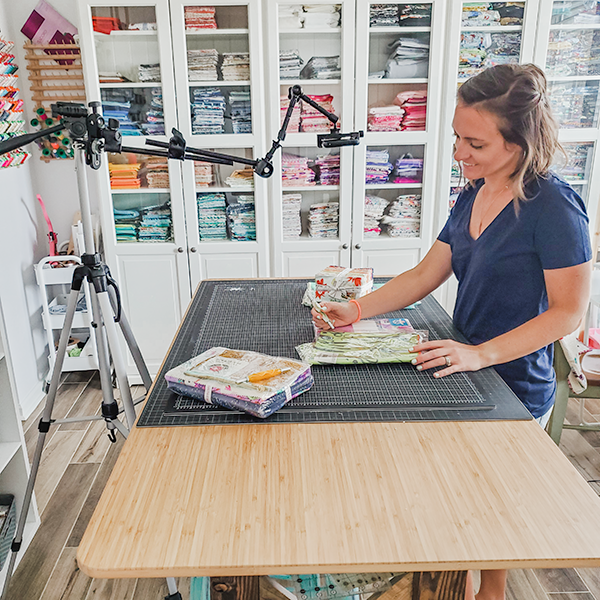
Are you ready for a little "behind the seams"?? Today I'm sharing how I film my videos from above!
More...
Before we dive in, I want to let you know that there are MANY different ways to do this. My setup is by no means the best or more affordable option, but it's what works for me currently.
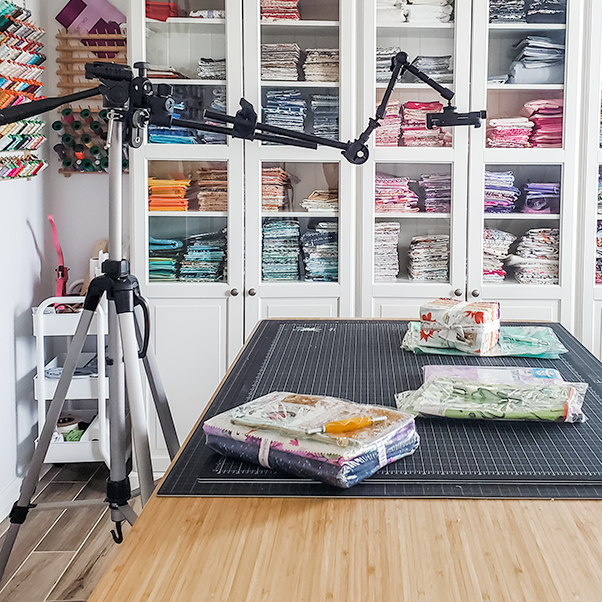
My sewing room is actually the dining room in our home. Obviously, we aren't eating in there, but I didn't want to make too many intense modifications to the room for filming, yet. Installing an anchor to the ceiling and some heavy duty equipment doesn't work for me, because I'm constantly changing the layout and location of my studio. I also wanted to make sure the device I used was easily portable, since my sewing room isn't incredibly large. So I needed something that I could pull out, set up, film, and then put away at the end of the day.
Meet my filming buddy! It's actually made up of 5 different pieces, all screwed or clamped together. It's easy for me to put away in my hallway closet when not in use. I can pull it out, set it next to my table, film for a few hours and easily move it around as necessary.
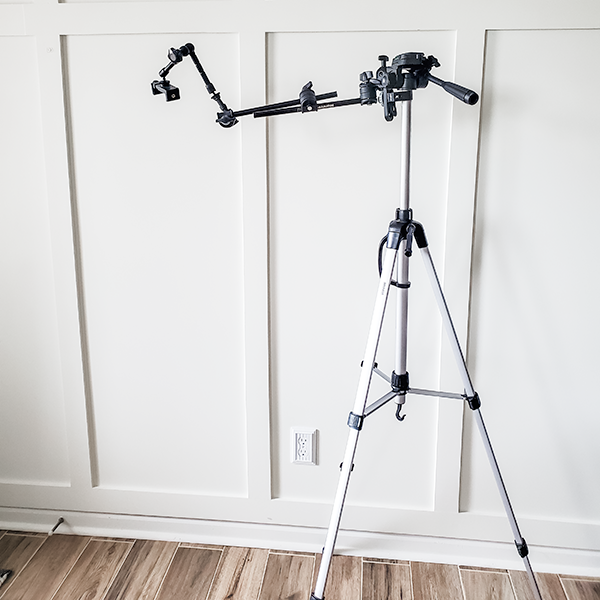
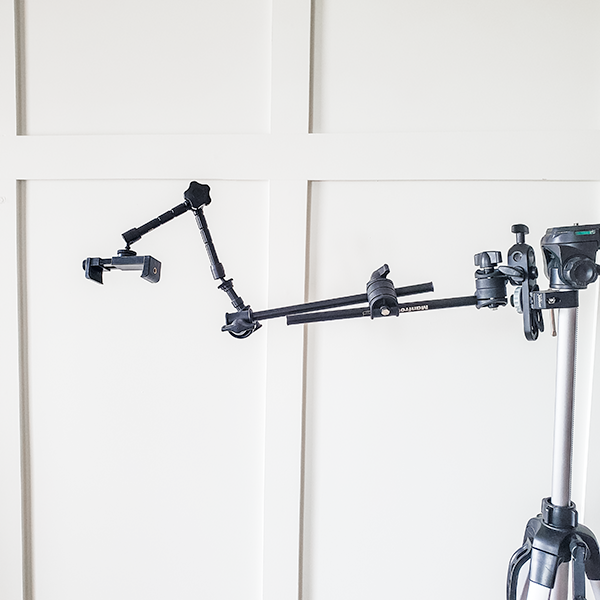
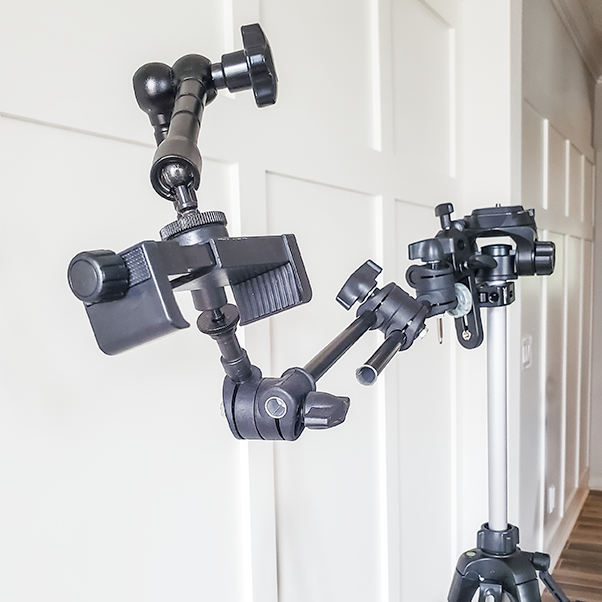
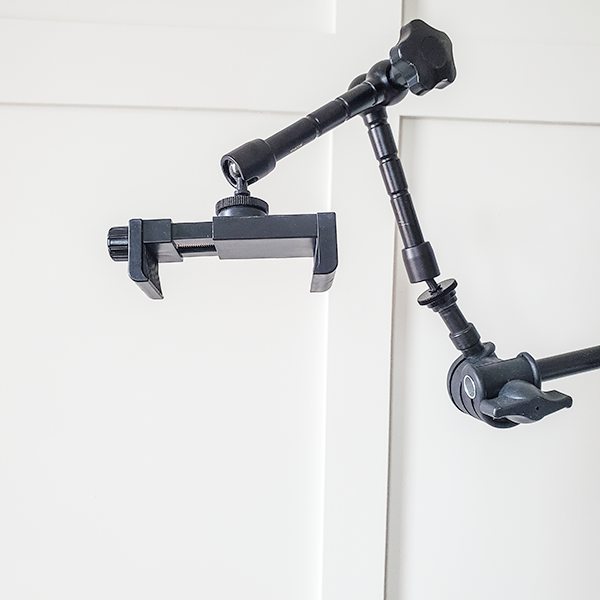
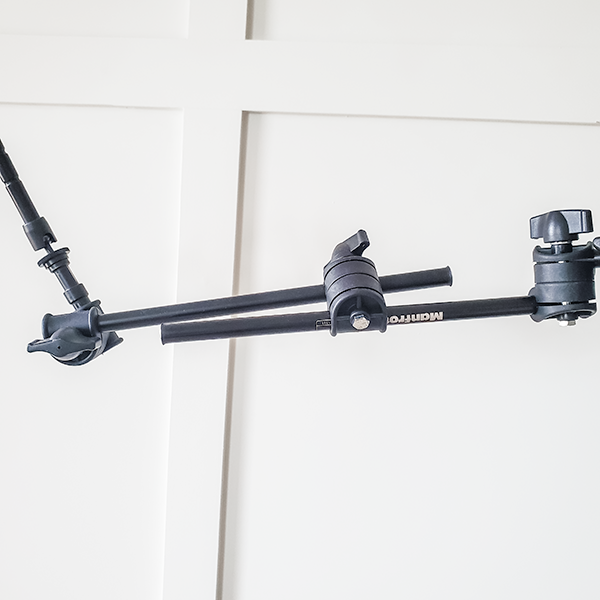
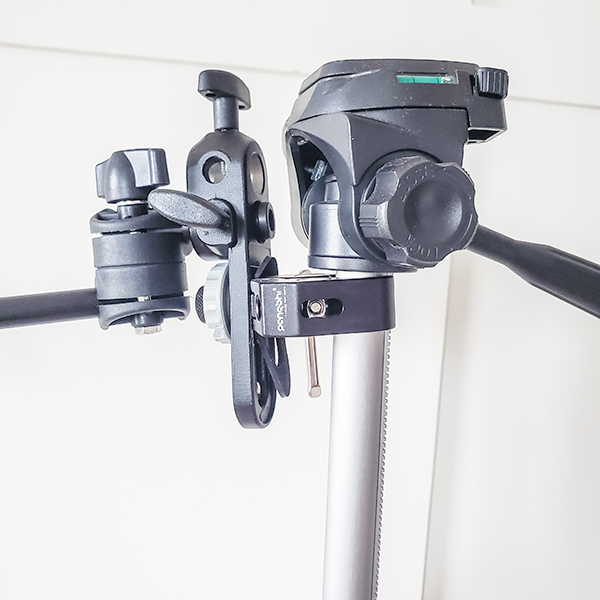
So at the time of this post, all of my videos are recorded on my Samsung Galaxy S10+, my cell phone. At the end of my setup I have a phone Mount Adapter Phone Holder. I like this one, because it uses a screw to hold it in place, versus a spring that many phone holders use. This phone holder is attached to a small adjustable articulating arm. This arm allows me to move the phone in a range of motion, brining it up higher or down lower, depending on the shot I need. To help get the phone holder to the center of my table, I attached my small articulating arm to the Manfrotto Single Articulating Arm. Now, to be completely honest, I'm not sure this is installed in the best manner. But, it works. The opposite end of the Manfrotto is attached to my tripod using a large super clamp. It's a bit messy, and it doesn't allow me to take the camera as high as I would like. However, this offers a non-permanent filming option that doesn't cost an arm and a leg. When I upgrade my set equipment I can still use each of these pieces with my camera setup.
I hope this helped those of you wondering how I "get the shot" in my tutorials! If you're interested in filming tutorials, it pays to get creative. Use whatever you have to make it work. You'll find that the most time required in this business is just figuring out how to do all the things. But if you're willing to watch the videos, read the reviews and follow the tutorials, you can make some really cool videos.
Below are links for all the items described. These are affiliate links, and I do receive a small kick back from Amazon if you choose to buy these using the links.
Thanks!


Mary-Ann Reynolds | 13th May 20
Thank you for sharing this info. I’m currently seeing up a studio in a bedroom and wondered if it would be big enough. I guess we’ll see… 🤔💕
Julie White | 9th Jun 20
Thanks for sharing! Great information as always Jess!
Marilyn Diaz | 25th Jun 20
This is helpful! I didn’t think about getting arm extensions for my tripod! I just ordered on Amazon, however the 2 specific items I wanted were sold out but I was able to find similar items. Thank you for sharing!