• Skip to primary navigation
  • Skip to main content
  • Skip to primary sidebar
OklaRoots

OklaRoots

Dream. Motivate. Create.

  • Video Tutorials
  • Shop OklaRoots!
  • Pattern Vault
    • All Free Patterns
    • Quilts
      • Binding Calculator and Tutorial
      • Block Party!
      • Free Quilt Patterns
      • Delilah BOM Tips
  • Blog
    • Weekly Roundup
    • Small Business Series
    • Running
  • Subscribe
  • About Jess
    • Drop a line!

Quilts

Delilah Block of the Month – Month 6 – In Orbit

Delilah BOM Tips - Apr. 28, 2019 - Jessica OklaRoots

Hello there! Remember me???  You thought I forgot about this sew along, didn't you? Well, jokes on you! I tried to forget about it, but couldn't. 

...
Read More

Delilah Block of the Month – Month 5 – North Star

Delilah BOM Tips - Oct. 13, 2018 - Jessica OklaRoots

You know what's coming.... you can see it in the picture.....

NOOOOOO CUUUUURRRRVES!!!!

After Month 4 and those tiny curves, I needed this easier block.  Need me to make 5? No problem! Heck, I'll make 20, if you ask. 

...
Read More

Delilah Block of the Month – Month 4 – Fairhaven

Delilah BOM Tips, Quilts - Sep. 26, 2018 - Jessica OklaRoots

So this block took... a while. 

Partly because I have been in a cross country move.  But mostly because.... don't make me say it....

Ok.... I'll say it....

CURVES.

Those @$#^@$&#* curves. 

...
Read More

Sweet Cone Quilt Pattern

Quilts - Sep. 05, 2018 - Jessica OklaRoots

This was such an exciting pattern to put together. I had been mulling over this idea for over a year, trying to come up with an intersecting quilt block pattern.  One that you could arrange however you want, and all the blocks will "connect" with one another. 

TA-DA!  The Sweet Cone Pattern was born. It's currently available in my shop here!  The pattern includes measurements for Throw, Twin and Queen sizes.

...
Read More

Delilah Block of the Month – Month 3 – Shooting Star

Delilah BOM Tips - Jul. 12, 2018 - Jessica OklaRoots

"NO CURVES!!"

Did you hear someone screaming that from their rooftop? You did?! Wasn't me....

...
Read More

Delilah Block of the Month – Month 2 – Bells Beach Block

Delilah BOM Tips - Jun. 03, 2018 - Jessica OklaRoots

Welcome back!  This month we explore curves.... again.  If you have been following me on Instagram (@oklaroots) you may have noticed that I am not a big fan of the curves.  

Well, let me clarify:  I love the look of curves... I just don't like making them. 

...
Read More

Delilah Block of the Month – Month 1 – Rising Sun Block

Delilah BOM Tips - Apr. 10, 2018 - Jessica OklaRoots

Anyone else listen to "Delilah" on the radio?  You know the intro.... "Deliiiiilaaaaaaaahhh"? Well, I sing that EVERY TIME I am working on one of these blocks... and I kind of love it. (So does my husband, he just doesn't want to admit it)

If you don't know, the Delilah star of this blog post is a recent quilt pattern by Jen Kingwell.  I have been holding on to this block of the month pattern since it started... a year ago.  I participated with Amitie quilt shop, receiving a block pattern, acrylic templates and a selection of fabrics each month.  At this point in time (April 2018) the block of the month program is over and the pattern is not available to purchase.  I will update this once that changes. UPDATE: Pattern available here!
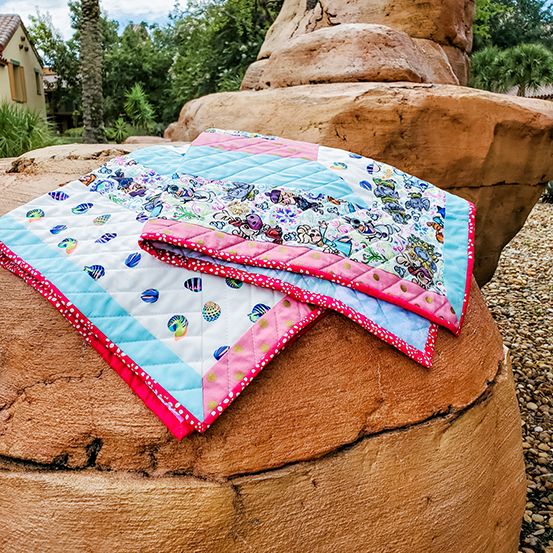
...
Read More

Binding Calculator and Tutorial

Quilts, Tutorials - Oct. 02, 2017 - Jessica OklaRoots


Here is a handy calculator to cut the calculation time for binding down SIGNIFICANTLY!!  

Simply enter in your quilt and fabric measurements, click “Calculate” and the calculator will tell you how long your binding should be, as well as how many strips you need to cut and how many yards that will require.  

I know…. my mind is blown as well. 

Video Tutorial:

Quilt Top Height (in)

Quilt Top Width (in)

Binding Strip Width (in)

Binding Fabric Width (in)

Binding Length (in)

Strips

Yards

The following is a tutorial to make quilt binding. Please refer to the video above for even more details.

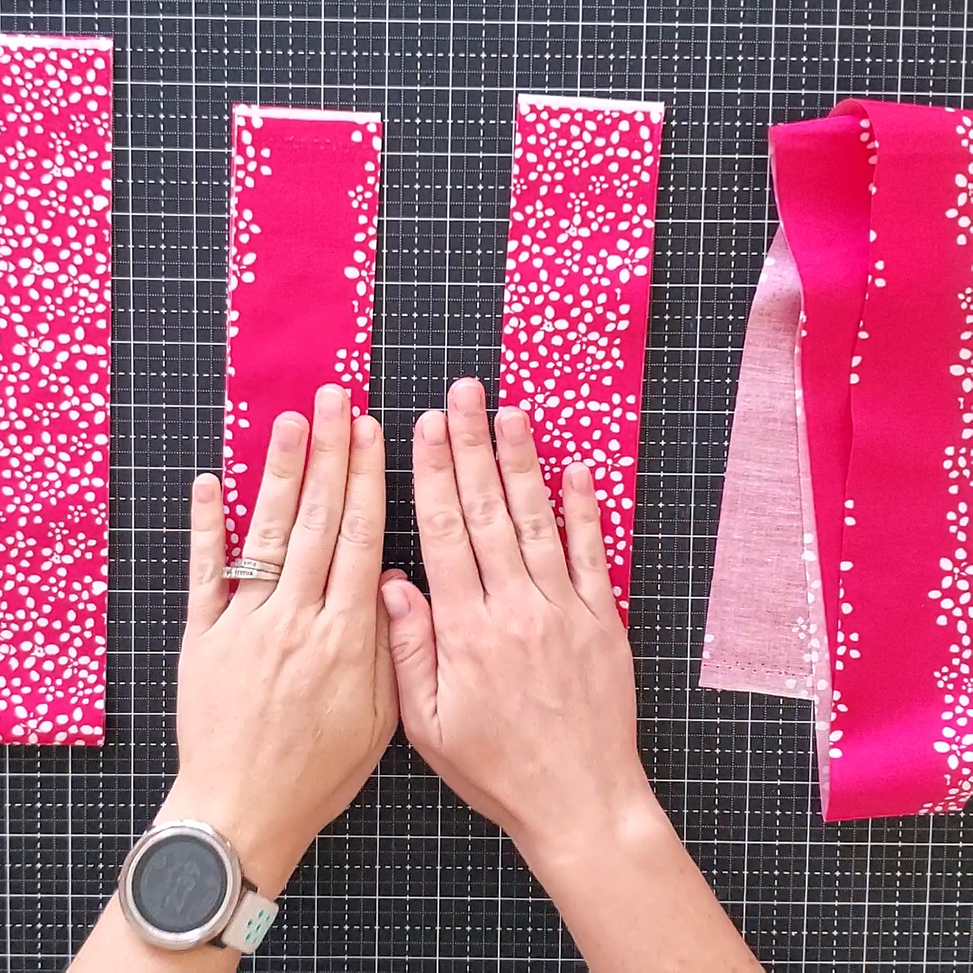
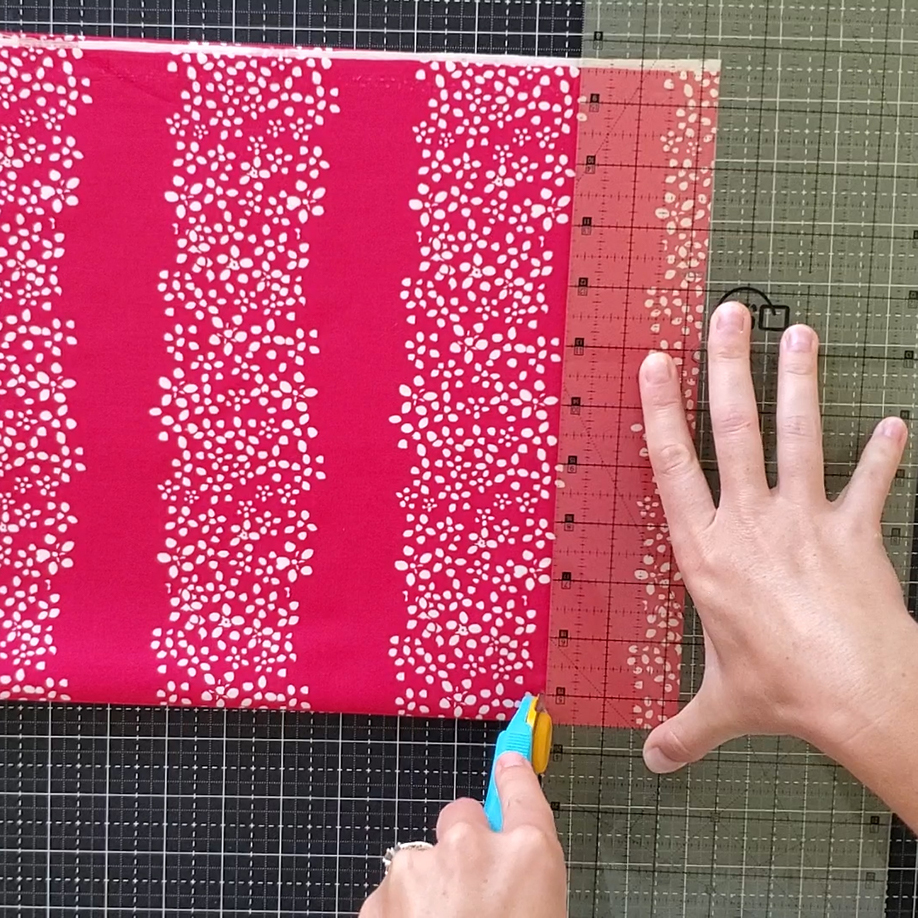
First, cut your strips as long as possible.  Usually, this is width of fabric (from one selvage to the other). Cut the strips your desired width (I default to 2.5 inches, but many quilt patterns call for 2.25 inches). 

Now we need to stitch them together!
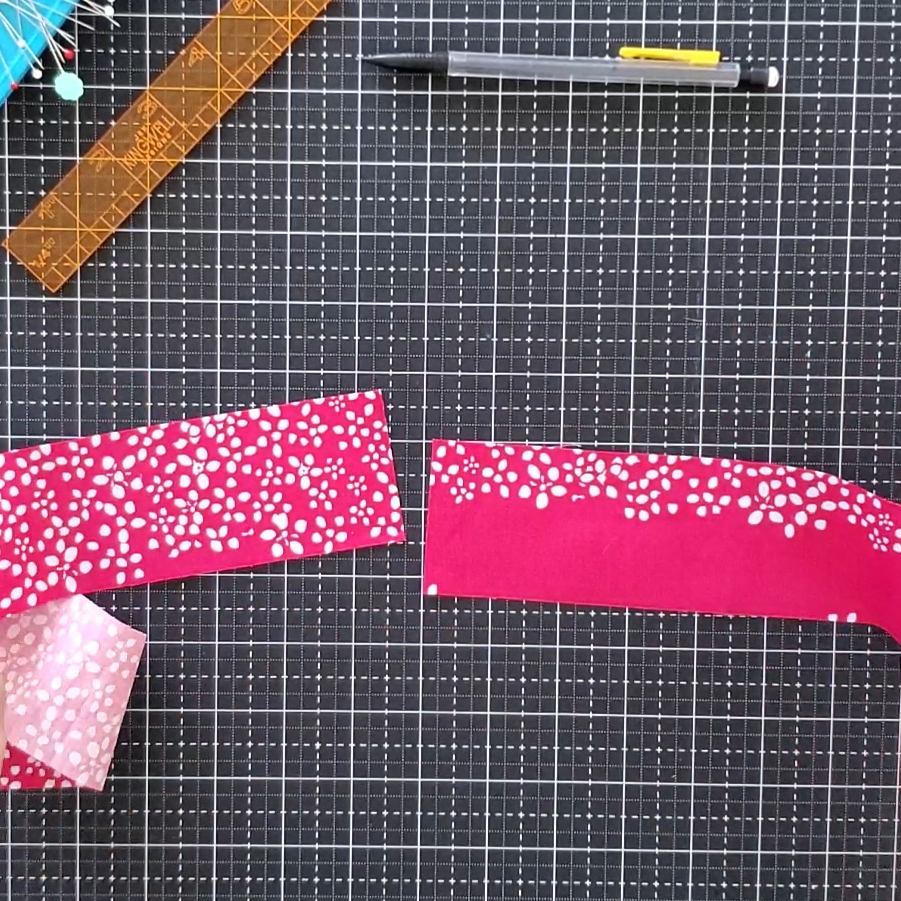
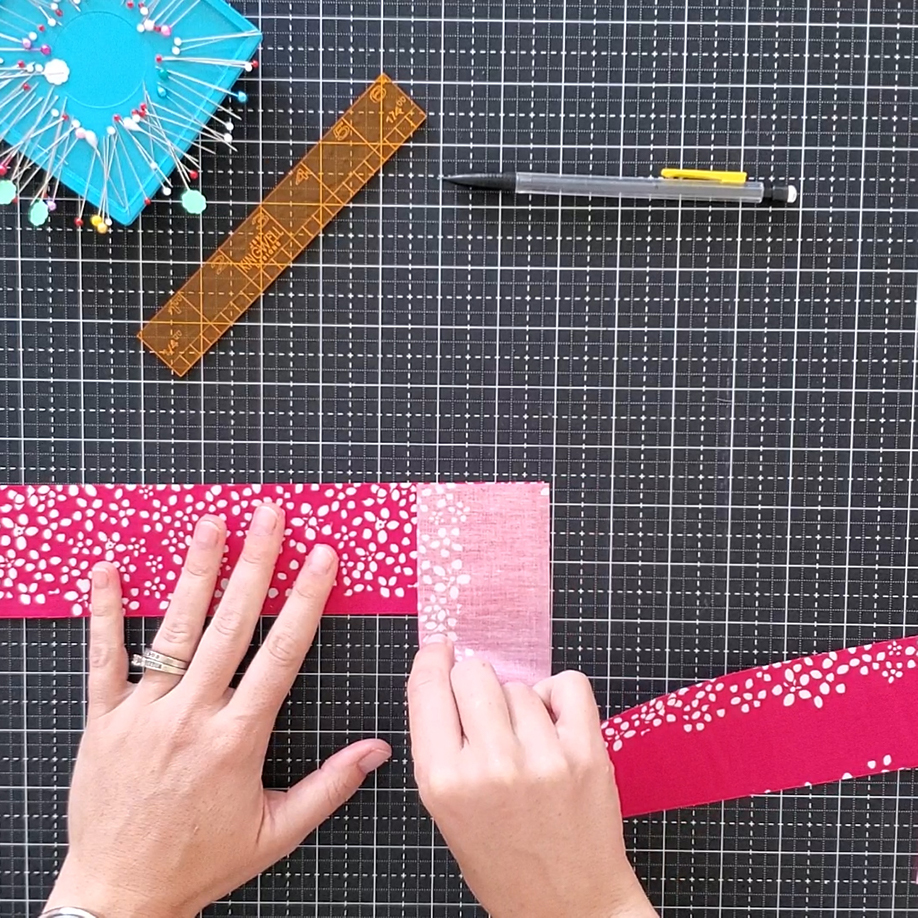
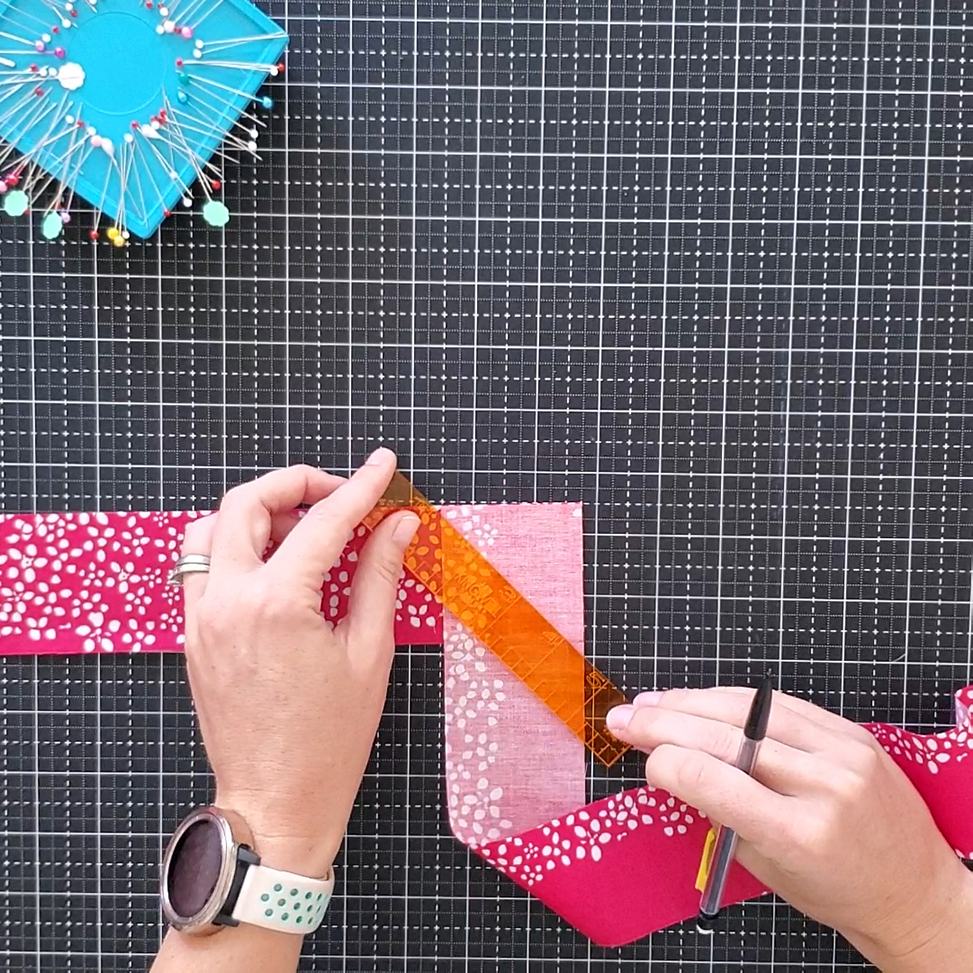
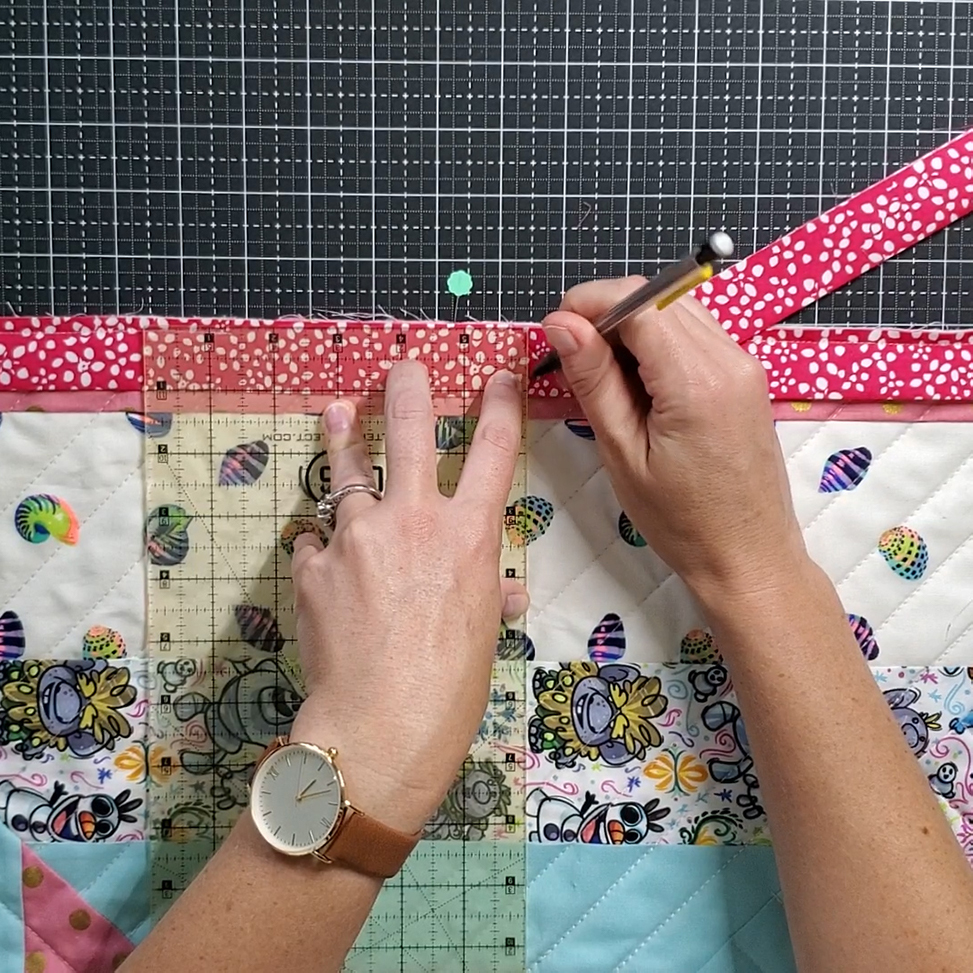
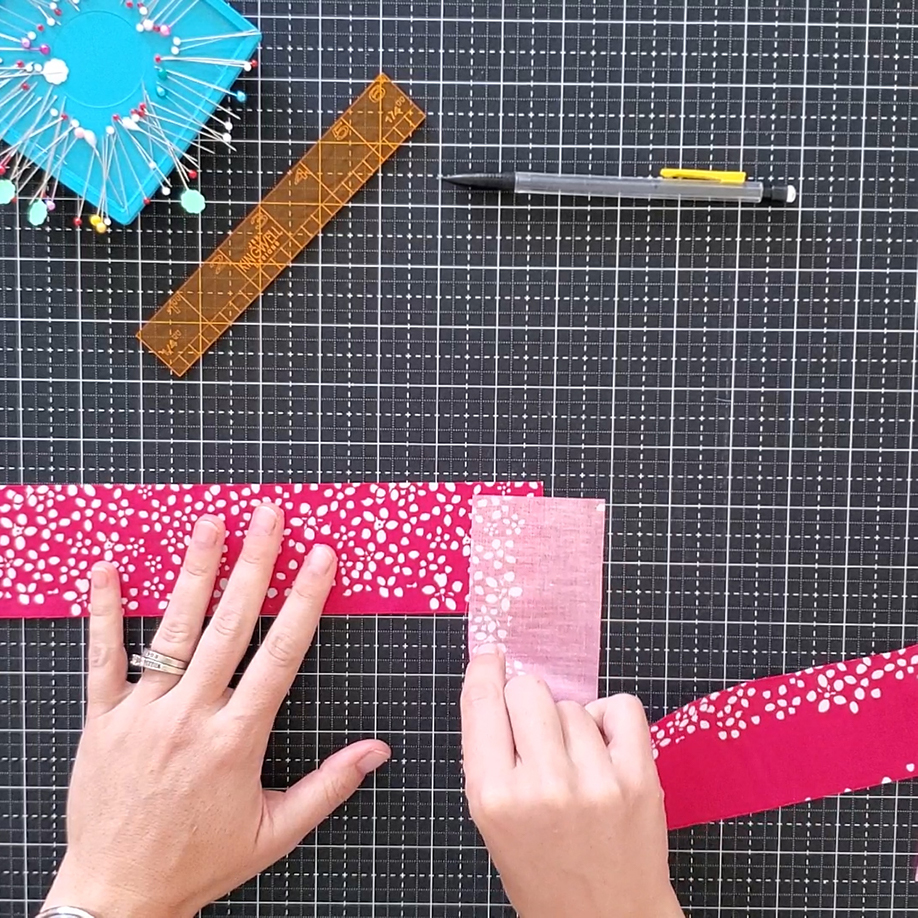
Take two strips and align them right sides together, perpendicular to one another.Align the edges as shown, and mark the bottom right edge of the bottom strip on the top strip.  Then, using a small ruler, draw a line from the top left corner of the top strip to that dot.

Do this for all the strips, creating one long strip. Sew along these marked lines. 
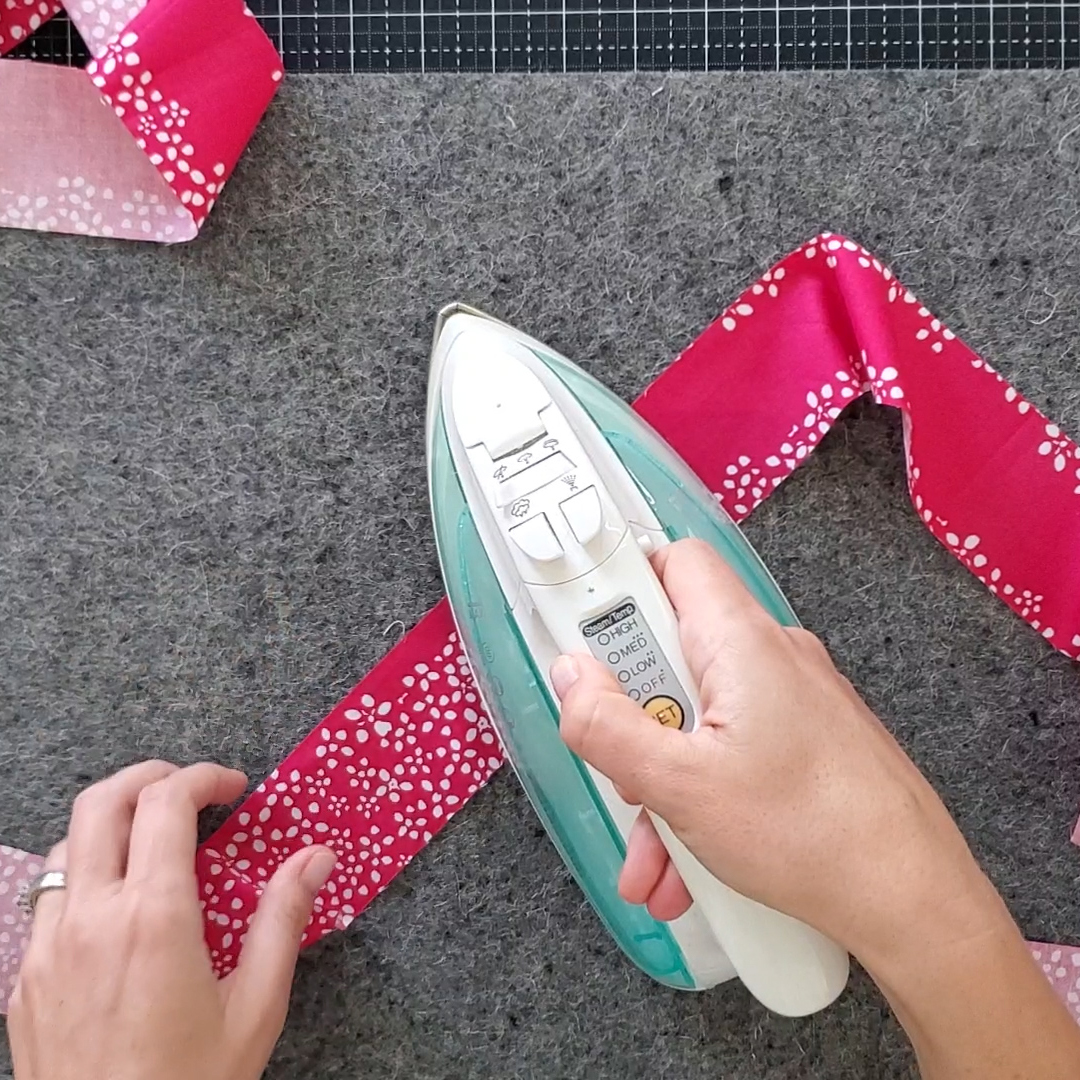
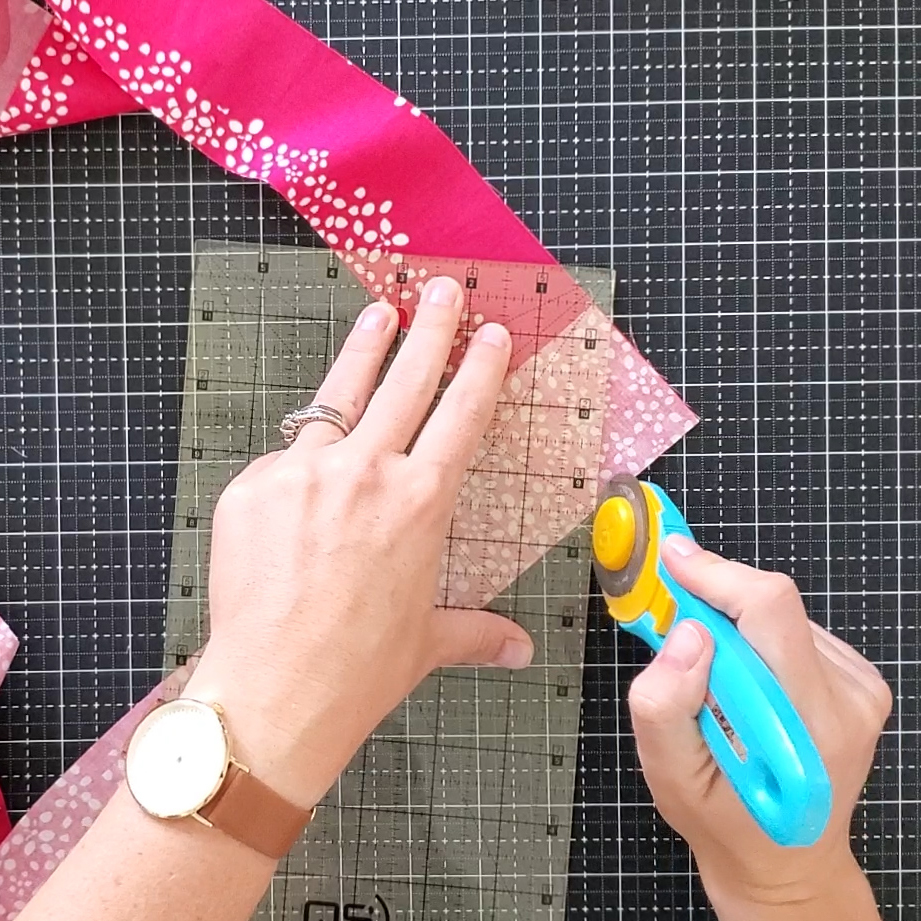
Trim off a quarter inch seam allowance. Press the seam open.

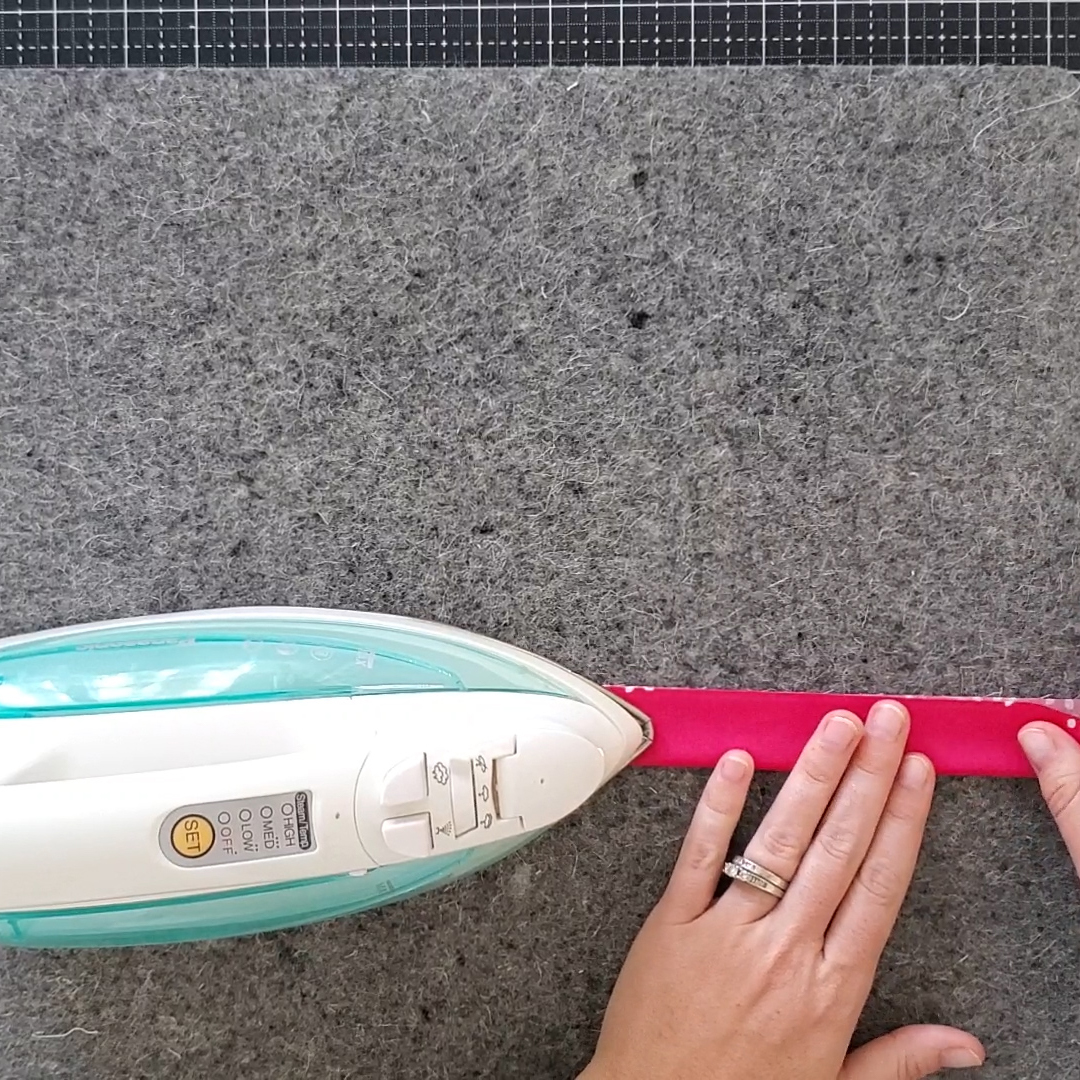
Fold the strip width wise and press, creating a crease along the half of the strip.
I like to use Binding Babies to organize my binding strip, especially for larger quilts.

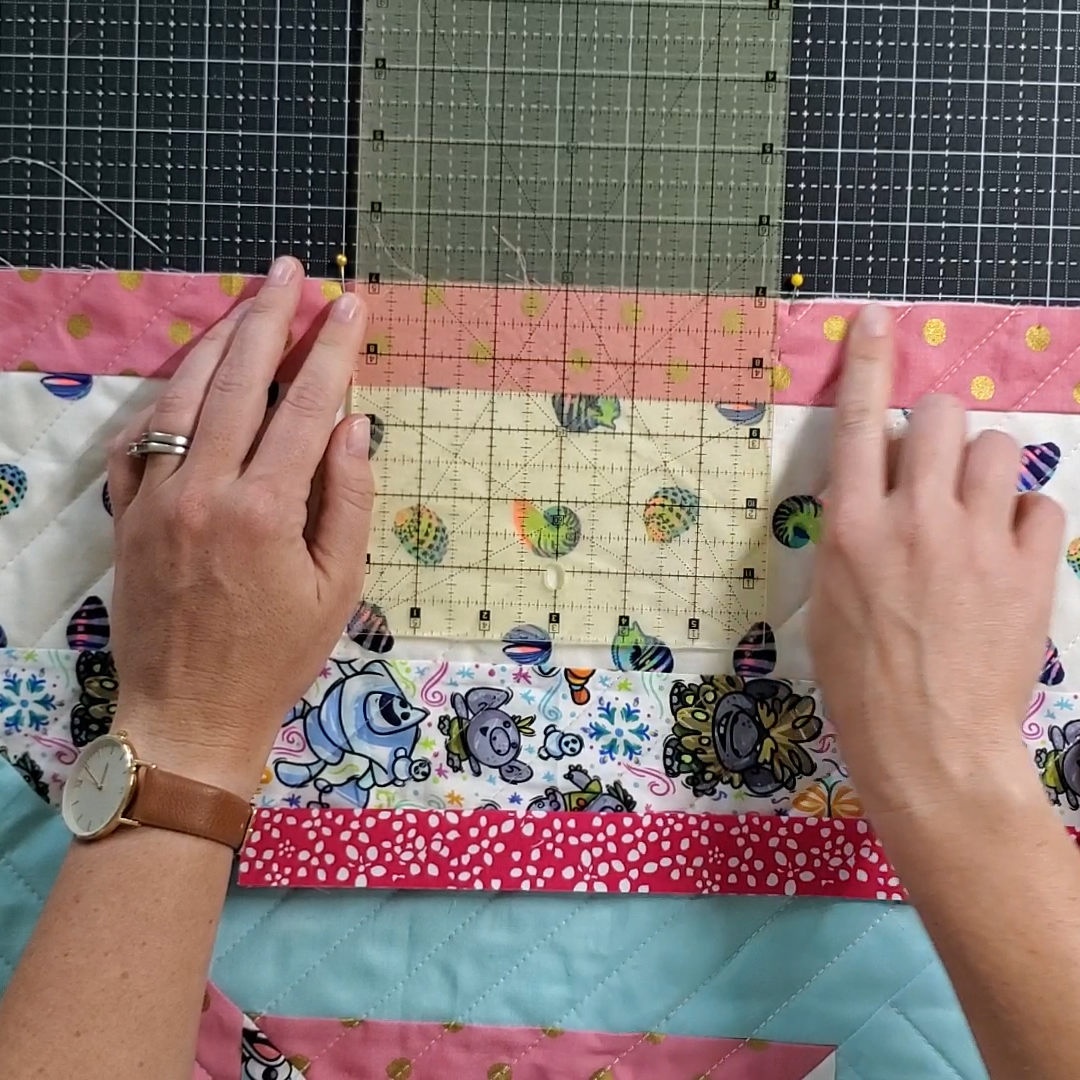
Lay your quilt top side up .  Along the middle of one edge, mark a 6-10 inch opening. Use two pins to mark the ends.

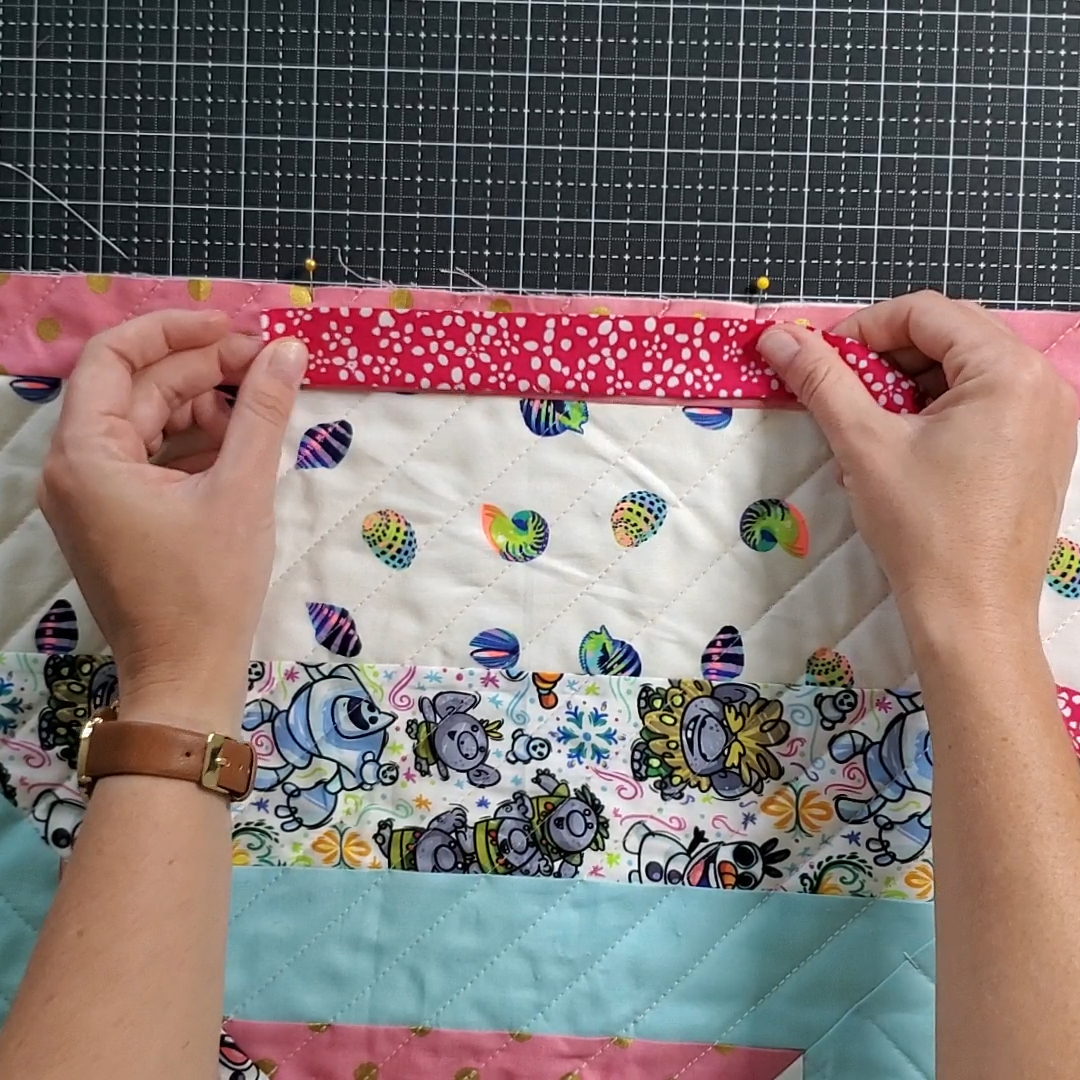
Lay your binding strip down with raw edges against raw edges of the quilt. The tail of your binding should cover the opening marked with pins. Pin the binding to the pin on the right side.  This is where we will begin sewing.
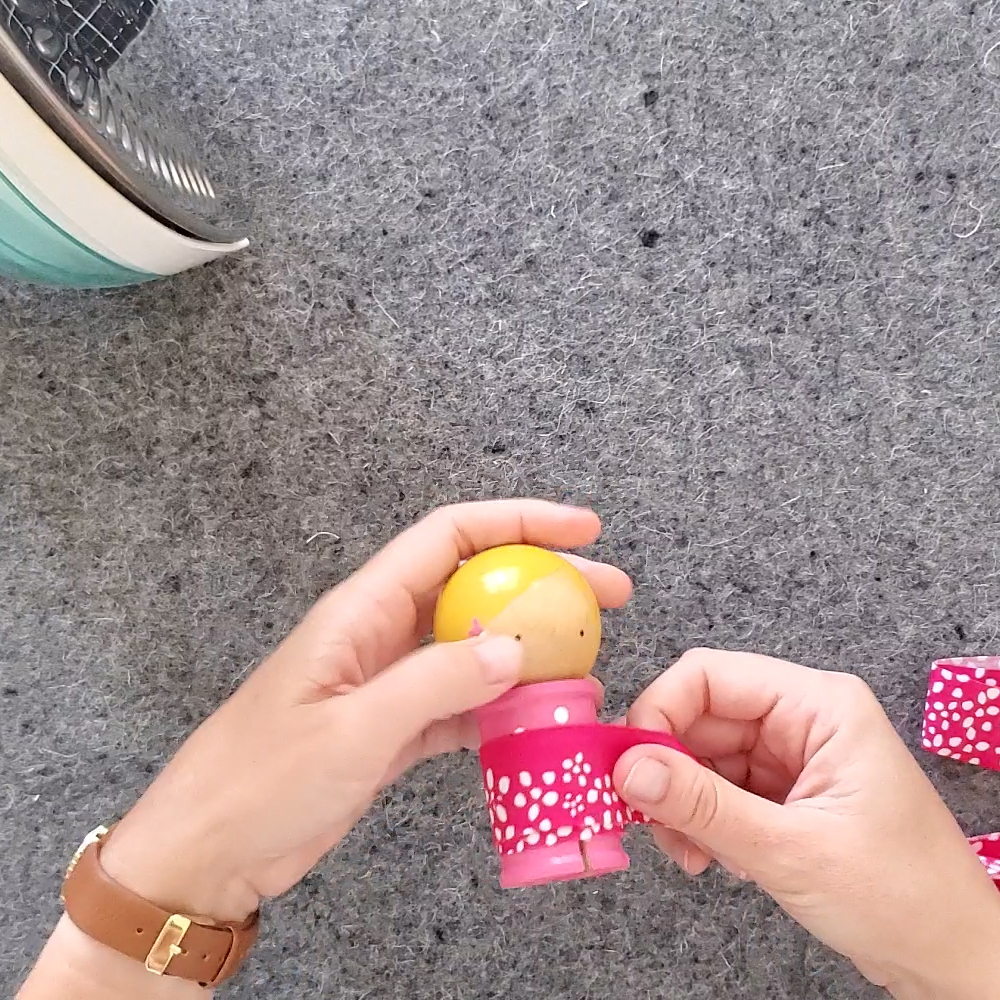
Starting at the pin on the right side, remove the pin and stitch on the binding (remember to back stitch), using a quarter inch seam allowance. 

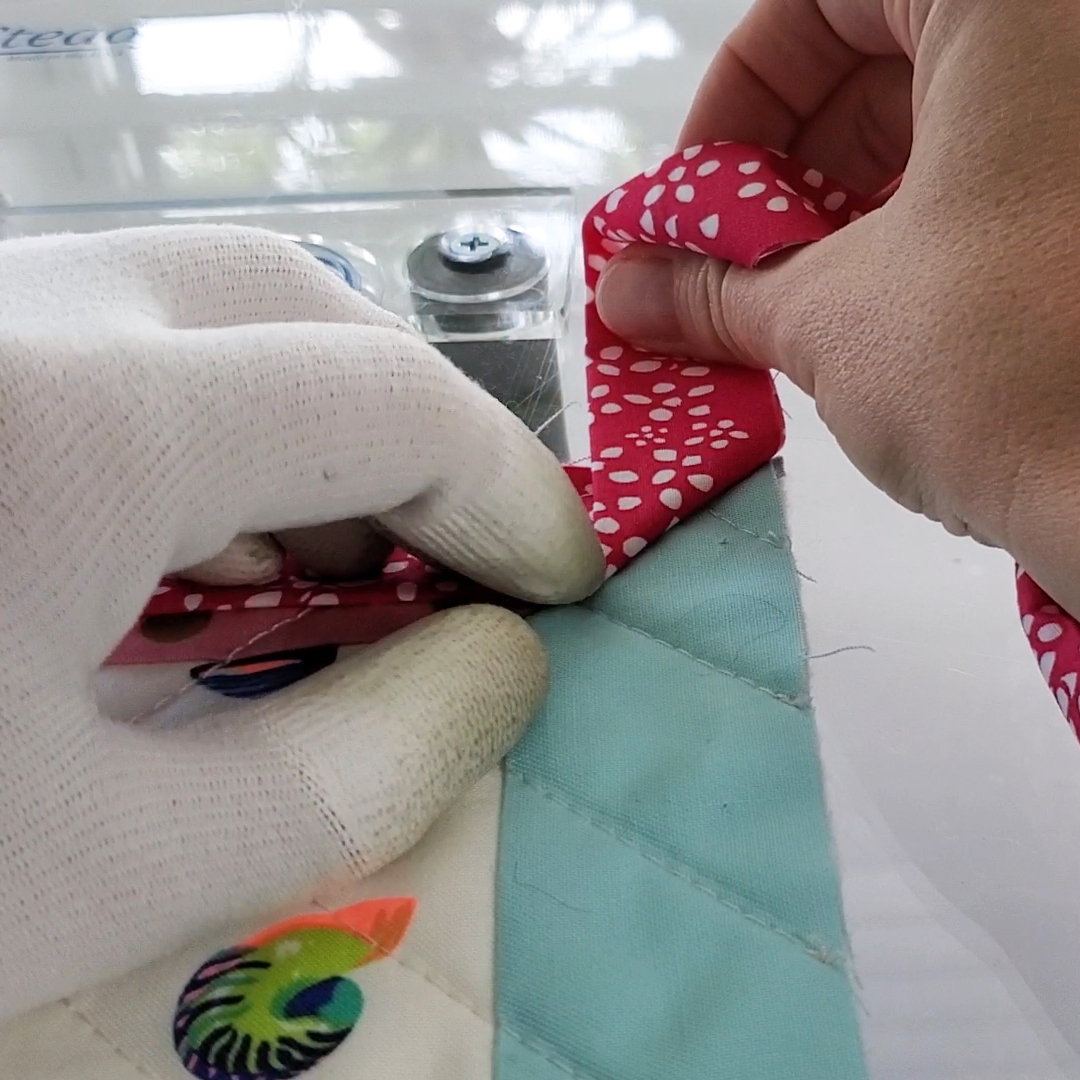
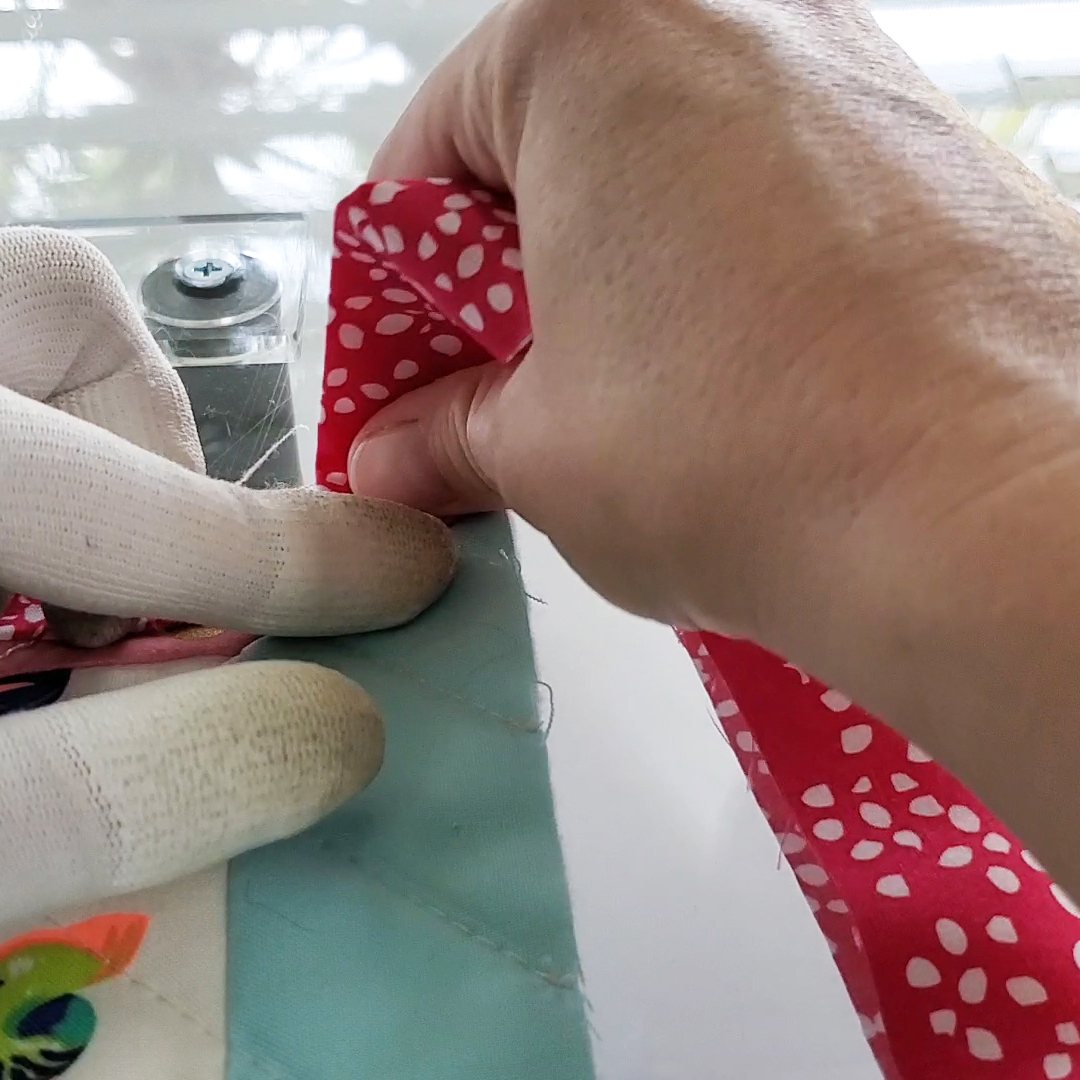
Stop about a quarter inch away from the edge. Cut the machine thread and pull quilt out. With the sewn edge laying left to right (corner stopped at on the right) pull the binding straight up. This should create a 45 degree angle on the binding. Use your finger to hold this in place.
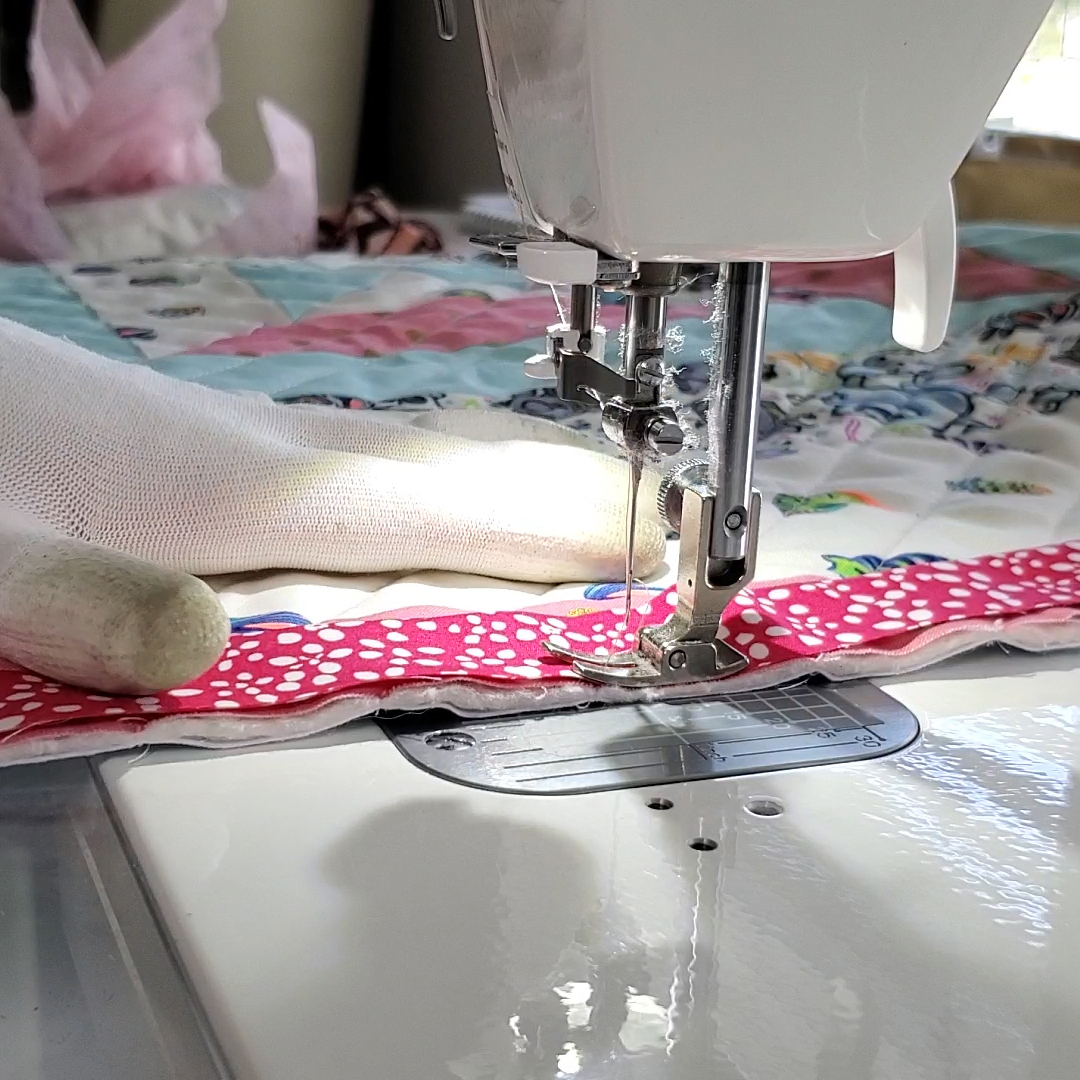
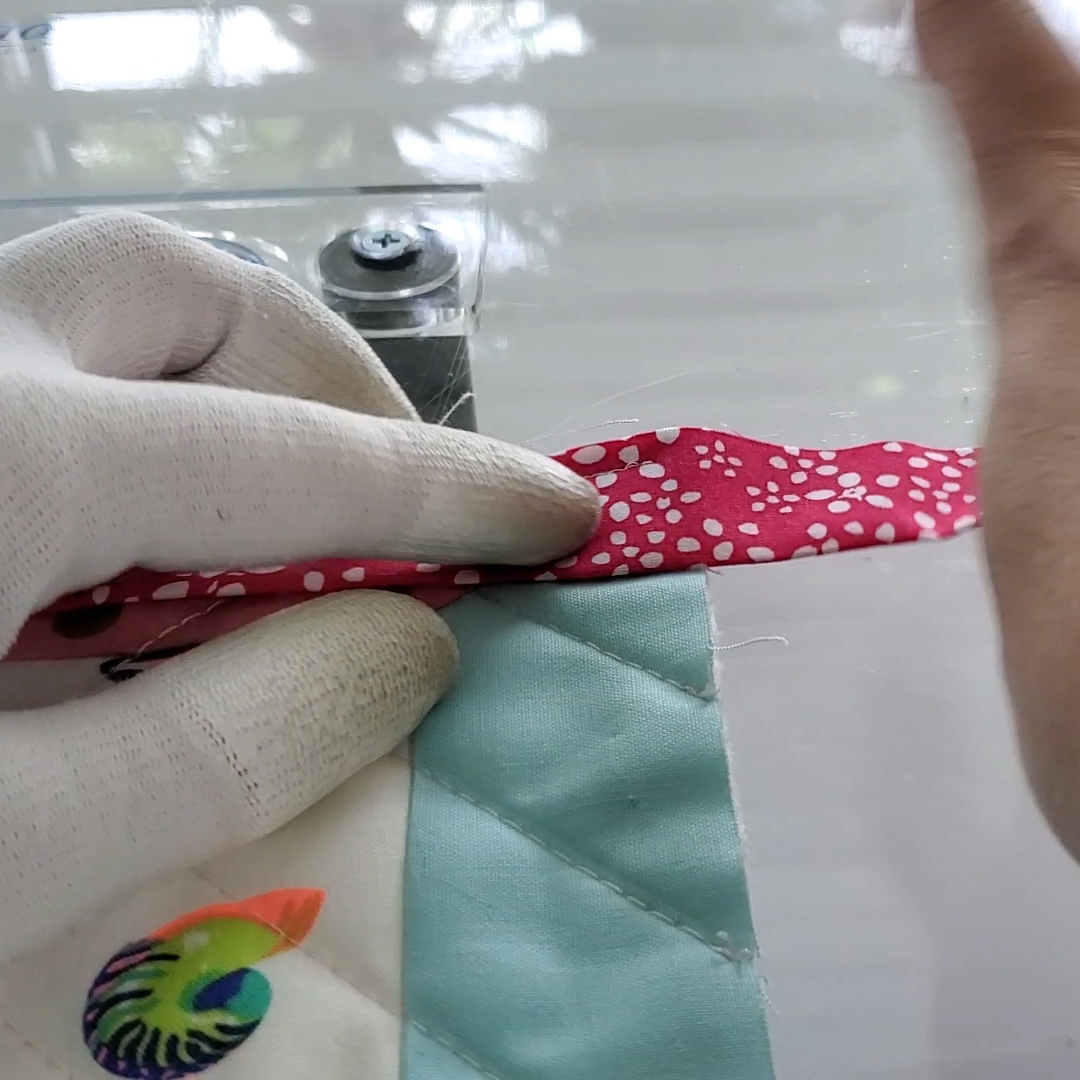
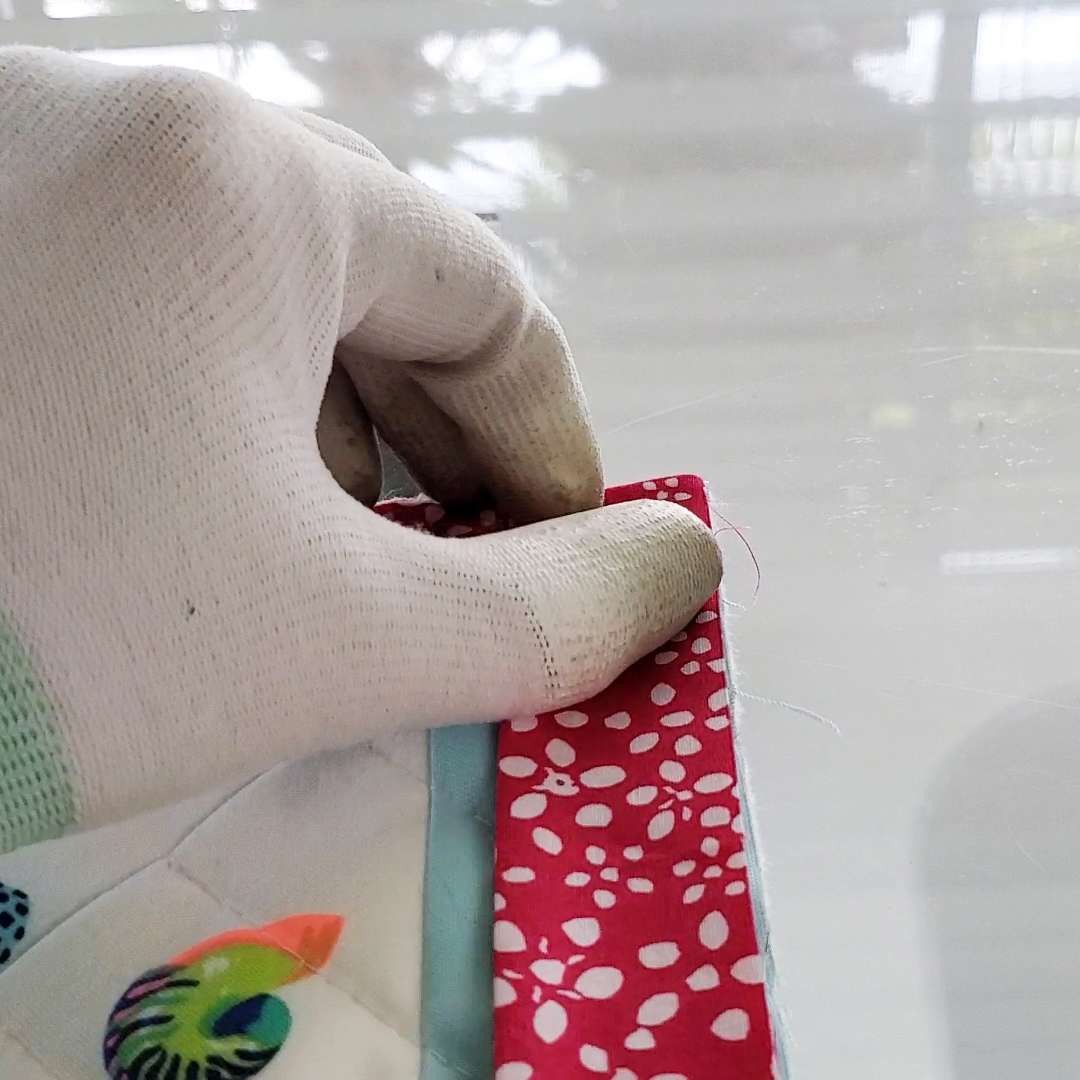
Keeping that 45 degree angle, fold the binding straight down, aligning the raw edge with the raw edge on the right side of the quilt. Clip this corner in place, and return to the machine.

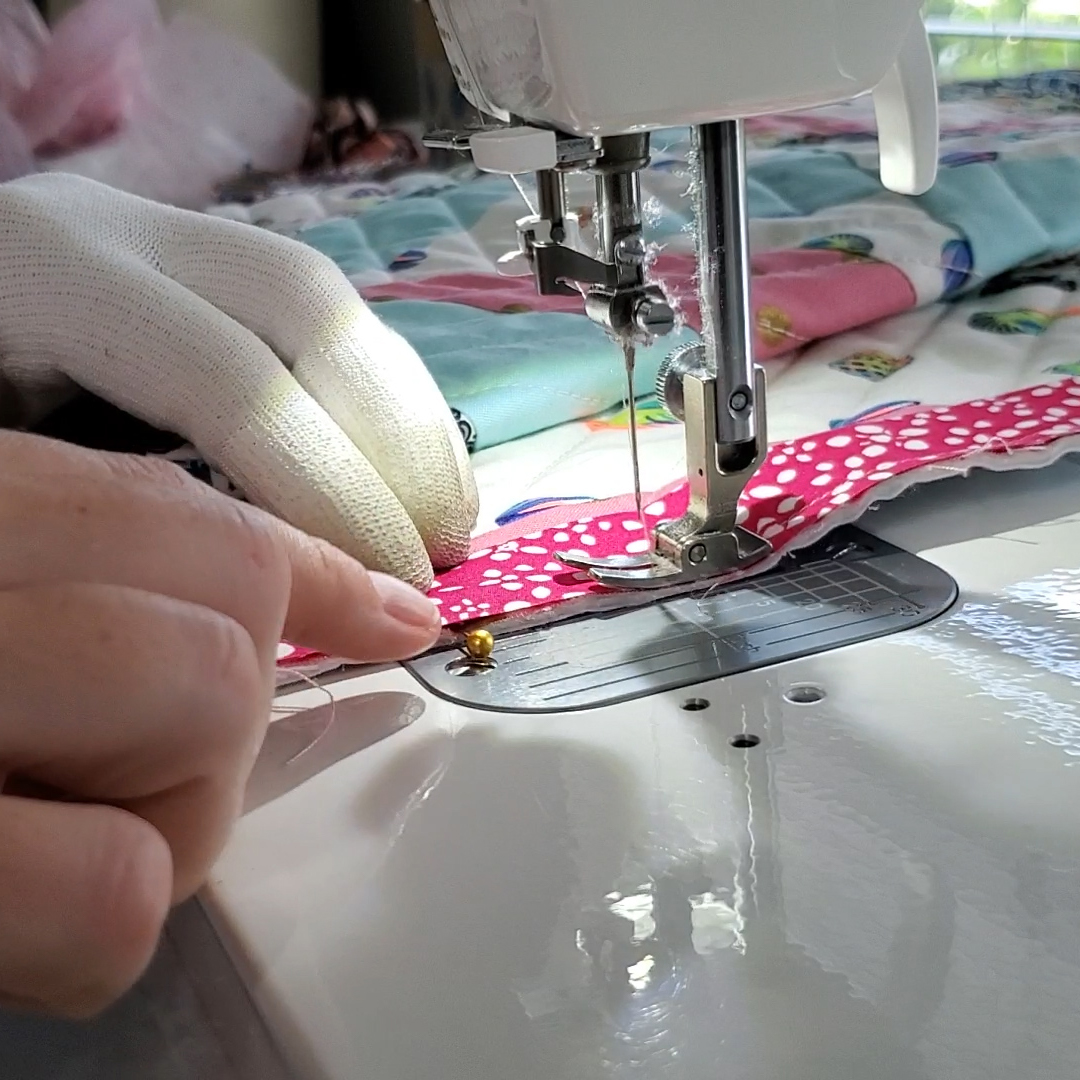
Make sure to backstitch at the start, and continue sewing. Do this for each corner.

Once you have reached the other pin mark for the opening, backstitch and cut the thread.
Lay your quilt with binding open. Mark a spot in the center of the opening, on the quilt. 

Take your binding on the left side, and lay over the pin. Mark (binding width)/2 to the right of the pin. [If using 2.5 inch binding, this will be 1.25 inches, for example]. Pull binding back to the left. 

Take the binding on the right and lay over the opening. Mark (binding width)/2 to the left of the pin, on the binding. [If using 2.5 inch binding, this will be 1.25 inches, for example]. Pull binding back to the right. 
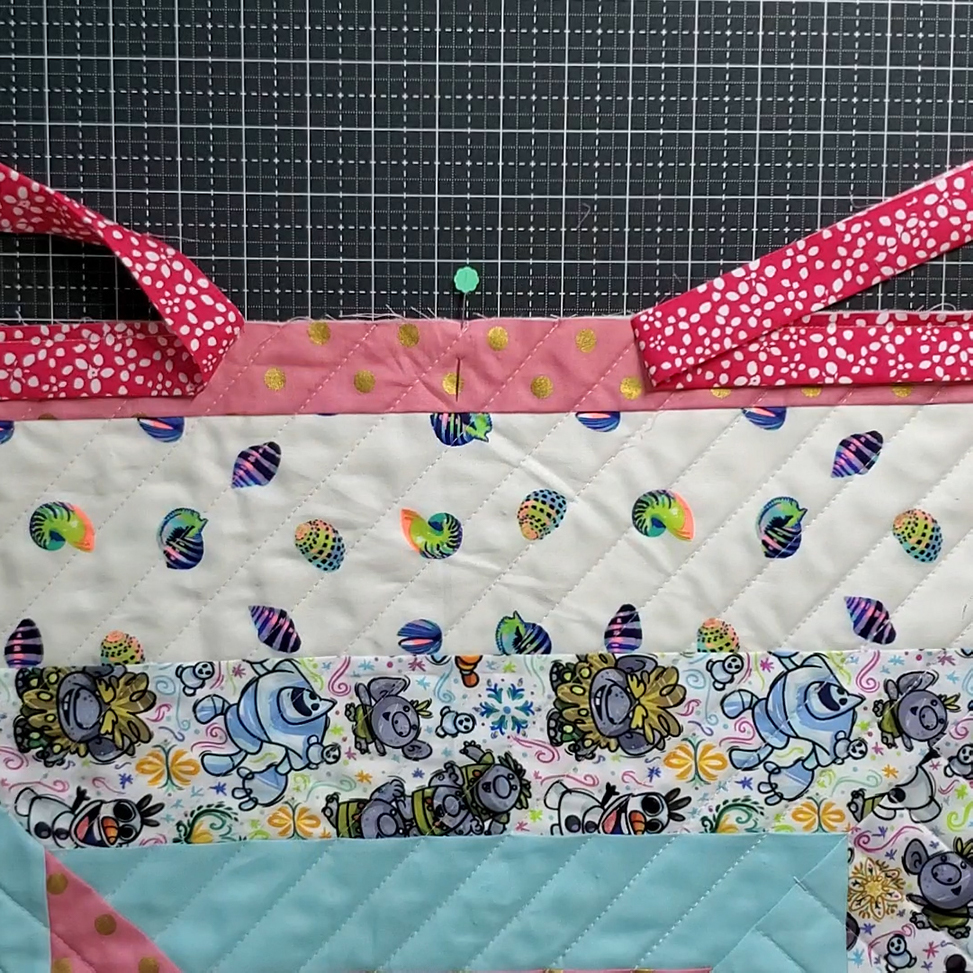
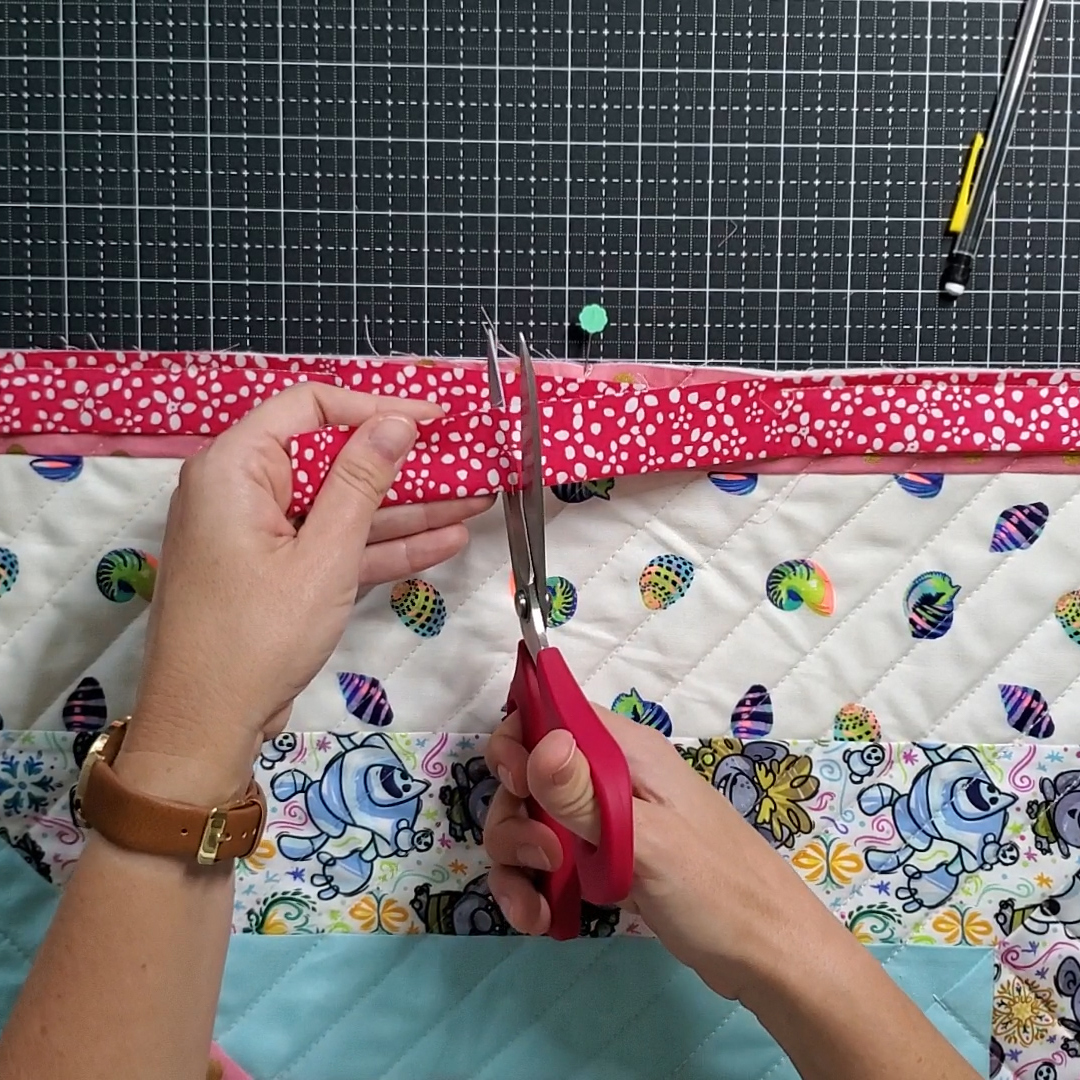
Cut both ends of binding on these marks.

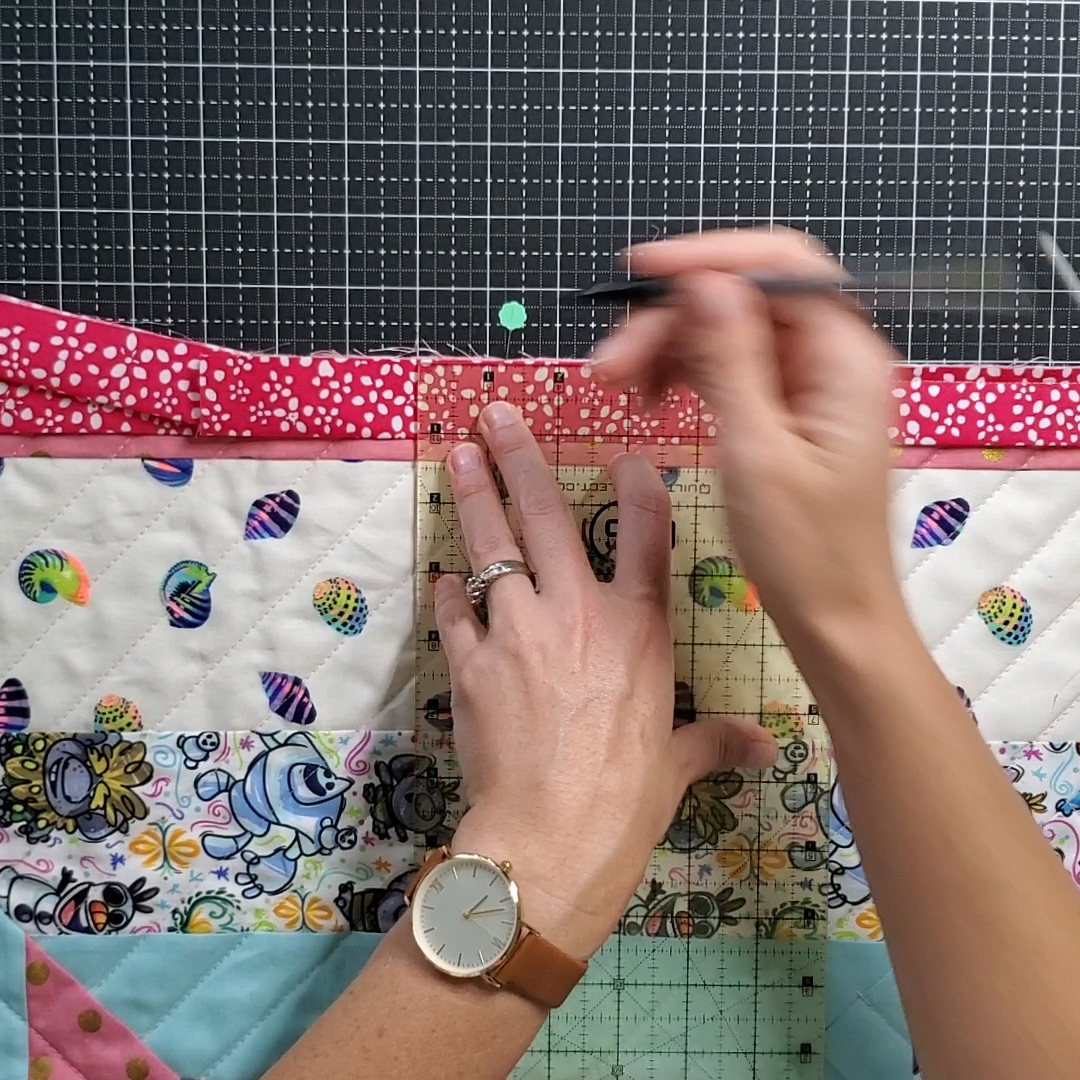
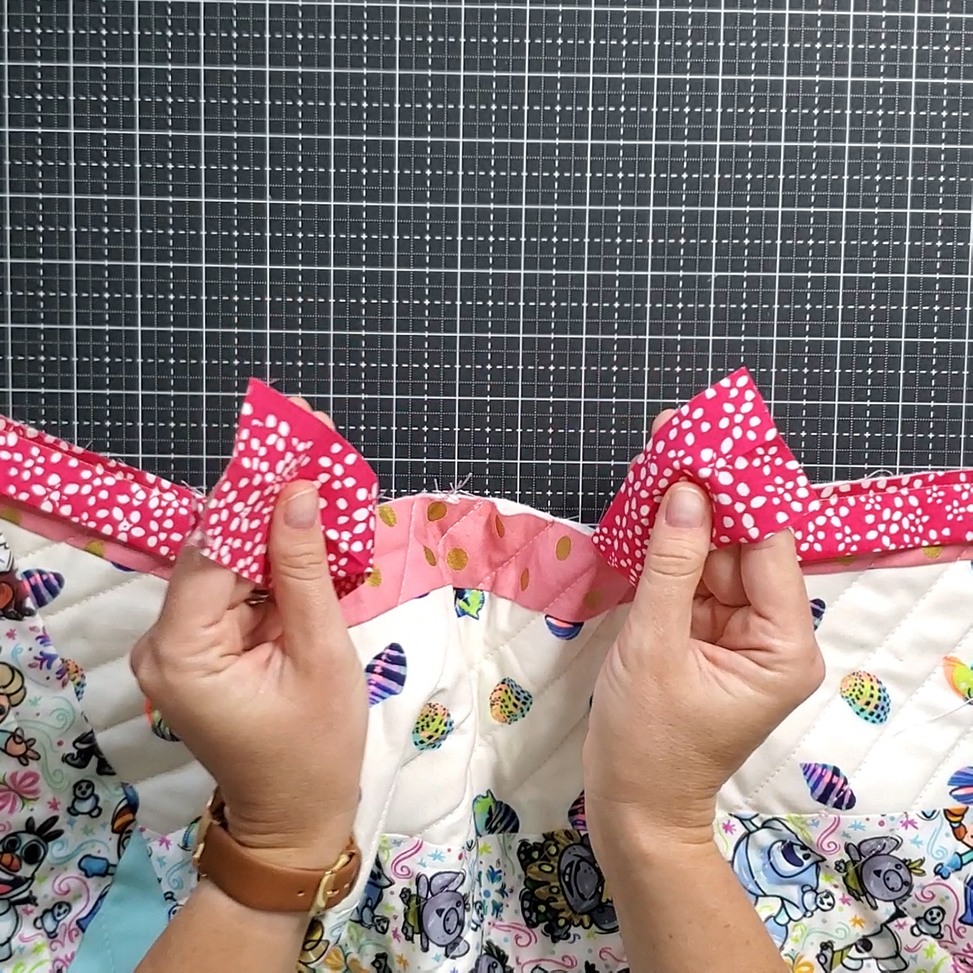
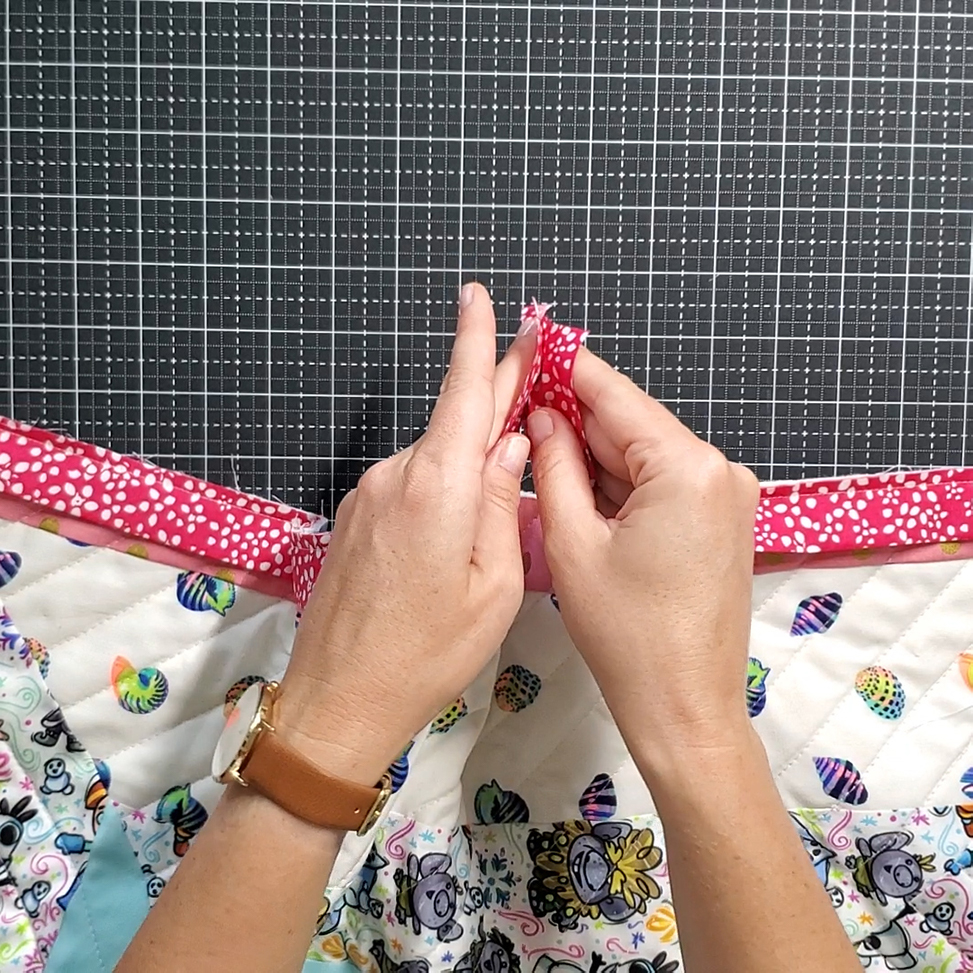
Pull the two ends together, with creases on the bottom. Open and press right sides together. Twist the ends so they are perpendicular (refer to the video for help with this step). 
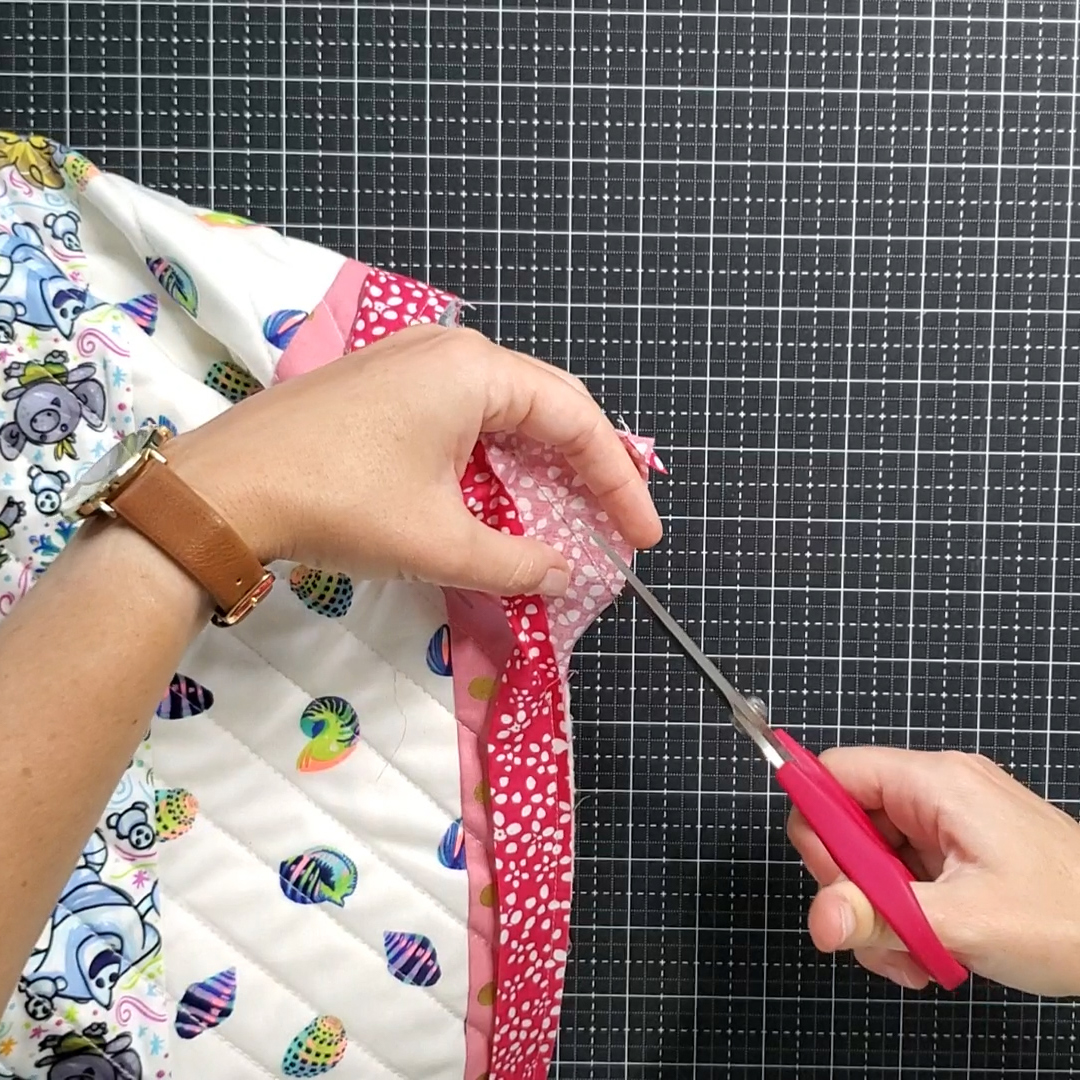
We are going to sew these two ends together just like we did when sewing the strips together to make a longer binding strip. Draw a line from top left corner on the top binding end to bottom right of the bottom binding end. Sew along this line, and then cut off a quarter inch seam allowance.
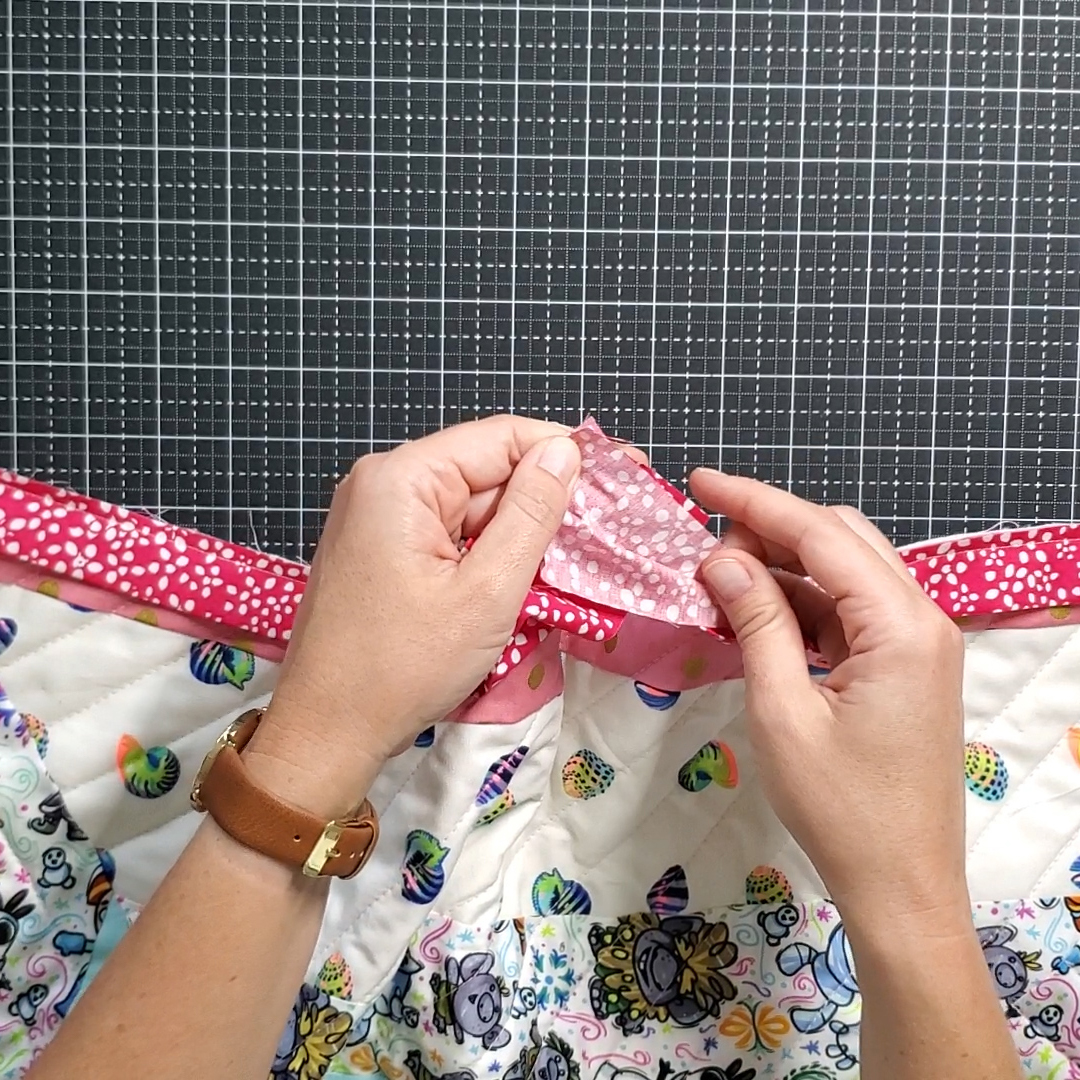
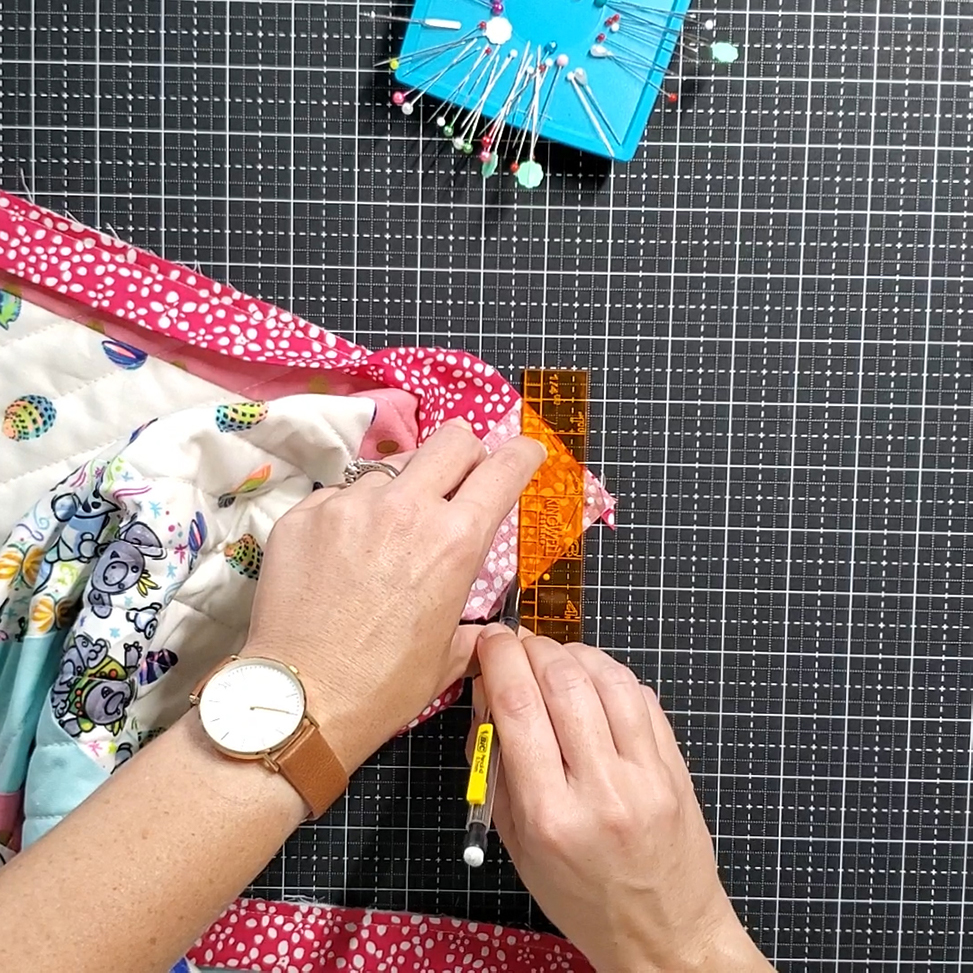
Open and fold along the original crease.  This should perfectly cover the opening, with raw edges of binding along raw edges of the quilt. Stitch this opening closed using a quarter inch seam allowance.
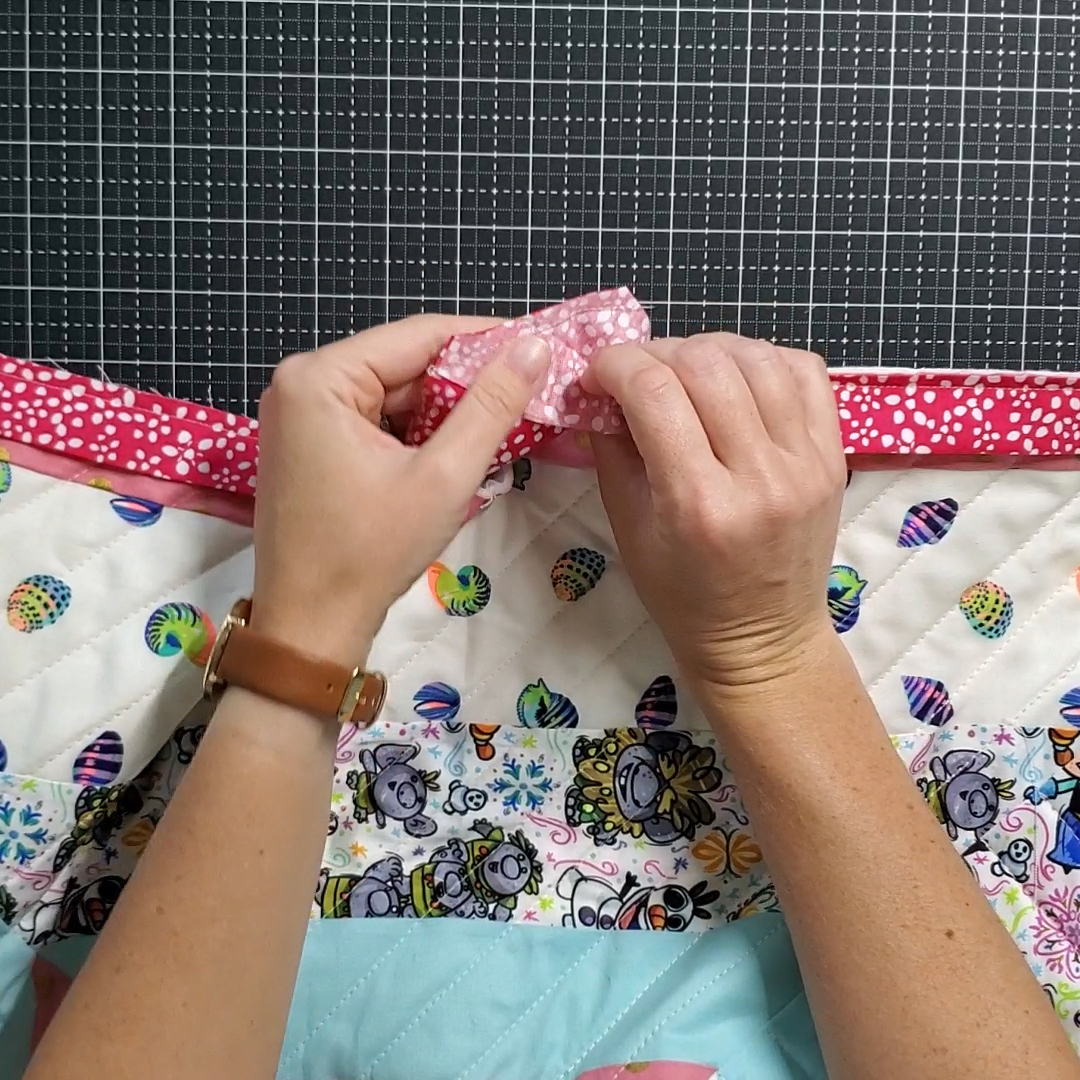
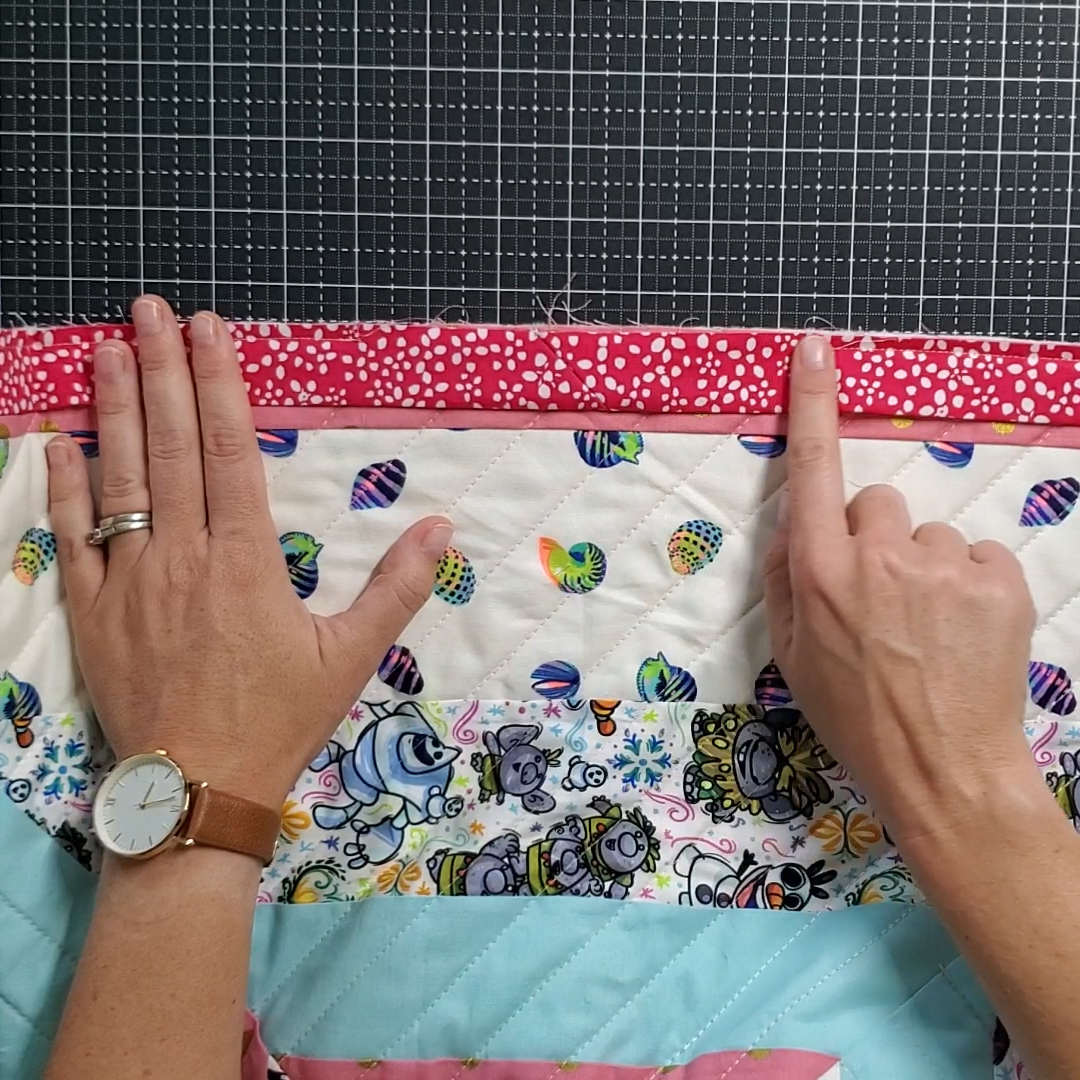
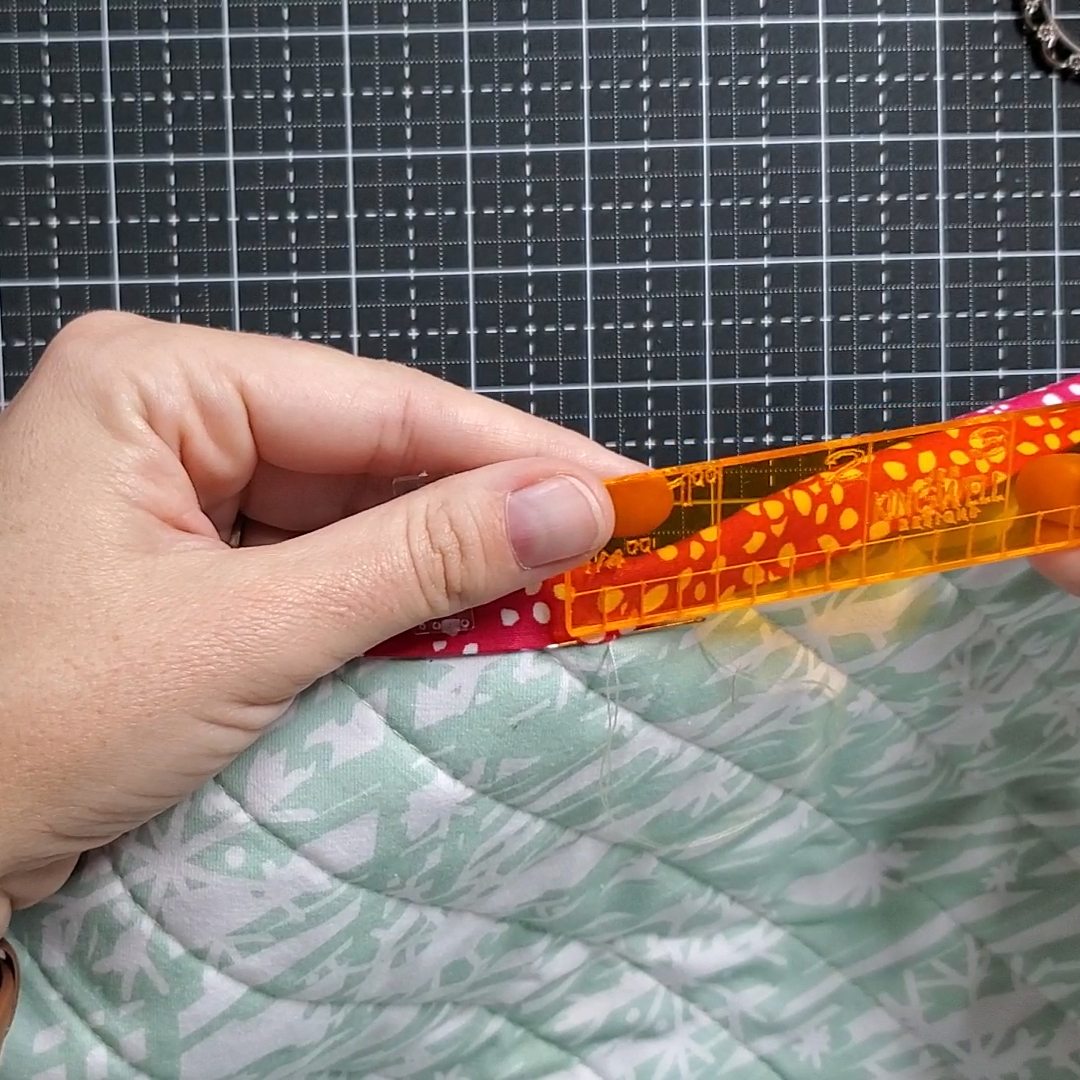
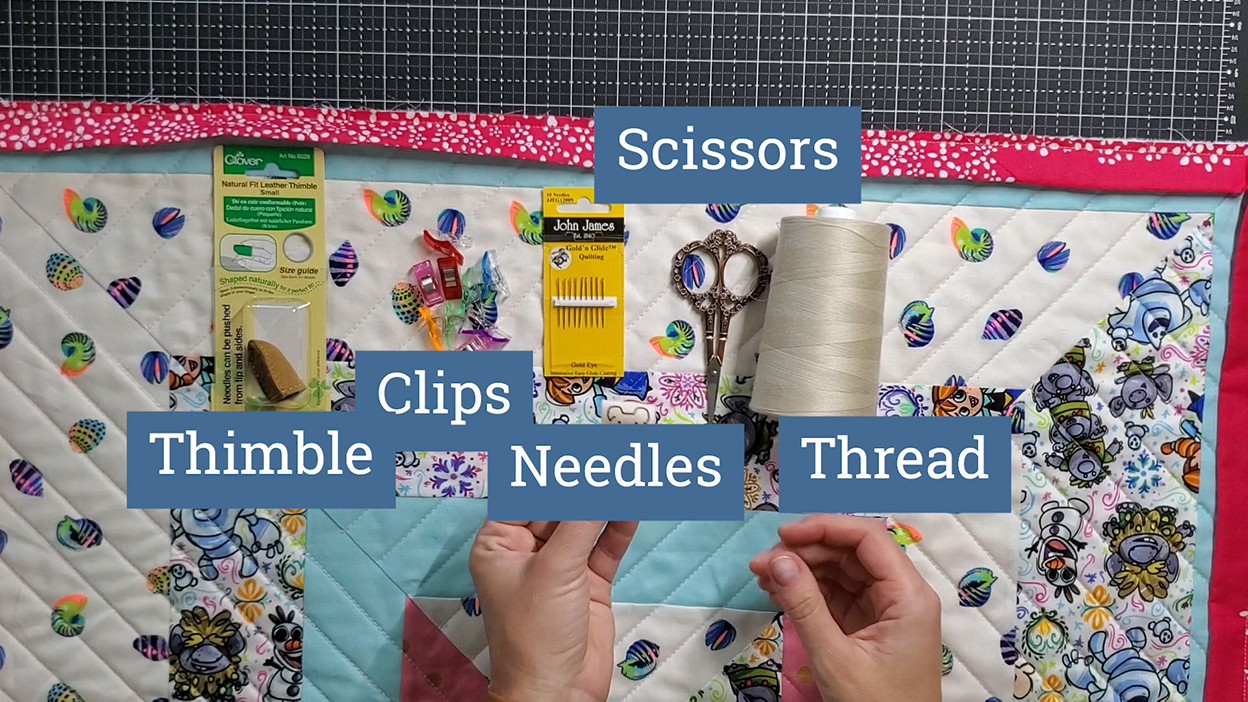
Hand binding the back requires the following tools. 
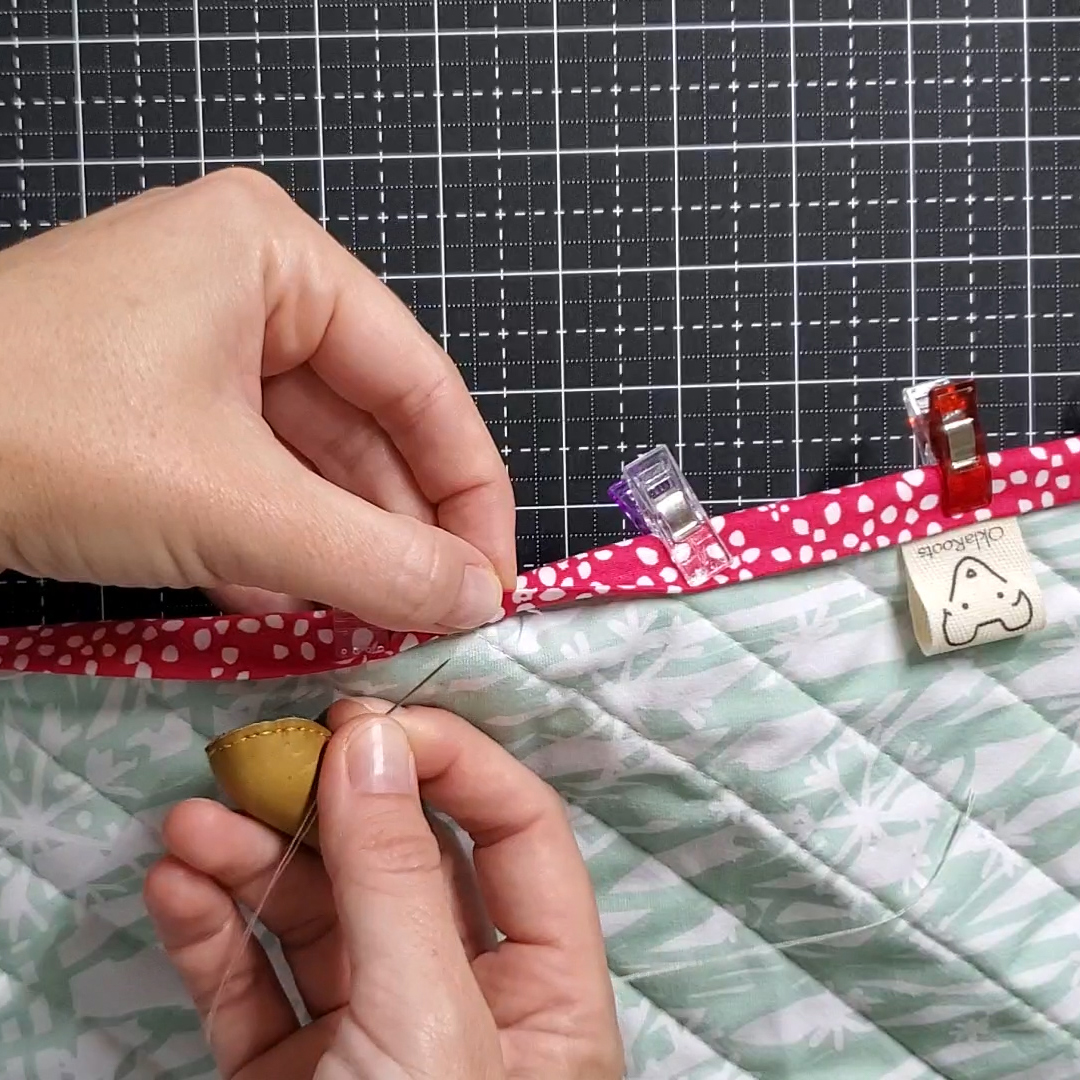
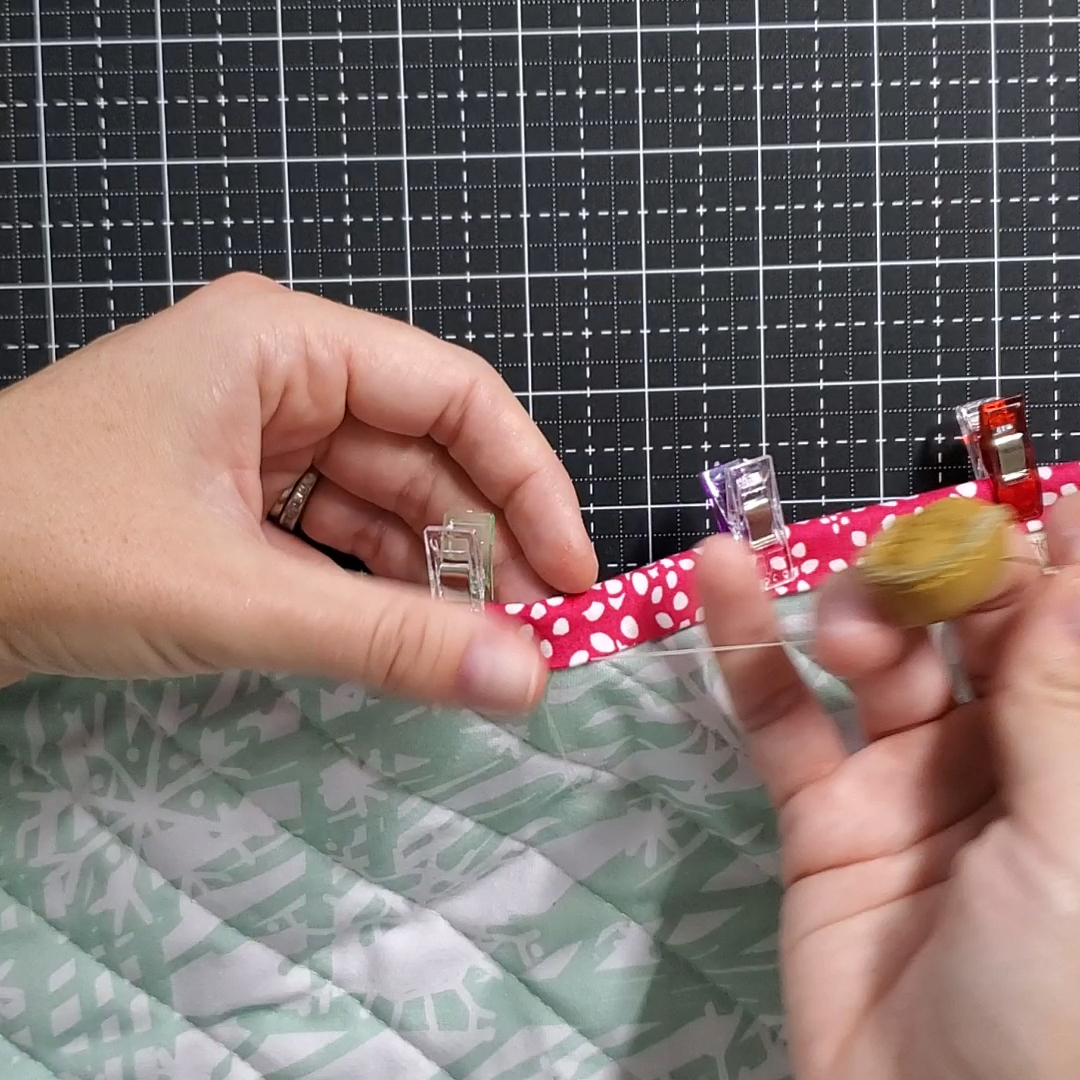
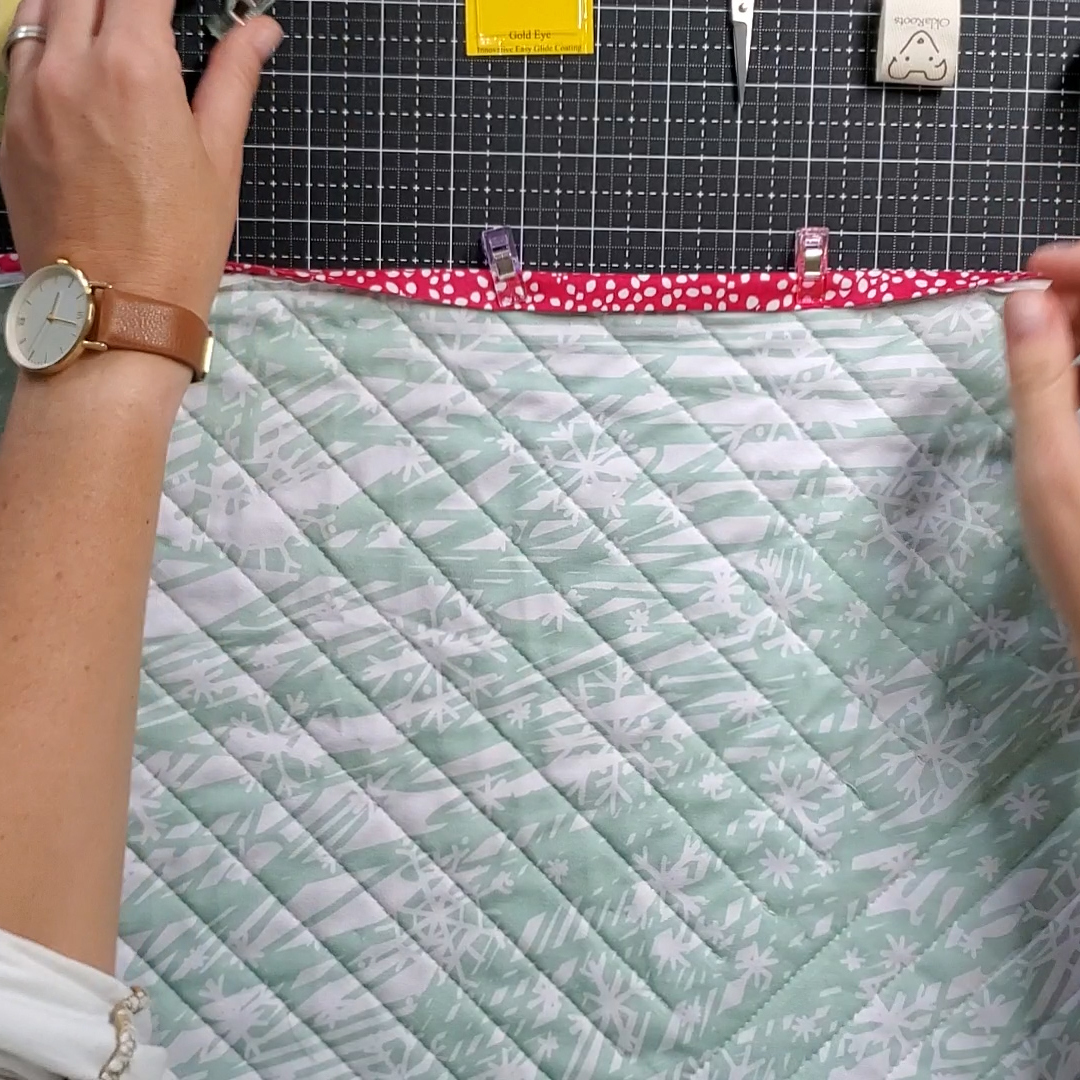
Lay the quilt back side up. Wrap the binding around to cover the seam and pin in place using the clips. Double thread your needle and knot the end. Pull the needle through the backing fabric, close to the seam, and through the binding. The needle should come out of the binding in the crease. 
Decide which direction you will be sewing. In my photos, I am working from right to left. Insert the needle close behind where the thread came out of the binding. Push the needles into the backing fabric and then through the binding in front of where the thread came out previously, through the crease. My stitches are about a quarter inch long. 

Remember, when sewing this you will always insert the needle slightly behind where it came out, and then pull the needle out of the crease in front. Think 1 step back, 2 steps forward. 
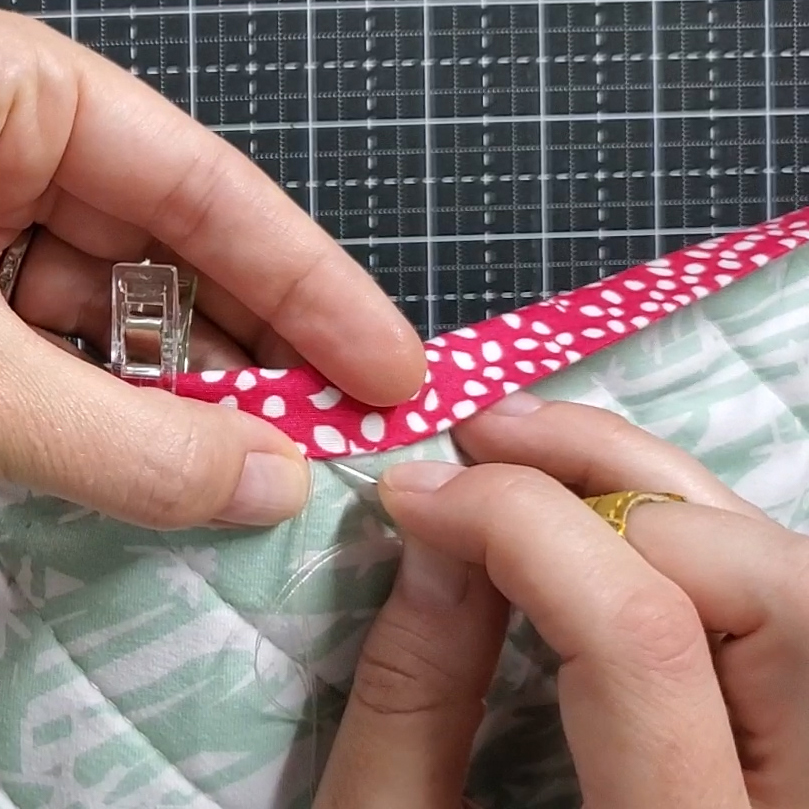
Once your thread has shortened knot it off and pull through the backing fabric, close to the seam. 

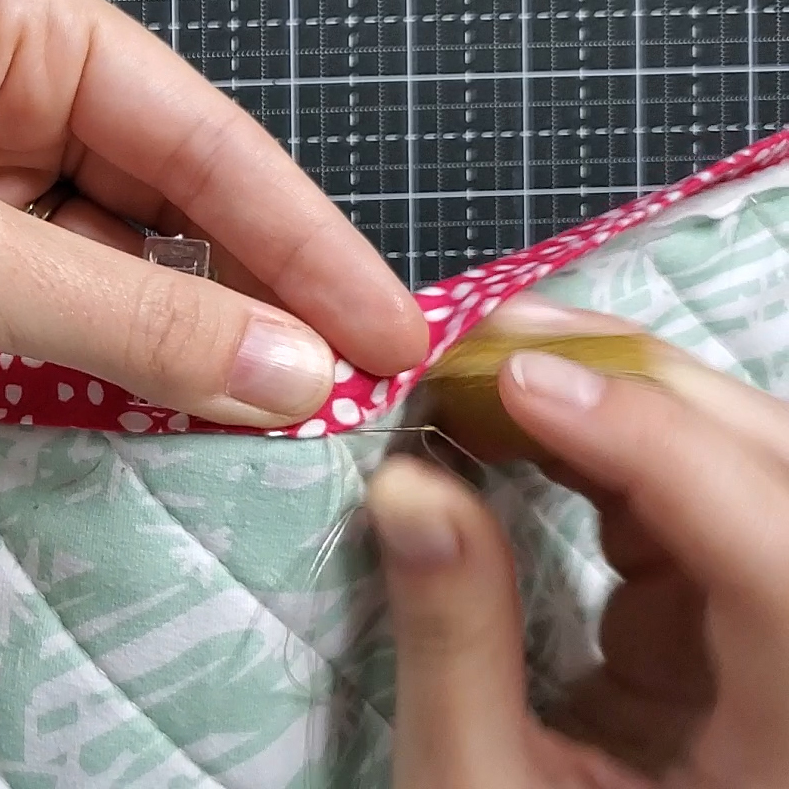
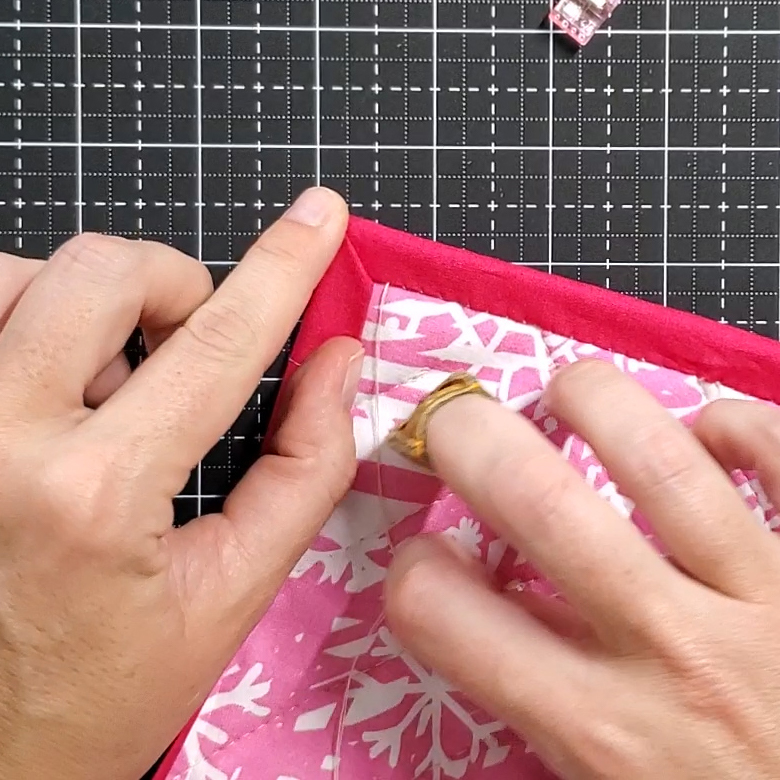
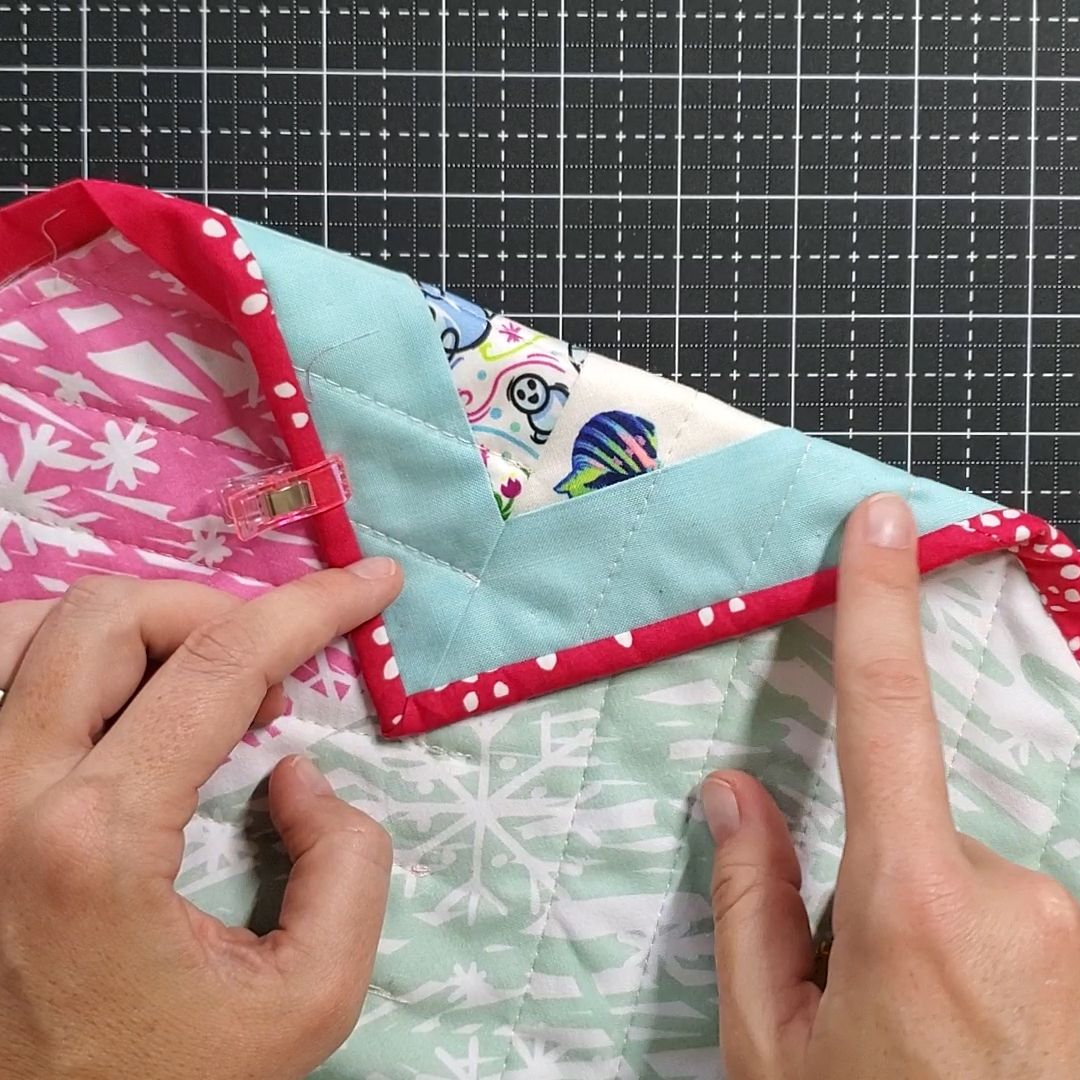
When working with corners, fold down the side you are sewing and leave the next side open. This will create a 45 degree angle on the binding. Then, fold over the next side, so the 45 degree angle now points into the center of the quilt. Adjust as needed to get both edges lined up. Use clips to hold in place.
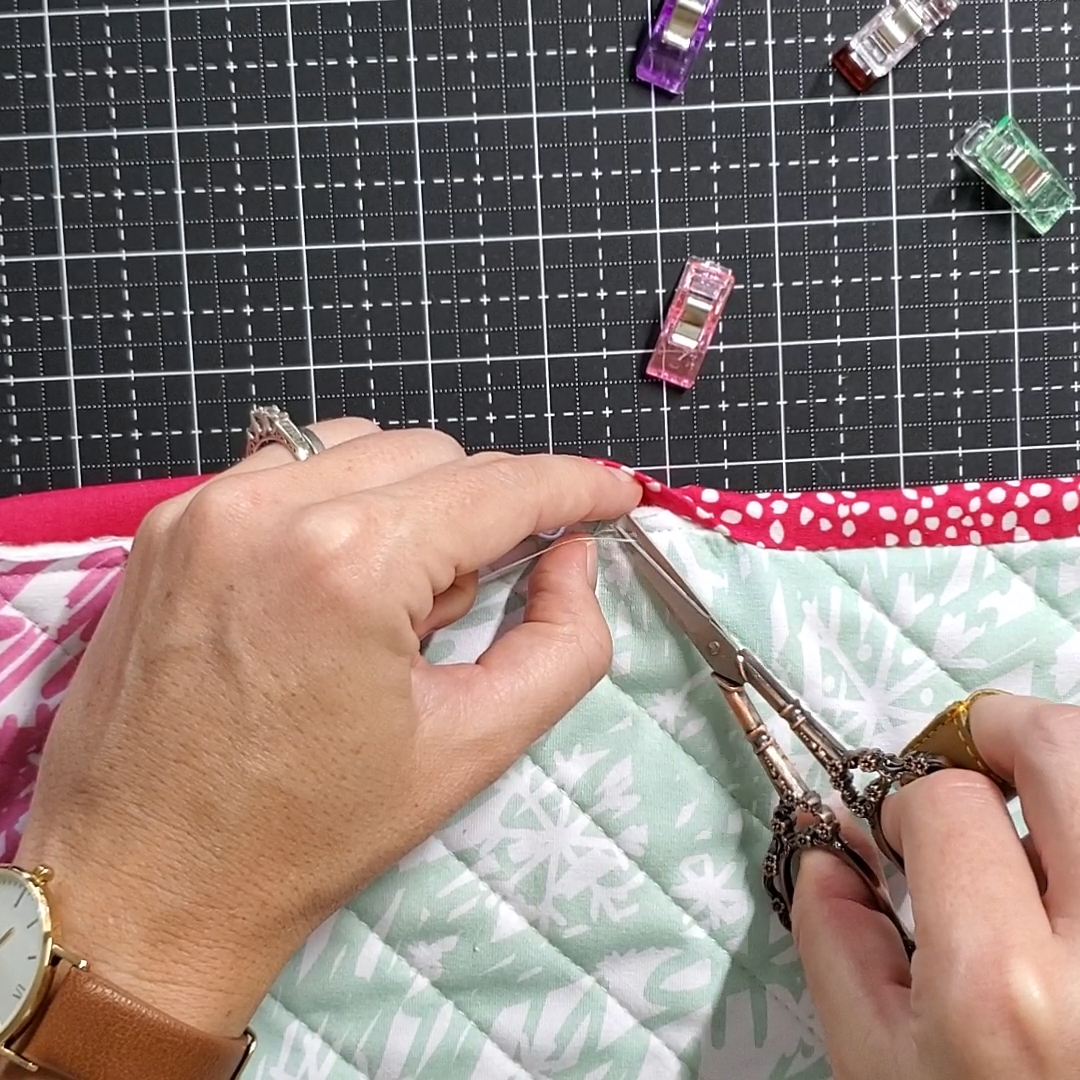
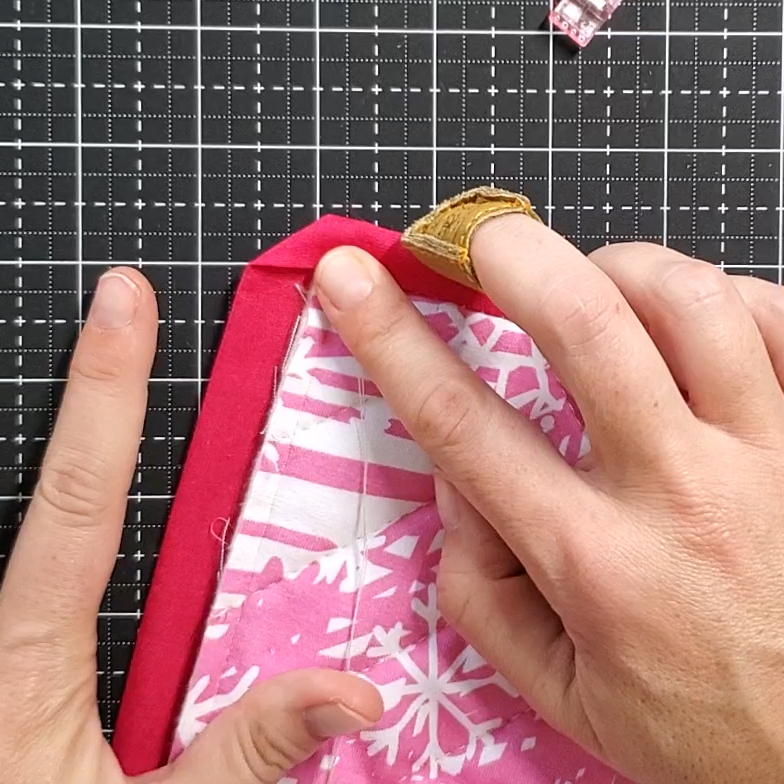
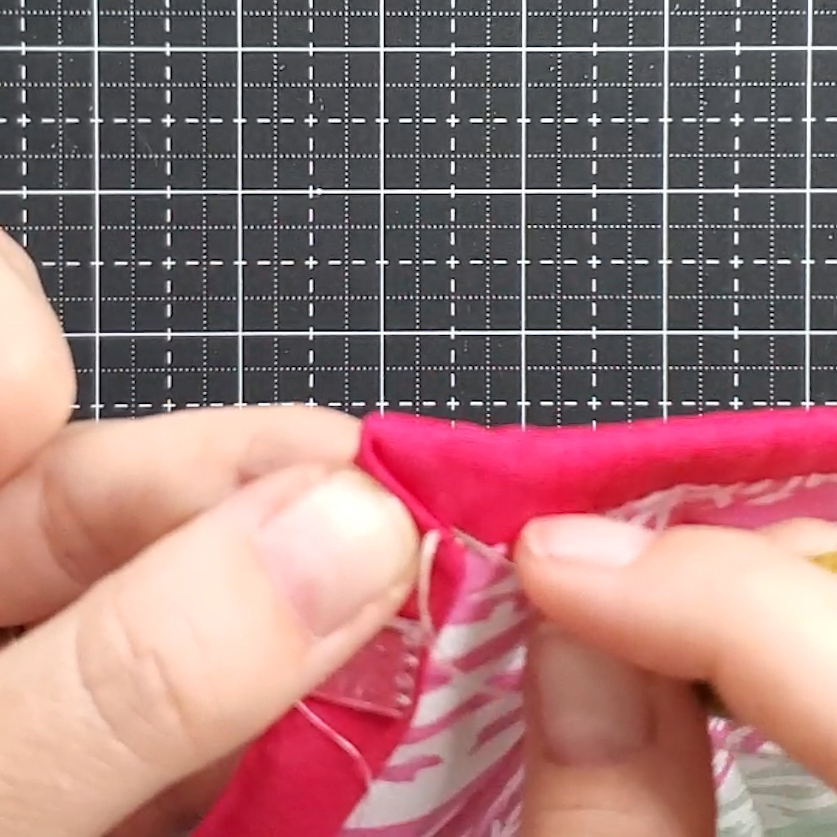
Sew along the binding into the corner, the same way you have sewn the binding on to the quilt. When at the tip of the corner, insert the needle into the binding and push it through the corner towards the middle of the quilt.  Pull out in the crease and then continue along the next edge.  Do this for each corner.
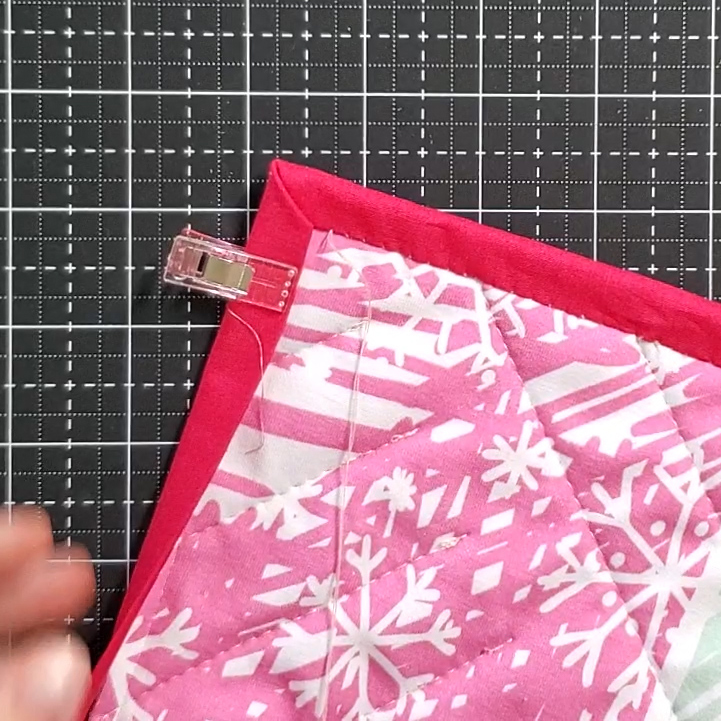
And that is how I bind my quilts! It takes a bit, but my quilts in general take a bit more time. I love getting the quilts done and binding attached to the front during the warmer months. Then once cool weather comes I have a nice stack to hand bind while watching some awesome fall shows!  Another bonus: I get a LOT of quilts completed in a short amount of time (or so it appears).

Happy sewing! Don’t forget to use #OklaRootsTuts in any of your social media postings you want me to see!

Do you have a different way of binding your quilts?? Let’s hear them!

Faux-Flake Quilt Pattern — Download

Free Patterns - Apr. 12, 2017 - Jessica OklaRoots

Pattern Details


​

Full size : 50″ x 70″

​Downloadable PDF

Half Square Triangle Pattern

Perfect for scraps!

Detailed layout

Beginner friendly

Includes links to tutorials

​

Access Pattern


“Faux-Flake” Quilt Preview

Quilts - Feb. 23, 2017 - Jessica OklaRoots

Here is a sneak peak at a pattern I am working on.  This is a beginner pattern, specifically a winter pattern. The pieced quilt top is made up entirely of half square triangles, which were made using Triangles On A Roll Half Square, 2″. For the backing and binding, I used a large cut of  Shannon Minky Soft Rabbit Cuddle Creme. 

A printable, easy to understand pattern is still in the works.  Here is a sneak peak of the design!

This was hand quilted, using a small stitch on the minky side and a long stitch on the quilt top.  This allowed the top of the quilt to look heavily quilted, but no quilting lines show up on the back (minky) side.

« Previous Page

Primary Sidebar

Recent Posts

  • The Bag Maker’s Companion – An All New Sewing Book!
  • 2025 ByAnnie SewPINK Blog Hop – Making The Zip It Up 2.0
  • 2026 OklaCruise!
  • January 2025 Livestream
  • 2024 ByAnnie #SewPink Breast Cancer Awareness

Instagram

oklaroots

Want to make the most adorable fancy strap? I got Want to make the most adorable fancy strap?

I got you 😘

New templates come soon.
This week’s tutorial is so fun! The quick and fun This week’s tutorial is so fun! The quick and fun Crystalline Pencil Pouch from @the.styled.magnolia is a big time sew-jo booster 😍 

Have you made a binder pouch like this? What would you use it for?? Obviously, I have a few ideas.

Full tutorial is available on the OklaRoots YouTube channel. Enjoy!

#oklarootstuts #binderpouch #backtoshool #sewing
Template for all new fancy straps coming soon to S Template for all new fancy straps coming soon to Shop OklaRoots! Stay tuned 👀

#oklarootstuts #comingsoon #crafty #handmade
Yes, this zip pouch is adorable. Yes, you can get Yes, this zip pouch is adorable.
Yes, you can get really creative with materials and appliqué.
Yes, it’s super scrap friendly.
Yes, it’s beginner friendly.
Yes, it’s ridiculously fun to make.

But if those reason aren’t enough for you to try the Real Lip Shady from @kazconadesigns then let me give you one more: It is an incredible, confidence boosting skill builder. I can’t tell you how many times I’ve shied away from patterns that have that back and forth curvy zipper, for fear of it not turning out ::just:: right.

But this pattern? Easy peasy! The measurements are perfect, the tips are spot on, and the curvy wurvy zipper is glorious. 

10/10! You gotta make this.

#oklarootstuts #zipperpouch #sewing #tutotial #howto
I saw the Campfire Shirt trend and I don’t sew clo I saw the Campfire Shirt trend and I don’t sew clothing. So here’s my take on it using the full size Wish Tote pattern! More to come on how I built this bag 🎃😘

Tshirt from 2025 @horrornightsorl and flannel from @oldnavy 

#oklarootstuts #handmade #sewing #halloween
Comment BEE and I’ll message you a link to the box Comment BEE and I’ll message you a link to the box! 

We’ve never done this before and we’ll (probably) never do it again. But the 🐝 boxes have been selling out month after month, and to make sure everyone who wants one has the opportunity, we’re previewing the next box early. 

Sign up for this box ASAP to make sure Gabbi has enough!

#oklarootstuts #bagmakingbeesclub #handmade #sewing
These week we’re going up against my bag making ne These week we’re going up against my bag making nemesis: piping. And we’re nailing it! Mostly 😉

Today’s tutorial is going over the Traverse Bag from @noodlehead531 ! This bag is so much fun. It has the look of a messenger bag but the ease of a simple zip pouch. The functionality is spot on and it comes in two sizes! 

This is also September’s @bagmakingbeesclub Bee Box! The waxed canvas we’re using is stunning 😍. And although I usually reach for a webbing strap, that handmade strap is well worth the extra few minutes. 

Enjoy and happy Monday!

#oklarootstuts #bagmakingbeesclub #noodleheadpatterns #handmade #sewn
My latest order from @georgiagirlstitches is full My latest order from @georgiagirlstitches is full of 🍁fall🍁 vibes! Make sure to check out their online store for a great selection of bag making goodies ❤️

#oklarootstuts #bagmaking #craftsupplies #shopsmall
Gotta be quick for this, but Barnes and Noble has Gotta be quick for this, but Barnes and Noble has 25% off book preorders (including The Bag Maker’s Companion 😱) from now until 9/11 for premium and rewards members! Comment MAKER and I’ll send you the preorder link! 

#BNPreorder #oklarootstuts #bookworm
Follow on Instagram

Recent Posts

  • The Bag Maker’s Companion – An All New Sewing Book!
  • 2025 ByAnnie SewPINK Blog Hop – Making The Zip It Up 2.0
  • 2026 OklaCruise!
  • January 2025 Livestream
  • 2024 ByAnnie #SewPink Breast Cancer Awareness

Instagram

oklaroots

Want to make the most adorable fancy strap? I got Want to make the most adorable fancy strap?

I got you 😘

New templates come soon.
This week’s tutorial is so fun! The quick and fun This week’s tutorial is so fun! The quick and fun Crystalline Pencil Pouch from @the.styled.magnolia is a big time sew-jo booster 😍 

Have you made a binder pouch like this? What would you use it for?? Obviously, I have a few ideas.

Full tutorial is available on the OklaRoots YouTube channel. Enjoy!

#oklarootstuts #binderpouch #backtoshool #sewing
Template for all new fancy straps coming soon to S Template for all new fancy straps coming soon to Shop OklaRoots! Stay tuned 👀

#oklarootstuts #comingsoon #crafty #handmade
Yes, this zip pouch is adorable. Yes, you can get Yes, this zip pouch is adorable.
Yes, you can get really creative with materials and appliqué.
Yes, it’s super scrap friendly.
Yes, it’s beginner friendly.
Yes, it’s ridiculously fun to make.

But if those reason aren’t enough for you to try the Real Lip Shady from @kazconadesigns then let me give you one more: It is an incredible, confidence boosting skill builder. I can’t tell you how many times I’ve shied away from patterns that have that back and forth curvy zipper, for fear of it not turning out ::just:: right.

But this pattern? Easy peasy! The measurements are perfect, the tips are spot on, and the curvy wurvy zipper is glorious. 

10/10! You gotta make this.

#oklarootstuts #zipperpouch #sewing #tutotial #howto
I saw the Campfire Shirt trend and I don’t sew clo I saw the Campfire Shirt trend and I don’t sew clothing. So here’s my take on it using the full size Wish Tote pattern! More to come on how I built this bag 🎃😘

Tshirt from 2025 @horrornightsorl and flannel from @oldnavy 

#oklarootstuts #handmade #sewing #halloween
Comment BEE and I’ll message you a link to the box Comment BEE and I’ll message you a link to the box! 

We’ve never done this before and we’ll (probably) never do it again. But the 🐝 boxes have been selling out month after month, and to make sure everyone who wants one has the opportunity, we’re previewing the next box early. 

Sign up for this box ASAP to make sure Gabbi has enough!

#oklarootstuts #bagmakingbeesclub #handmade #sewing
These week we’re going up against my bag making ne These week we’re going up against my bag making nemesis: piping. And we’re nailing it! Mostly 😉

Today’s tutorial is going over the Traverse Bag from @noodlehead531 ! This bag is so much fun. It has the look of a messenger bag but the ease of a simple zip pouch. The functionality is spot on and it comes in two sizes! 

This is also September’s @bagmakingbeesclub Bee Box! The waxed canvas we’re using is stunning 😍. And although I usually reach for a webbing strap, that handmade strap is well worth the extra few minutes. 

Enjoy and happy Monday!

#oklarootstuts #bagmakingbeesclub #noodleheadpatterns #handmade #sewn
My latest order from @georgiagirlstitches is full My latest order from @georgiagirlstitches is full of 🍁fall🍁 vibes! Make sure to check out their online store for a great selection of bag making goodies ❤️

#oklarootstuts #bagmaking #craftsupplies #shopsmall
Gotta be quick for this, but Barnes and Noble has Gotta be quick for this, but Barnes and Noble has 25% off book preorders (including The Bag Maker’s Companion 😱) from now until 9/11 for premium and rewards members! Comment MAKER and I’ll send you the preorder link! 

#BNPreorder #oklarootstuts #bookworm
Follow on Instagram

Recent Posts

  • The Bag Maker’s Companion – An All New Sewing Book!
  • 2025 ByAnnie SewPINK Blog Hop – Making The Zip It Up 2.0
  • 2026 OklaCruise!
  • January 2025 Livestream
  • 2024 ByAnnie #SewPink Breast Cancer Awareness

Copyright © 2026 · OklaRoots

Lexi Theme by Code + Coconut